A
reporter once asked a miner what he'd do if he won a million dollars.
The
crusty old man
thought for a
moment, then said:
"Prospect for gold until the money ran out."
There's
as much truth as ironic humor in that tale. The sad fact is that if
all the travel expenses, lodging costs and the price of the equipment
needed for gold prospecting were added up, ninety-nine times out of
one hundred they would greatly exceed the value of any gold the
average prospector finds. Sure, there is the rare individual who
lucks into a rich pocket and manages to make a little money, but if
the time value of his labors are considered he's working for less
than minimum wage. Gold is unbelievably scarce and collecting it is
an expensive pastime.
The closest analogy is fishing. Many people spend hundreds of dollars on fishing equipment, hundreds more in travel expenses and even thousands on a boat to catch a few fish they could buy at a grocery store for ten dollars. Where this analogy wears thin is when we consider the amount of labor gold prospecting involves. All fishing requires is a comfortable chair on a pier or boat. Gold prospecting demands endless hours of back breaking work. Consider a good location where the pay dirt averages $100.00 a ton. To get that $100.00 you need to shovel 2,000 pounds of dirt into some sort of concentrator. Since this pay dirt is usually wet, that increases its weight to 3,000 pounds. With the average shovel-full weighing 4 pounds that means you'd have to bend-scoop-lift-and-dump almost 800 shovel-fulls of mud. And that just gets it into the concentrator. After that you have to wash out the mats and reprocess the 100-pounds of concentrates through a second concentrator before the pay dirt's been purified enough to see any of that $100.00 worth of gold. And how much is that? About three grams, less than half a teaspoon.
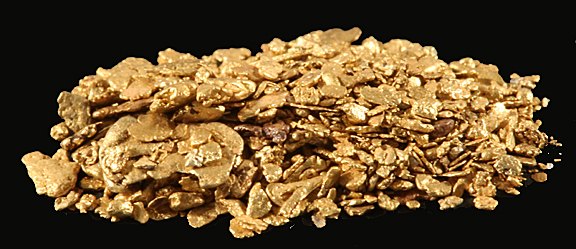
Three grams of placer gold worth $100.
Yet, just as there are avid angles who think nothing of investing thousands of dollars and endless hours to catch a few fish, so there are countless prospectors who love nothing better than taking out a second mortgage to pay for gold processing equipment and endangering their backs grubbing up ton after ton of dirt. These are, after all, hobbies and they aren't required to make financial sense. But there may be a compromise that provides much of the thrill of prospecting without the crushing expense and back breaking labor traditional prospecting demands: backyard gold prospecting.
Backyard gold prospecting is simply paying someone else to do the hard and expensive field work to acquire your concentrated gold pay dirt, having them mail it to you and then processing it in the comfort of your own home. While I use the term backyard gold prospecting in this page's title, the actual process of separating gold from these concentrates can just as easily be done on a kitchen counter. If this sounds too easy because it eliminates the thrill of finding a glory hole rich with gold, it does... and it doesn't.
The challenge in both is to find a good source of gold pay dirt and the fact is that finding a reliable source of pay dirt on-line is just as difficult as finding the mother lode out in the field. Most pay dirt retailers exaggerate and even misrepresent what to expect from their products. A few, a very few, offer true pay dirt concentrates that have been run through a sluice box. More common is the seller that defines "concentrates" as plain, unprocessed dirt from an area that has slightly higher than average amounts of gold. Most are far worse. The average seller buys gold and sprinkles a little into dirt he dug out of his backyard. And a few don't even do that. They ship dirt devoid of gold and when you complain, respond by claiming that either your techniques weren't good enough to find the gold or that there is an unavoidable randomness in the samples so that while some have lots of gold, a few don't... and you unfortunately got one that didn't. Even worse, the pay dirt industry is rife with unscrupulous sellers who's orders disappear in the mail with suspicious regularity.
To work the field, prospectors have to research past claims and historical records to find a promising location then fine tune where to prospect by panning out test spots. For the backyard gold prospector the process is almost identical. He has to research YouTube and on-line reviews of sellers to see which have good histories of providing the best pay dirt and then get a few test bags to see if that research has lead a good source. The only advantage the backyard prospector has is that he can do all this seating comfortably in an air conditioned room instead of baking under a blazing sun.
But make no mistake... you will loose money either way. Pay dirt sellers have the right to make a little money so what they sell is almost always going to be less than the value of the gold you'll find. The usual return on investment (ROI) from the best sources is 50-percent. Many are down around 10-percent. But remember, this is a hobby, not a business. It doesn't need to be profitable. The fact that gold is universally valued makes this harder to accept than most hobbies, but it's true nonetheless.
Now we come to the most important issue: is backyard gold prospecting fun? For me, "Yes!" There's a thrill finding your first speck of real gold no matter how small it is. Gold is scarce. Gold is small. Gold is hidden in tiny quantities in massive amounts of dirt. It's stealthy to to point that it almost seems to be trying to hide form you. Finding it is a challenge, but not impossible. With a little knowledge and some simple equipment you can defeat it and drag it into the light of day, to be proudly displayed in home or office... with one big advantage.
Catch a big fish, mount it and show it to people and they'll nod agreeably while they struggle of hide a yawn. But, show them a tiny glass vial filled with gold and those same people will crowd in for a closer look. Gold prospecting is a rare hobby and everyone loves gold. Try it and I'm sure in one way or another you'll garner more satisfaction than any other endeavor.
Interested? Good. Let's get started!
There are many different techniques and types of equipment used to separate gold from pay dirt. Some people prefer to keep it simple and use a traditional gold pan. Others are in love with their shaker tables. There are blue-bowl fanatics and microsluices and countless homemade gismos that all get the job done. Which is best for you is a personal choice. I recommend searching through YouTube videos about gold recovery to learn what options are available and how to use them. Select the technique that appeals to you the most. That's what I did to develop my own technique. I'll present it with the reasons why to provide insight into why I went the way I did.
The Equipment:
1. A small bowl or plastic container. This is used to wash the mud out of the pay dirt so it doesn't foul the Miller table's water.
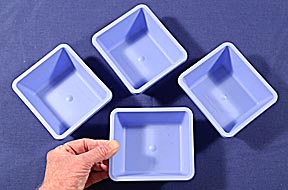
I got these perfectly sized small bowls with my magnetic black sand separator.
2. A good set of classification screens with #4, #8, #12, #20, #30, #40, #50, #70 and #100 meshes. Sets like this are available on Amazon.com for $85. No matter what type of separating process is used, it will work better if it's handling particles that are all the same size. Sifting the pay dirt provides this uniformity of size. This isn't as important if you're only using a gold pan.
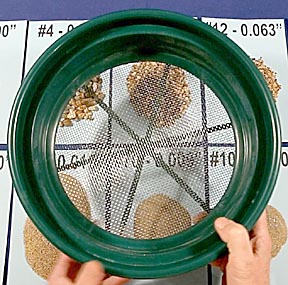
This is the #12 mesh screen.
3. A pair of 5 power binocular magnifying glasses. These can be found in craft and hobby stores. Used to spot fine gold that's too small to be seen by the unaided eye.
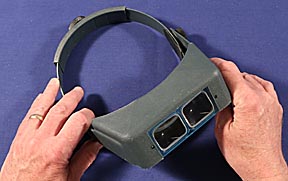
A good pair of
magnifying glasses these these are literally worth their weight in gold
because they
help you spot small but valuable gold that would otherwise be missed.
4. A good scale with 0.001 gram accuracy

A good scale like this one costs $50 on Amazon.com.
5. A pair of tweezers with very fine points for picking up tiny objects. I took the smallest pair I had and filed them down even finer.
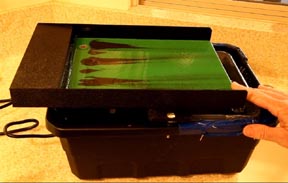
6. A Miller table. I got an inexpensive one made by USA Prospectors on Amazon.com for $99. A Miller table flows a thin layer of water down a very slightly inclined surface. Concentrates are spooned onto the table near the top and the heavy gold remains in place while lighter material is swept away by the water. These are easy do-it-yourself projects. Miller tables are slow, but they catch the finest gold and are better than most other processes in separating gold from heavy black sand. These are my preferred gold separating devices.
7. A snuffer bottle. These can be purchased on Amazon.com or made very cheaply. This is a soft sided plastic bottle with a long tube in its nose. It's used to pull water and gold up and out of gold pans and Miller tables. They can be purchased through Amazon.com or made at home. I made mine using 8-ounce squeeze bottles (pack of three from Harbor Freight) and a straw from a package of my grandchildren's lemonade.
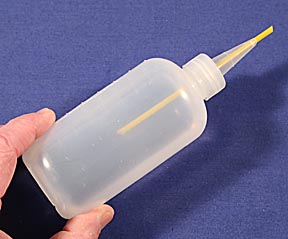
Squeeze a little air out, invert it, place the tip near the gold and release. Suction will pull the gold up.
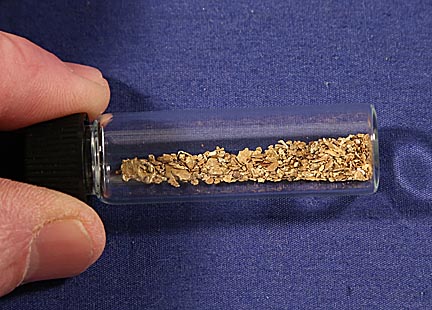
8. Small glass vials for storing your gold. The beading section in craft stores carry them. The screw-top type are the best. Corks tend to trap fine gold in their pores.
9. A scale that measures in the 1 to 10 pound range. For weighing bags of concentrates to see if you're getting the amount the seller promised. An inexpensive kitchen scale is fine for this.
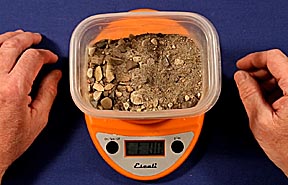
This isn't necessary, but it's fun to see how close the actual weight is to the advertised weight.
10. A bottle of Jet Dry. This is used in automatic dishwashers to prevent water spots forming on dishes during the drying process. It's purpose it to reduce the surface tension of the water so that fine gold particles don't float away. Gold is hydrophobic, repels water, so this can be a problem. Dish soap can be used but Jet Dry works just as well and doesn't foam up.
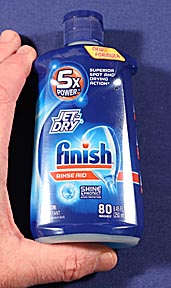
This can be found in the automatic dishwasher section of any grocery store.
12. Some people like using a magnetic separator to remove the magnetite, magnetic iron oxide, from the pay dirt I've found that most of the time there is so much hematite, non-magnetic iron oxide, that it's a waste of time.
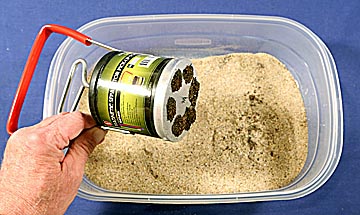
Six
magnets inside the aluminum can grap the magnetite.
Pulling
on the loop shaped handle releases it.
My process starts by selecting which pay dirt to purchase. Amazon.com has offerings from a multitude of sellers. This is a good resource because the reviews at the bottom of the page provides an idea of how good the pay dirt is. Another source I use is goldpaydirtreviews.com. This site by Dylan Miller provides the best pay dirt reviews on the Internet, many with both text and YouTube versions. I usually limit myself to Dylan's top ten or Amazon offerings with at least a 3.5-star rating with greater than 50-percent 4-star votes.
Before continuing I need to address the issue of gold fever.
Yes, it's real. It's easy to get caught up in the search for gold to the point where it takes over your life. This can happen just as easily buying pay dirt on-line as it can going out into the field in search of that next glory hole. Some people feel the irresistible attractive of the gold itself or the value it represents. I feel it's seductive pull not from a desire to gather as much gold as possible but to test as many sources as possible. Either way has the potential of incurring financial distress. Pay dirt can get expensive and it's all too easy to order just one more bag. My advice is to set a monthly dollar limit and stick to it. When the urge to buy more is impossible to resist, try telling yourself this simple and inexorable truth: "No matter how much pay dirt you buy or how hard you work you will always, always, loose money."
So much for the psychology of gold fever. Let's get back to work!
Once the bag of pay dirt arrives I fill out a page in a notebook I keep on all my pay dirt purchases recording the source, cost, date amount and seller's description of the sample. After that I open it and weight it, writing down the amount and comparing it to what was promised. So much for the paperwork... it's time to play!
Starting with the #4 (the largest) classifier screen I sift the pay dirt through it. The material it stops gets placed on a piece of card stock with the mesh size labeled on it. I repeat this with all the screens until all that's left is the finest powder that passes through the #100 mesh classifier.
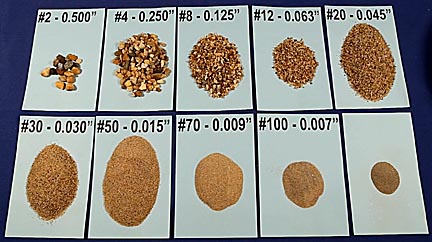
This is a
sample of Gold Hog Pay Streak Concentrates classified out.
The piles are
+meshes, meaning that they are what didn't pass through the screen.
The unlabled
pile in the lower right is the -100 mesh material that passed through
the 100 mesh screen.
Next I take the tweezers, put on the 5X magnifying glasses and very slowly pick through all the pebbles classified as #4, looking for small pebbles or flakes with a bright metallic yellow. If it's gold it won't glitter or have shiny flat or angular surfaces. It will be smooth and rounded and and not sparkle. If it does, it's iron pyrite: fool's gold. (YouTube abounds with videos showing how to tell the difference.) An easy test is to shine a flashlight on it and move the flashlight around to illuminate it from different angles. If it's gold it'll look evenly yellow regardless of the flashlight's position. If it's pyrite or some other shiny object, as the light changes position the sparkle will flash on and off. It's rare that I find anything as large as #4, but there's always that possibility. Gold stands out because its smooth surface doesn't hold onto dust, whereas the pebbles do, making them very dull in appearance. It's easy to spot.
I repeat this process with each of the siftings down through the 30-mesh. Below that mesh size there are so many particles and they are so small that mechanical separation is easier and more reliable.
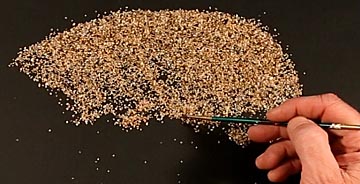
Hand picking
through some +20 mesh material.
It's slow but
rewarding, like finding pieces to a puzzle.
For me, this manual hunting for gold is the most enjoyable. Some may complain that it's too slow, and I can't argue with that. But I'm in this as a hobby and pastime so I'm not in a hurry to get the gold. It's like putting a puzzle together: most of the fun is in the process of putting it together, not admiring the finished piece. After that, it's time to move to the kitchen if you haven't done so already.
Once I've convinced myself I've found all the pickers in the #4 to #30 mesh screenings, one size at a time I place each size screenings into the wash bowl, add a drop of Jet Dry, add water, stir, then pour the water off taking away the silt and mud. Pour slowly so none of the heavy material in the bottom of the pan is lost. Repeat until all the mud is washed away. This step prevents the processing water from getting dirty.
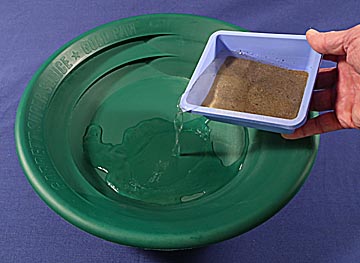
Washing away light silt and clay keeps the panning or Miller table water crystal clear.
After the water is clear, pour off most of it so all you're left with is a layer of wet sand in the bottom of the bowl. Set up your Miller table, if that's the route you've chosen being sure to add one teaspoon of Jet Dry for a four gallon size reservoir, and one tablespoon at a time spread it along the top edge of the table.
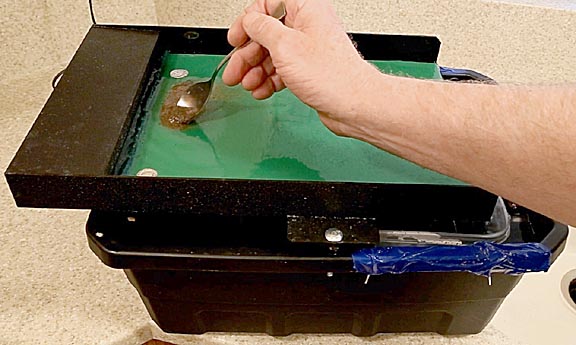
Spooning
classified and washed concentrate onto the Miller table.
The tanble
inclines downward from left to right, the same direction as the water flow.
The water washes away light blonde sands and heavier black sands. Wearing the 5X glasses, search for specks of yellow near where you placed the sample. It usually doesn't travel far because it's too heavy for the water to wash away. Larger pieces can be picked up with the tweezers. Smaller pieces have to be sucked up with the snuffer bottle. One way to speed up the separating process is to repeatedly tap the side of the table. These vibrations shake the table's surface and make the black sands wash away faster but don't affect the gold as much.
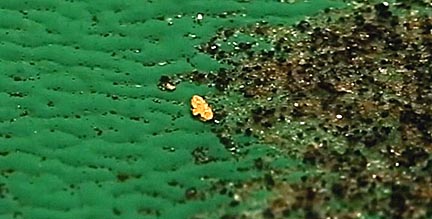
A piece of +30
mesh gold just discovered on the Miller table.
Water flowing
to the right washed away the lighter blonde and black sands.
This process can take a couple of hours depending on the amount of pay dirt. But remember, the goal isn't to get the gold out as quickly as possible but to enjoy capturing every single speck of it. This is why I like the Miller table. If you pan the gold out you don't see anything until the very end of the panning process and then all the gold is in a single pile. With a Miller table I get to experience the joy of discovering each piece as an individual experience, plus I get to see gold usually with the first spoon. I don't have to wait until the very end of the process to see anything.
If you take your time, a properly set up Miller table (there are dozens of YouTube videos showing how to do it) will enable you to clean all the gold out of a sample of pay dirt with a single go-through. But by all means, run the material through a second time. There's always the chance something slipped by.
And that's about it! I transfer the gold from the snuffer bottle to the bowl into which the pieces picked up with tweezers had been placed, pour off any water and let it dry out. Any black sand that might have been sucked up with it can then be easily removed. I add this to the pickers from the classification, weigh it, take a picture of it and add it to my gold horde in one of the glass vials mentioned in the Equipment List. Then I update the page in my gold notebook recording the amount of gold on that sample's page, figure out its value based of that day's gold price and finish the page off with a brief description of how easy the pay dirt was to work with.
Conclusion:
Backyard, or in my case more correctly kitchen, gold prospecting is an interesting, rewarding and satisfying hobby. You can keep the gold you find to show to others or sell it to buy more pay dirt. You'll never make any money, but you'll loose it slower than venturing out into the field to find a mother lode or playing the tables at Vegas. Not many people try it so it has a lot of entertainment value. Best of all, unlike collecting dolls, model cars or many hobbies, it's unusual enough and gold has so much mystique that you'll never get laughed at for doing it. In fact you may have to fight off people wanting to join you. Give it a try! You'll have a blast.
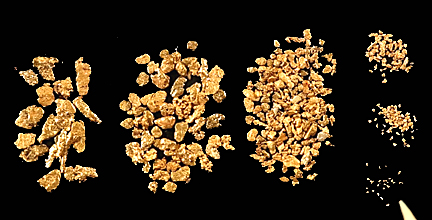
From
the left: +20 mesh gold, +30s, +50s, +70s, +100s below that and -100
mesh gold near the tip of a toothpick.
This
is a magnified image of the gold recovered from two pounds of Gold
Hog Pay Streak Concentrates.
Gold
is so valuable that this 0.536 grams, which barely fills 1/8th of a
teaspoon, is worth over $20.00.
This is the introduction page to the Backyard Gold Prospecting section on my main website. In this section you'll find pages and videos about a Miller table review, testing alternate Miller table surfaces, gold pay dirt reviews and many more.
Thank you for visiting this page. I hope you found it entertaining.
Visitors
wishing to watch any of my 18 and growing collection of YouTube
videos about Backyard Gold Prospecting, please click on the following link:

Return to my main page to browse 60 other subjects