
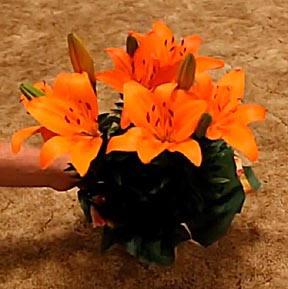
This is of a small section of my bed of Orange Asiatic lilies.
Asiatic lilies are some of the easiest flowers to grow and propagate. Because individual bulbs can cost $3.00, creating a large bed can be an expensive proposition. But, with a little patience and time, anyone can work their way up to a bed that would be the pride of any garden. My own bed, which is now 65-feet long and boasts over 400 prime-sized bulbs, started off humbly from a single pot of orange Asiatic lilies purchase for a few dollars.
Common every Spring in hardware and variety stores across the country, one gallon pots of lilies can be found for as little as five dollars. They typically contain three to five bulbs. The one above is typical. After the flowers die, remove the root ball from the pot and plant it in a convenient spot in the garden. If you live in the sun belt like me, an east facing wall is ideal. This provides mild morning light and shade in the afternoon to mitigate summer temperatures. Water once or twice a week with an inch of water depending on your location. By August the tops will have died back.
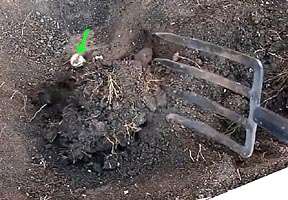
As soon as Fall is in full swing, dig them up and you should be rewarded with two or three bulbs for every one originally in the pot.
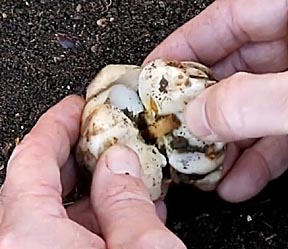
Some will be individual whole bulbs while others may be pairs of bulbs growing as one but separated by a crack. Pull the halves apart and you'll have two viable bulbs.
I recommend replanting right away with the petals pointing up. Asiatic lily bulbs dry out quickly and unlike tulips or daffodils, can die from dehydration. Loosen the soil eight inches or more deep and amend with bone meal to encourage future bulb growth. Bulbs should be planted four to six inches deep depending on how far down winter frosts penetrate. They need to be below that depth. In areas of severe cold, a thick layer of loose munch will provide additional insulation. Water sparingly. You don't want to keep them too wet or they'll rot. Equally, you don't want them to dry out. Shoot for a moisture level of a thoroughly wrung out dish cloth: just barely damp. If you live in an area of heavy winter rain where lilies tend to rot because of water trapped in the bulb's petals, try planting them sideways so the water can drain away.
Repeat this process year after year, keeping the bulbs that are at least one and a half inches across (smaller bulbs won't flower) and in just a few years you'll be collecting hundreds of bulbs every Fall for the following year.
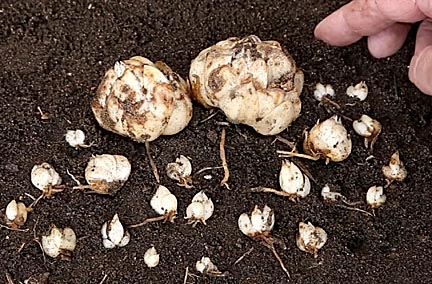
It's necessary to dig and separate them every year because in addition to two or three full sized bulbs they will also produce up to 24 smaller bulblets.
Left in the ground, these will quickly grow in number to the point where they choke out the full sized bulbs.
Harvesting two to three times the number of bulbs planted the previous year may not sound like much, but such exponential growth builds up amazingly fast. The container below has well over 2,000 bulbs, of which at least 400 are prime-sized and could cost up to $3.00 each.
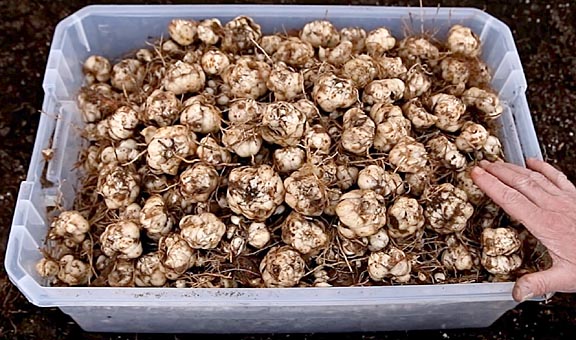
Yet it only took six years to build up to this point from a single pot of lilies. Buying a few dozen lilies the first year will shorten this time considerably.
After digging, I recommend sorting them by size.

This not only weeds out the small bulbs that won't flower, but also enables you to identify the largest bulbs so they can be planted toward the rear of the bed. Their plants will be taller and by placing them in the back rows they won't shade and stunt the growth from the smaller bulbs.
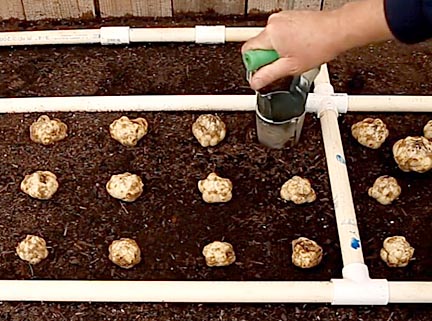
Since I have all the bulbs required for the following year, I plant my bulbs three inches apart to maximize flower density at the cost of bulb productivity. If you're still in production mode, I recommend five inches apart to encourage bulb growth. I prefer planting to a grid so it's easier to figure out what's a plant and what's a weed the following Spring.

Dogs and cats can be a problem if they dig up the bulbs. I found this product works well at deterring them. If you prefer a mechanical barrier, hardware stores sell inexpensive 2-inch plastic netting for construction barriers that can be laid down on the ground. It'll need to be picked up in Spring once the sprouts start appearing.
And speaking of sprouts...
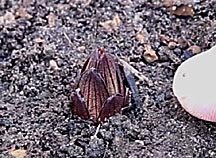
The first should appear in March, though the exact day depends on local weather. At first they appear red. This is a survival trick. Being late comers and likely to be overshadowed by faster growing plants, the red color allows them to use red light filtering through leaves. Once they get their first taste of sunlight they quickly turn bright green.

At this point it's a good idea to weed the bed. No matter how carefully I try to remove all the bulblets from the previous year, there are always hundreds that managed to remain hidden. Thankfully, the pull out easily.
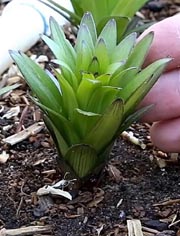
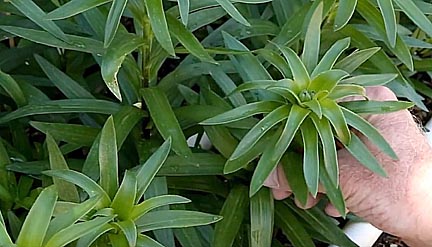
Two weeks later the shoots are starting to spread. At this stage I think they look like the tops of miniature pineapples.
By the beginning of May the plants are 18-inches tall and showing flower buds.
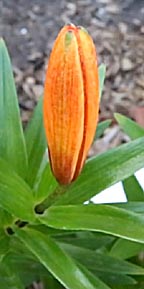
In my high desert location, the buds are fully developed and showing color by the third week in May.
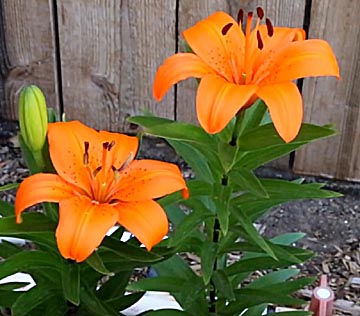
In 2016, the first blooms opened on May 23. By this date, it's common for daytime temperatures in my location to top 90 degrees. The bright sun, low humidity and the density of the planting can result in the plants exhausting all the water in the bed very quickly. Consequently, during the flowering period I use a drip irrigation system to lay down an inch of water a day. If your plants look droopy, consider upping the water.
The bed was in its full glory on 1 June. The image above is an eight-foot long section of the bed that's 65-feet long. The blaze of orange is unbelievable and lasts at least two weeks. From the first flower to the last the bed has blooms for a good six weeks. Our family has a Lily Party every year to celebrate their coming.
Building up a large Asiatic lily bed is a lot of fun and thoroughly rewarding. I sincerely hope you'll give it a try. If you'd like to watch live action versions of the content of this page, I hope you'll try the following YouTube videos.

Return to my main page to browse 60 other subjects