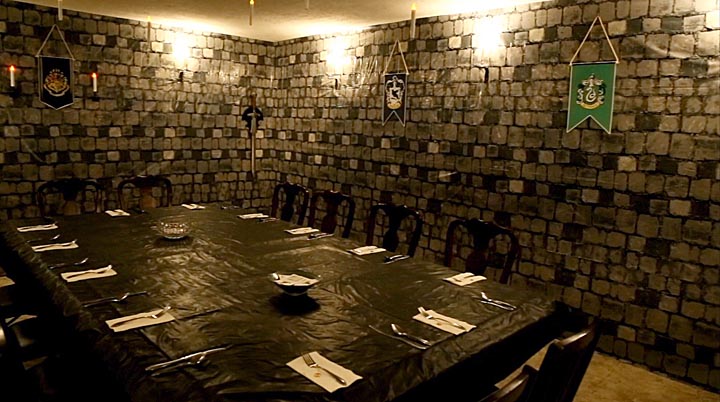
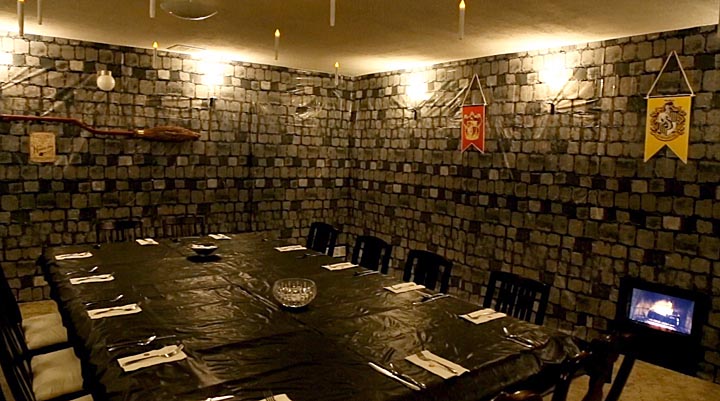
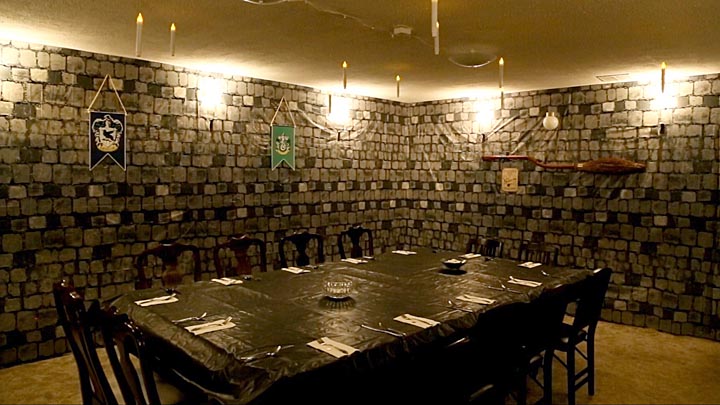
Two views of the Hogwarts Banquet Room built into a room
While this room is decorated in the Harry Potter theme, simply changing a few wall hangings can convert it to a wide range of medieval venues: everything from cosplay group meetings to binge watching Game of Thrones. Unfortunately I have to warn anyone thinking about doing this that it is nether easy nor cheap. It took 40 hours to put together and cost over $200.00. But, for anyone interested in hosting medieval themed parties it can really bring bring the era to life. Here's how to do it:
Assuming a temporary setup is preferred, the best option to making walls look like the inside of a castle is to cover them with plastic tablecloths printed with a stone pattern. When I started working on my Hogwarts banquet room I discovered Walmart, Jo-Ann's, Michael's, Hobby Lobby and Party City did not carry any such tablecloths. On Amazon.com I found three.
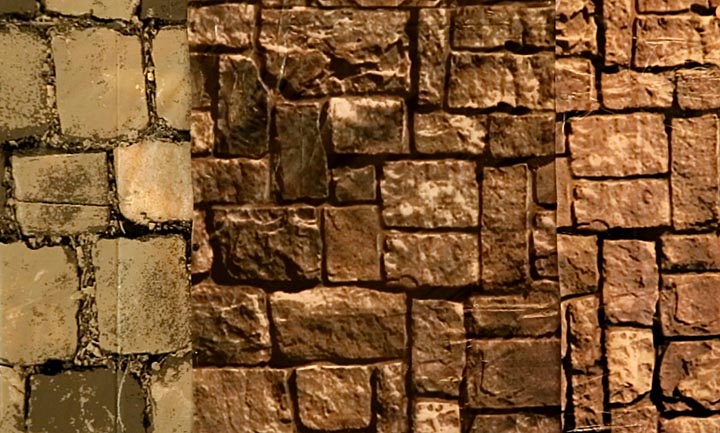
In the image above the example on the left is "Cobblestone tablecloth" and comes in 56-inch wide by 9 foot long sections. These can be ordered in combination packs of up to 6 tablecloths at a considerable cost savings. The sample in the middle is a "Stone Wall table cover" by Beistle and comes 56 inches by 9 feet. On the far right is a roll offering of the same table cloth but comes only 40 inches wide by 30 feet long. It too is by Beistle. Although the middle and right samples have the same pattern and are from the same manufacturer, the roll version is considerably lighter and has a noticeable pink tinge. I chose the cobblestone pattern because it looked like the stone wall of a castle. The other two looked more like the wall of a cave. Also, they had a very obvious repeat pattern that created an artificial look. The cobblestone pattern was also easier to piece together to hide the seams.
It took 18 tablecloths to cover the walls of the 20 x 17 foot room pictured. The cost for the coverings came to $120.00 in October of 2017. Prices vary greatly from day to day on Amazon so a little patience could save a lot of money.
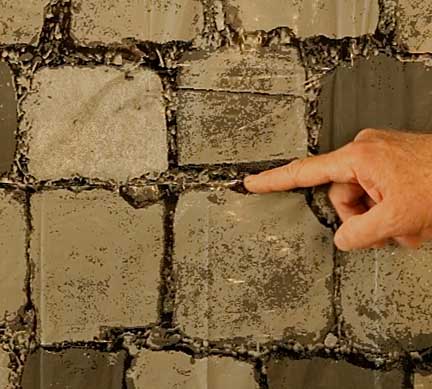
The cobblestone pattern had horizontal mortar joints that made hiding seams easy. I cut along one of these joints on the bottom of the upper piece and then overlaid it on the piece used for the bottom half until the cut edge was hidden in a joint on the lower half. The irregularity of the joint made it difficult to spot the seam.
I recommend using a one inch long piece of clear tape every three inches to join the two pieces. Using a continuous piece of tape often leads to the tape pulling in creating wrinkles. The gaps left by spacing the taped sections apart also helps air trapped behind the plastic escape.

The plastic stretches and tears very easily so re-enforce with tape anyplace the cover is pinned in place that carries the weight of the cover. Pins in the middle of the cover to keep it laying flat don't require re-enforcement. I found using black push pins makes them almost impossible to see if they are pushed in an area that is dark. They hide well even in light areas because they look like a natural defect in the stone wall.
Hang the pieces in 9-foot long sections. Longer sections are difficult to control. When overlaying the previous section with the next section, move the new section left and right to get the cobblestone patterns to match as much as possible. The last pins used to hold up the first section should be flat thumbtacks instead of the black push pins because they won't create a bump in the overlaying cloth.
Remove any doorknobs you can to prevent them from creating raised areas. Those that can't be removed for reasons of safety should not have pins close to them. Doing so creates a sharp bump, which is more obvious that the smooth bump made if the cover is loose in that area. Taping the gaps around doors will reduce the amount of air drawn in behind the cover, causing it to billow out.
Few air conditioning systems are perfectly balanced in a room. If they pull more air out than put in, then the resulting negative pressure can cause the wall coverings to billow outward.
I found that by experimenting with how much of the return air ducts are covered that I could balance the room and avoid billowing.
A big problem is windows, or in the case of my room, a large open area with a window. If the window is left so light comes through it and the room is used during the day, light will pass through the thin plastic covering and wash out the stone pattern. If the window is blocked out with a heavy black cloth and the walls of the room are naturally light, then the wall covering over that area will look much darker then the rest of the room. The solution is to get a cheap flat bed sheet large enough to cover the opening and close to the same color as the wall. Walmart carries a wide range of sizes and colors are very reasonable prices.
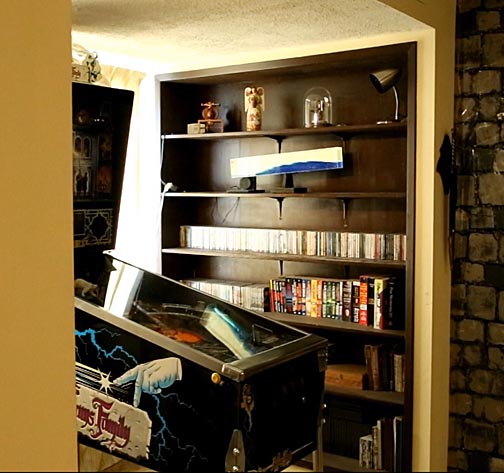
Large openings such as the one above create another problem. If someone walks past them quickly, air currents can cause to wall covering to ripple. The bed sheet backing reduces this significantly but an even better solution is to mount a 2 x 2 inch wood beam halfway up across the opening and then stapling the cover to it.
An open fire is one of the hallmarks of a medieval castle, but few people have one in a room available for decorating as a castle. An easy solution is to use a small TV and disk player. It's also a lot safer.
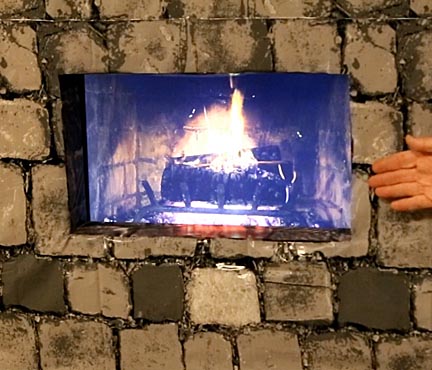
Just cutting the fireplace into the wall ends up looking a little strange.
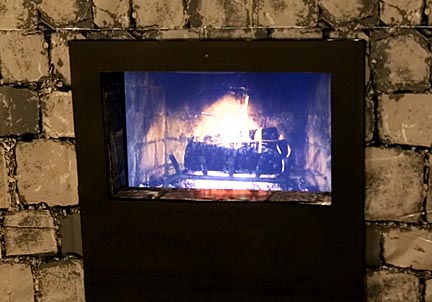
Adding a frame sprayed flat black to mimic wrought iron improves things. The one above was cut out of a piece of 1/2 inch thick foam board. Adding a fireplace can be a lot of work, but the crackling of the flames, even fake ones, adds to the room's ambience.
I wanted fake torches to light the room but couldn't find anything that looked believable. So I went with the next best thing: fake candles.
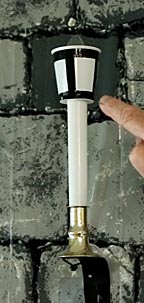
These looked okay, but the bare bulbs were far to harsh. I solved this by cutting a hole in the bottom of a 3 ounce plastic cup and screwing the bulb through the hole and into the base. Strips of black duck tape created a wrought iron look that worked very well. Ten, 40-watt equivalent LED bulbs illuminated the room bright enough to have a meal but slightly dimmer than normal room lighting, which helped enhance the medieval room theme. To hide the wires, cut an opening in the cover and slide the wires down behind the covering.
The best time to collect decorations for a DIY medieval castle room is the month before Halloween. During this period there are decorations for both that holiday and Christmas. For example, the candle lights I used came from the Christmas decoration section of Hobby Lobby. They are normally two for $10 but they were on sale for half price. This is also a great time to find gargoyle masks, swords and banners for the walls from Halloween specialty stores.
Decorating a room to look like a Hogwarts banquet room, or any medieval themed castle room, is a lot of work. But it's all worth it to see the amazed expressions on everyone's faces when they walk in for the first time.
For a live tour of my room, please click on the following very short video:
To see how people react to it, watch the follow-on video:

Return to my main page to browse 60 other subjects