
The drumbone popularized by the famous Blue Man Group is half drum and half trombone. By sliding tubes back and forth the tone of the drum can be changed. They're easy and inexpensive to build a tons of fun to play. Here's how to make two different types:
Before building a drumbone, watching a video of the Blue Man Group playing one will provide insights on how to make one and how they work. There are many of these on YouTube.
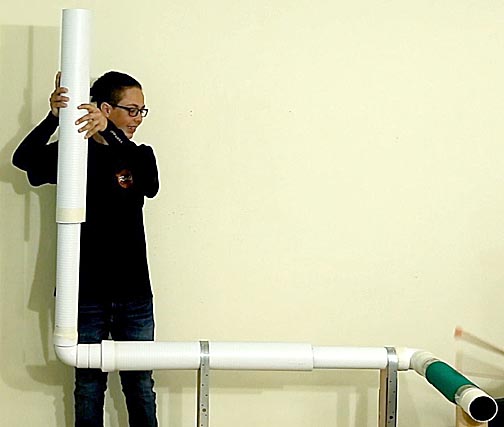
The version pictured above is a simplified design that can be made in as little as one hour and only costs $30. That doesn't include the frame, which enabled it to be played with only two people. Usually drumbones require three participants: one to play it and two to move the tubes to change their pitch.
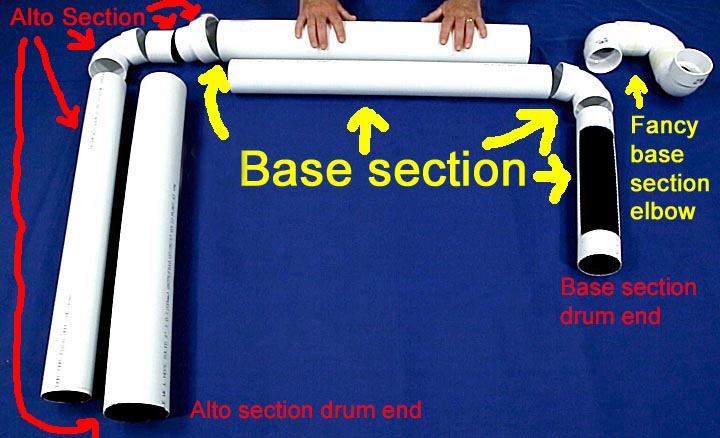
In the Blue Man Group Drumbone show, the instrument is played first on only the base section with the 4-inch diameter sliding tube pointing upward. After a few minutes, the alto section is played on then the two parts are connected to make the final drumbone. For the simplified version, the base section consists of a 15-inch length of 3-inch diameter plastic pipe with a 9-inch long section cut out of it as shown above on the right. Next comes a 3-inch diameter slip-slip elbow (which can be replaced with three elbows to produce a fancier looking turn,) a 30-inch long piece of 3-inch diameter pipe and a 30-inch piece of 4-inch diameter pipe, which slides over the 30-inch piece of 3-inch pipe. These plastic pipes are available in most hardware stores in the plumbing section and typically cost $10 for a 10-foot length. The 3-inch elbows run $3 each.
The alto section consists of a 30-inch piece of 3-inch diameter plastic pipe with a 30-inch piece of 4-inch diameter pipe slid over it. The end of the 3-inch pipe is attached to a 3-inch slip-slip elbow, a 3-inch long section of 3-inch diameter pipe and a 3-inch to 4-inch slip-slip adapter. In play, the 4-inch diameter base tube connects to the 3-inch alto tube via the adapter to form the complete drumbone.
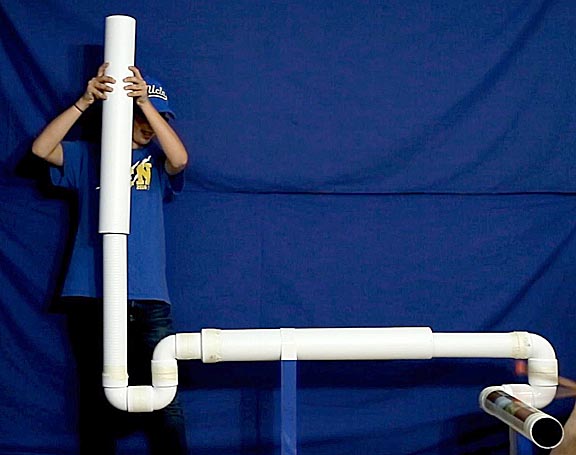
The following image shows what the completed instrument looks like, except that the alto tube is laying flat instead of straight up out of the screen as it would be in normal play:
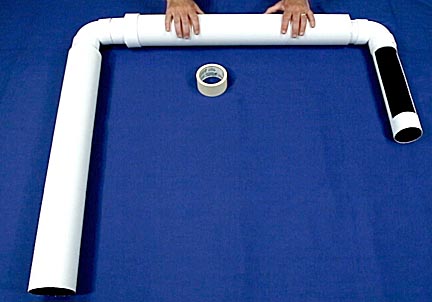
The final step is to cover the open area of the base section with a suitable drum head material.
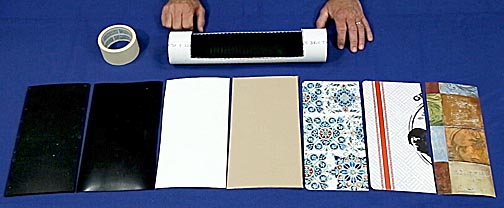
I tried several materials including 1/4-inch and 1/8-inch thick rubber, poster board (sounded the best but fell apart after just a few minutes of play) and various sheet plastics. In the end the one that was durable enough for continuous play and sounded the best was a thin plastic placemat. Walmart sells them in the kitchen section for $2 apiece. The best ones are those that pop when the corner is plucked rather than snapping back sharply. Cut a piece large enough of cover the opening and tape it in place. The Blue Man Group screw their drumheads in place but tape works almost as good and makes replacement easier. I found taping a layer of felt over the head mellows the sound considerably.
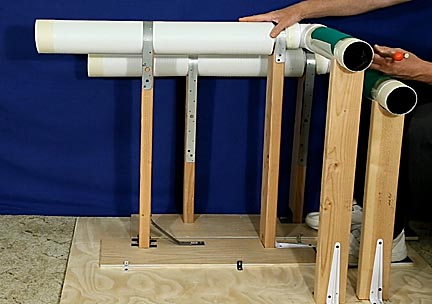
For solo play, the two sections of the drumbone can be mounted on a frame. The 4-inch diameter tubes are held by posts that attach to bases that can be slid back and forth by the player's feet, leaving both hands free to play. I found alternating the heights of the two halves helpful so the sections can be played without interference. Having one 28 inches high and the other at 34 worked well.
This simplified drumbone plays and sounds great, but purists desiring a true Blue Man Group drumbone will have to do a little more work because it requires 4-inch inside diameter tubes with 5-inch outside diameter tubes. Also, the outer tubes are constructed of cardboard and have to be handmade. The simplest way to do this is to cut a strip down the length of a 30-inch long piece of cardboard concrete forming tube so the remaining perimeter is 15 and 1/8-inches in circumference, spray water on the outside to soften it and form it around a 4.5-inch outside diameter piece of ABS pipe. Start with the smallest diameter concrete froming tube available. This is usually 8-inches but some stores carry 6-inch tubes. Wrap the entire length tightly and let it dry overnight. Remove the tube, cover the ABS with nonstick foil, reinsert the cardboard tube, glue the edges together and rewrap to let the glue dry. After the glue is dry, remove the tube and strengthen the seam with 2-inch wide strips of poster board glued to the inside and outside down the length of the tube. It may be necessary to sand the wax off the inside to the tube near the seam to remove any wax waterproofing for the glue to stick. This sanding is best done before gluing the seam together.
Build the drumbone with the new cardboard tubes using 4-inch diameter tubing and elbows. This larger instrument will sound slightly deeper and mellower than the smaller version, but is more expensive, heavier and messier to make.
If you build one of these drumbones are find that it doesn't sound as good as the one used by the Blue Man Group, it's because their drumbone is fitted with microphones and its output sent to an amplifier that not only magnifies to sound but corrects the pitch and range to sound better than any unplugged drumbone.
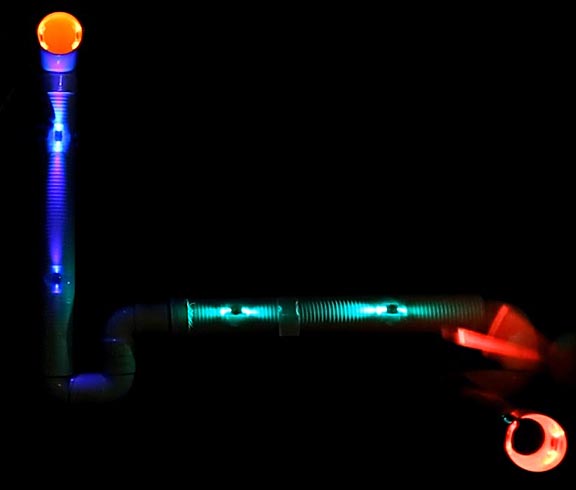
If you are planning a performance, one way to add some bling to your instrument is to purchase children's sound activated bracelets from Amazon.com, remove the bands and tape them to to drumbone. They will light up every time the instrument is struck creating a brilliant light show. A pair of sound activated drumsticks will complete the effect.
The following YouTube videos show both of these drumbones in action:

Return to my main page to browse 60 other subjects