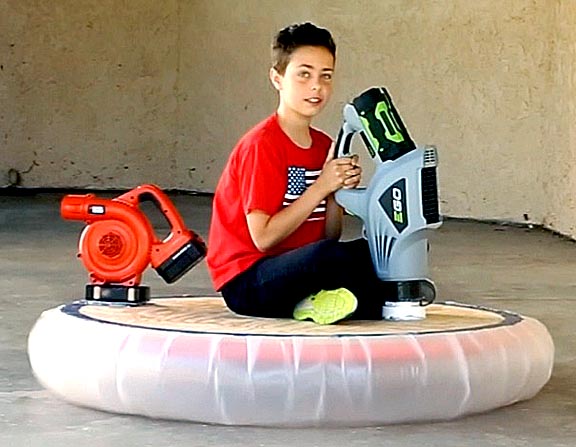
A million years or so ago, when I was as young as my grandson, James, in the image above, I dreamed of building a hovercraft, though they were more commonly called hover cars back then. The attraction was that they came as close to a flying saucer as anything you could get. I never made one. But now with six grandchildren tugging on my pant legs asking for something new to do I figured the time was ripe to satisfy this long forgotten desire.
Constructing a simple hovercraft like this one:
...can be accomplished in just a few hours and for surprisingly little expense. The base is a 48-inch diameter circle cut out of a piece of 4 x 4 foot, 3/4-inch thick plywood. Since this simple hover car isn't being finished, I opted for plywood with one side sanded. Cut a hole half way between the center and the edge for the blower to blow down through. The hole should provide a tight fit for the blower's exhaust nozzle.
This type of skirt is called a balloon or bubble skirt and was made from 6 mil polyethylene. Cut a 6-foot diameter circle and lay the base on top of it.
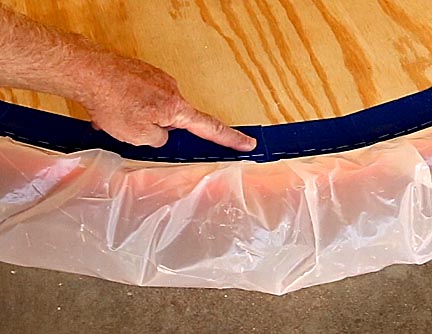
Put down a layer of indoor/outdoor double faced carpet tape around the upper perimeter. Bring the edge of the plastic up and stick it to the carpet tape. Work your way around the perimeter making sure to make the gathers, the overlapping sections of plastic, as even as possible. Cover the edge of the plastic with duck tape to seal it to the base. Make sure the tape is carefully burnished down to seal it as tightly as possible. Finally, drive a line of staples all the way around the edge to secure the plastic skirt in place. While I used 6 mil polyethylene and it worked well, using a thicker material like a heavy duty shower curtain will make the skirt more durable.
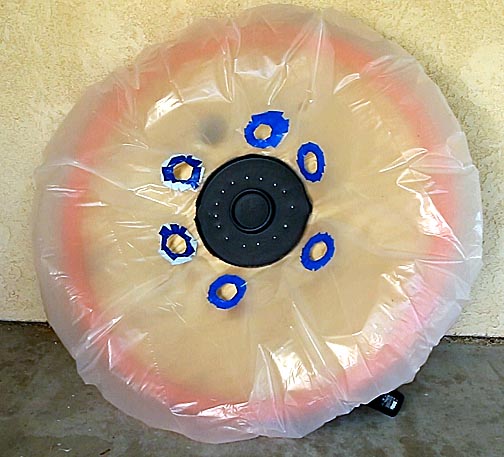
Turn the base over and secure the center with a smooth edged piece of plastic or wood. This holds the middle of the plastic to the underside of the base so a pocket is created to allow the air to escape. Cut six holes in the plastic close to the center and strengthen them with duct tape so they don't stretch out.
Before moving
onto the power plant, I wanted to explain a test I made of a
different type of skirt.
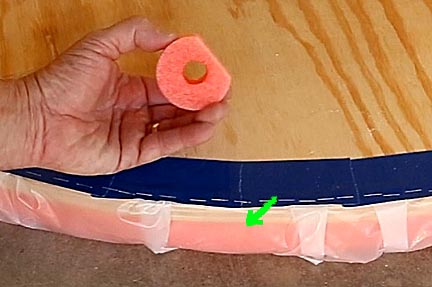
Before putting the balloon skirt on the hovercraft, I took some 3-inch diameter foam swimming straws, cut one side flat and glued them to the lower edge of the base. My thought was that this would create a skirt that was much simpler to make than a balloon skirt. It didn't work. On very smooth surfaces it would just barely support a 50-pound child with the motor running flat out. Even then it was hard to push. This was an idea that failed. Rather than take it off, I simply mounted the balloon skirt over it. The swimming straw skirt can be seen under it (green arrow.)
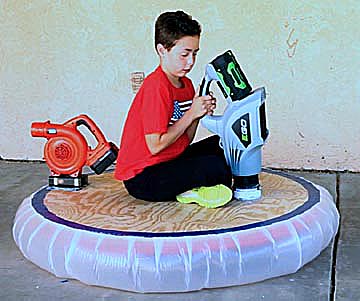
For convenience, safety and noise considerations I decided to use a rechargeable electric leaf blower for the power plant.
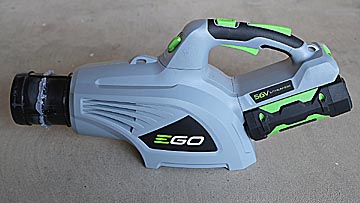
At the time I built this simple hovercraft, the most powerful blower of this type was the E-Go 56-volt blower ($179.00 at Home Deport was the best price I could find.) Rated at 395 MPH and 480 CFM it's stronger than most gas powered blowers. I jammed it into the hole cut for it and the hover car was done!
And how did it
work? Better than I'd expected! Even on medium power the blower puts
out enough air for children up to 100 pounds to ride. Kick in the
turbo boost and it easily supports adults over 200 pounds.
As great as it worked I learned a few things about simple hovercraft like this, which anyone thinking of building one should consider.
1. They work great on smooth surfaces and even carpet, but forget about grass. The blades hold the hover car far enough up to let the air escape before it can provide sufficient height to move around. I've researched this problem and came across a YouTube video of a man who made one supported by five high powered gas blowers and even that one didn't do well. If you want to have a hovercraft that can handle thick grass you may have to use a 20hp or greater power plant.
2. Hovercraft move so easily they need to be used on very flat surfaces. The concrete patio in the image above has a 1-inch in 10-foot slope for drainage. Even that gentle slope is enough to quickly make the hover car start sliding downhill.
3. The 18-volt blower mounted on the back of this hovercraft was woefully underpowered to push the car around. It only produced 1 ounce of thrust while I measured the required thrust to move the car at around one pound. This little blower couldn't even keep it from sliding downhill. I figure I'd need a second E-Go blower for propulsion. It turns out a pusher isn't needed. As a family activity, shoving the rider around by hand is almost as much fun as riding the hover car.
4. If only children under 100 pounds are going to ride it, you might not need this powerful a blower. I suspect the average home plug-in blower might do good enough, though the cord might be slightly inconvenient.
If you'd like to watch this simple hover craft in action, I invite you to click on the following YouTube video:
Members of all three generations of my family have ridden it and laughed doing so. It was an inexpensive project and an easy half-day build. I can recommend it to anyone considering building their own simple hover car. Thank you for visiting!

Return to my main page to browse 60 other subjects