I recently got interested in paper airplanes. After working my way through three books on them and making many dozens of designs, I learned that the ones that gave the most pleasure were those that flew the slowest and most gracefully. I also learned that even the slowest still flew so fast that in the average house, where I prefer flying, the longest flight was typically less than three seconds. Considering that I spent ten times that much walking over to pick them up and toss them for another flight, it quickly became an exercise in frustration. I wanted to spend my time watching them fly, not walking around for them.
Searching that modern font of all knowledge, the Internet, for a better solution, I discovered walkalong or airsurfing gliders.
These are made of thin sheets of foam that make them so light they can be made to fly at less than one foot per second. By following close behind them with a piece of cardboard, it's possible to use the updraft from it to keep one of these gliders in the air indefinitely. They're a lot of fun but I quickly tired of having to struggle to keep them flying in the small confines of a house. Also, using them felt like I was cheating. Pushing them along with the cardboard was almost the same as taping a string to their noses and dragging them around. They no longer had the charm and grace of a free flying glider.
As it turned out, the extreme light weight of these gliders and superior aerodynamics over paper airplanes made them outstanding free fliers.
Instead of a flight lasting a mere 3 seconds it was possible to make one remain in the air for as long as 14 seconds over the same distance. But, I still had to waste a lot of time walking over to pick them up after each flight. Additionally, because they are so light, doing so created air currents that lasted long enough to disturb the next flight.
The solution was to adjust the upward bends of the tips of the wings so that they flew in a large circle and came back to me all by themselves... and so the "comeback glider" was created.
Now, there are many paper airplane designs that will fly in a circle, but these tend to be stunt planes intended to be thrown hard. Their flights usually last barely two seconds. A comeback glider, however, will follow a much longer path and do so with greater grace, taking over ten seconds per flight. Finally, I had the glider I was looking for. Here's how to make them:
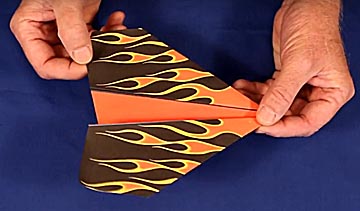
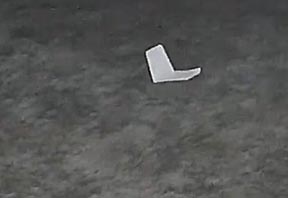
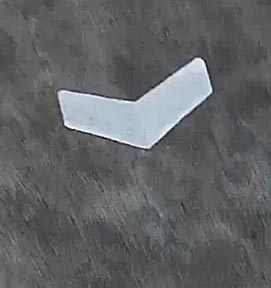
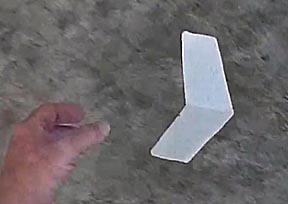
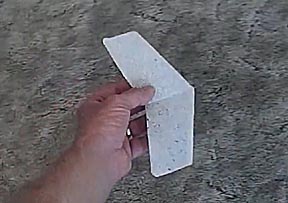
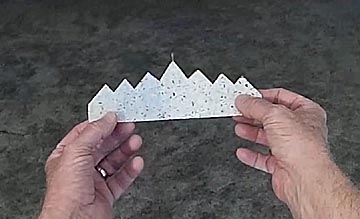
The following image shows the design of the best comeback glider I've made:
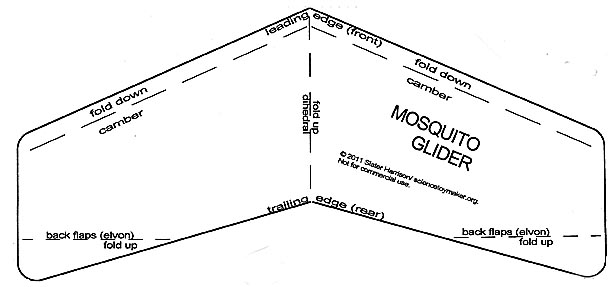
It's eight inches wide from wingtip to wingtip and four inches long. The leading edge is folded down approximately 30 degrees and the wingtips folded up the same. This design is by Slatter Harrison at the outstanding sciencetoymaker.org website.
The following link provides detailed information on how to make one:
http://www.sciencetoymaker.org/airsurf/images/GLIDERS/MakeMosquitoGliderPDF.pdf
... and here is where you can get a printable pattern for the glider:
http://www.sciencetoymaker.org/images/GLIDERS/MosquitoPattern.pdf
The secret to these gliders is that they use very thin sheets of light weight closed-cell foam cut with a hot wire cutter, such as the following:
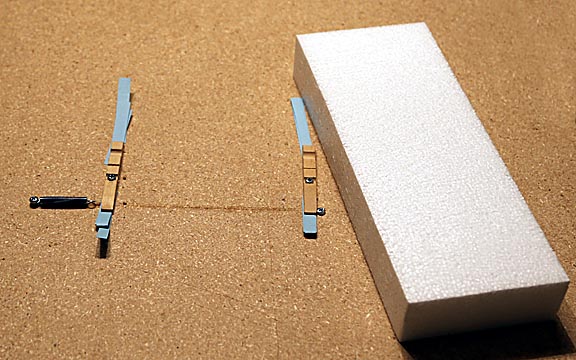
This is a very crude cutter made from bits and pieces found in the garage. The critical element is an eight inch length of 38 gauge nichrome wire, available from Amazon.com and many other sources. It's stretched between the two halves of clothespins. Shims made of layers of poster board between the wire and the bed of the cutter set the thickness that will be cut off the foam block on the right. The spring on the left keeps constant tension on the wire. As it heats up it expands and without the spring to keep it tight the wire would wobble and make an uneven cut. It's powered by a standard automobile battery charger. I tried two six volt lantern batteries in series but the current draw was so great the wire couldn't be maintained at constant temperature. There are many on-line sources with detailed plans for hot wire cutters. In fact sciencetoymaker.com sells a complete kit.
The temperature is adjusted by moving the charger's electrical contact point closer to the cutting section, which reduces the resistance so the temperature increases, or moving it farther away along the wire extending beyond the clothespin, which increases resistance and reduces the temperature. The wire must be hot enough to cut the foam effortlessly or the wire will wobble creating an uneven cut. But, if it's too hot it'll melt too much foam. The best settling is different for each cutter and can only be determined by experiment.
Expect to cut at least a dozen sheets before getting the settings correct. When doing so, it's best to barely push down on the foam block. Too much pressure and surface drag will make it difficult to maintain a constant speed, which is critical to getting a smooth cut. This may sound complicated, but once the cutter is working, peeling off thin slices again and again has an odd Zen-like appeal. I constantly find myself cutter many more sheets than I need.
The sciencetoymaker.org website is the best source for ultralight foam, which produces the best comeback gliders. The foam blocks available from craft stores will work, but their density can be ten times that of the ultraight stuff, which result in shorter flight times because they have to fly faster to stay in the air. I found the best performance comes from sheets 0.007 inches thick.
Once you have the foam sheets, and these can also be purchased pre-cut from sciencetoymaker.org, tape the printed pattern on to them, cut them out, remove the paper, fold the wing's leading edges down and the wingtips up and finally tape a three-inch long piece of copper wire to the nose for balance. The wire should be a single strand of the very thin wire used for common house electrical extension cords.
Adjust the leading edges, wingtips and the length of the wire by bending it to get level, straight flight. This takes a little time to master. For these gliders, to get one to turn left, bend the wingtip on the left side of the plane more upward. This increases drag on that side and the the glider will curve to the left. This is the opposite of paper airplanes. The reason is that comeback gliders have much more flexible wings, which makes them react differently than stiffer winged paper airplanes, which behave more like real airplanes.
Increase the amount of turn in your preferred direction so the glider doesn't collide with a wall, or decrease it to increase the diameter of the circle and therefore flight time. Once that's done you're ready to stand in a room with very still air and release your comeback glider.
Drop it gently, don't throw it, from as close to the ceiling as you can reach.
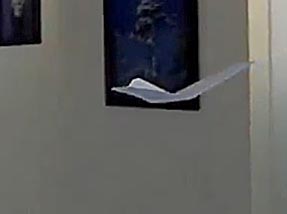
It may dip a bit at first to build up to flying speed
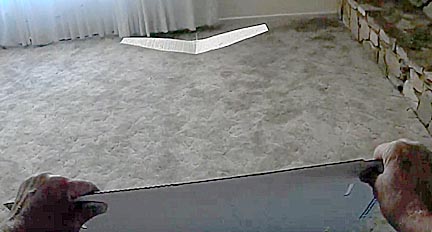
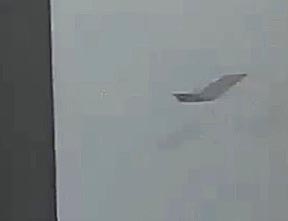
But then it should fly in a slow, graceful circle up to 20 feet in diameter...
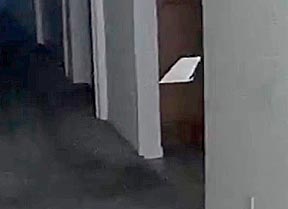
... come around in front of you, where you can scoop your hand under it...
... for a gentle landing on your fingers.
Properly adjusted, you shouldn't even have to bend down to catch it. No walking to pick it up. No creation of disturbing air currents. Just stand up and release it for another flight. Beautiful!
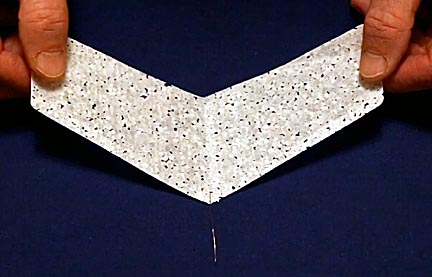
A popular alternative design is the jagwing glider.
These are unbelievably stable even without a dihedral angle and they fly even slower than the mosquito, but they don't have as good a glide angle so you may find yourself having to do deep knee bends more often to catch them. These can be made to fly so slowly and stably that it seems impossible for them remain in the air.
Once you have a good comeback glider you need a way to keep it safe. I found a holder like the following taped together from scraps of cardboard works great:

None of the control surfaces rest on it so they aren't disturbed. The 25-degree angle maintains the dihedral at the perfect angle and the top piece prevents drafts from carrying it away.
Comeback gliders have a beautiful grace about them as they slowly glide right back into your hands that has to be experienced to be appreciated. I hope this page helps you give them a try. Thank you for visiting.
The following YouTube video shows them in action:

Return to my main page to browse 60 other subjects