Wayne Schmidt's Cooking Page!
The following recipes are excerpts from my unpublished cookbook, An Engineer in the Kitchen: A Guide to Precision Cooking, by Wayne Schmidt.)
(Click on main site to browse 70 topics ranging from triangle looms and Knitting Nancies to the strange world of lucid dreaming.)
There are two things that bother me about virtually every cookbook I've read: they use the inaccurate method of volume measurement and the don't discuss the effects of varying ingredients.
A cup of flour can weigh anywhere from 120 grams to 180 grams depending on the type of flour and how it was scooped. Use a combination yielding a 180-gram cup when you need a 120-gram cup and your recipe will come out too dry and probably fail. The answer is to get a good digital scale (one accurate to at least two grams -- they run about $50.00 but last forever) and measure your ingredients by weight. This eliminates the problem of compaction varying the amount of ingredient scooped. The one exception to this is when very small ingredients are involved such at salt, baking powder, or vanilla. Kitchen scales aren't accurate at small weights so it's best to use a good set of measuring spoons for them.
Now consider a recipe you like but want to change it to suit your own taste preferences. What modifications produce what effects? Cookbooks never mention these sorts of things. They'll tell you how to change blueberry muffins into cranberry muffins by switching the can labeled "blueberries" for one labeled "cranberries" but that's about it. What people need to know is how changing the amounts and types of the fundamental ingredients effects the finished product. The following recipes try to address some of those questions. In so doing they give someone reading them a feel for what corrections to make to modify the recipes to achieve the desired result.
A third, and lesser, complaint is that I don't believe cookbooks give enough discussion of technique. Many times how a recipe is made can be as important as what goes into it. For this reason the following recipes present the details of technique in what at times may seem to excruciating detail.
Baking temperatures are critical. Readers are strongly encouraged to get an oven thermometer, or two, and check the actual temperature their oven runs at.
To prevent burning the bottom surface of many things baked in an oven, I use a technique that I have never heard of before. I lay one, two or three layers of paper toweling on the baking sheet and cover them with parchment paper prior to placing the item to be baked on the sheet. The paper slows the transfer of heat from the metal sheet and prevents burning. The number of sheets is varied to control the amount of heat applied to the bottom of the food. Using this technique, it is easy to bake cookies so that the bottoms and tops are both done at the same time. It's also useful for preventing the formation of the hard, burnt layer on the bottom of meatloaf.
I followed the same procedure for developing all of these recipes: first, make test batches of every recipe I can find for whatever I'm working on; second, select the one result from the first step that's closest to what I'm looking for; third, make a series of test recipes to optimize the texture and flavor. This is a lengthy process (it took over 50 batches to perfect my sugar cookie recipe) but yields recipes that are so delectable that they are almost irresistible.
Most of the recipes posted here will be sweets or desserts because they are most people's favorites.
Please note, some of these recipes are recently developed and haven't been converted to gram measurements. I promise to do so as soon as time permits.
NEW!!!
French Vanilla frosting (Please see Odds and Ends.)
CONTENTS
COOKIES:
Kris
Kringle Christmas cookies (photo)
Tuile
Twist Cookies (photo)
Lemon
Cookies for Grown-Ups (photo)
Jeff's
Sugar Cookies (photo)
Cinnamon
Puffs (photo)
Pecan
Fingers (photo)
Viennese
Crescents (photo)
Rice
Krispie Squares (photo)
Coconut
Macaroons
Peanut
Butter Cookies
Chewy
Peanut Butter Chip Cookies
Oatmeal
cookies (photo)
June's
Butterhorn Cookies (photo)
Chocolate
Chip Cookies! (photo)
White
Chocolate Chip Macadamia Nut Cookies (photo)
Shortbread
Butter
cookies
CAKES: (Jump
to cakes)
Glendale
Community College Memorial Apple Turnover (photo)
Blueberry
Upside Down Cobbler (photo)
Pineapple
Upside-Down cake (photo)
Pound
Cake
Brownies
Peanut
Squares (photo) NEW
VIDEO POSTED!!!
Individual
Apple Pies (photo)
Industrial
Strength Apple Pie
Chocolate
Lasagna (photo)
DESSERT
BREADS: (Jump
to Dessert Breads)
Date-nut
Bread (photo)
Banana-nut
Bread (photo)
Zucchini
Bread
Pumpkin
Bread
Apple
Spice Bread
Cinnamon
Rolls (photo)
Jenny's
Raisin Scones (photo)
Blueberry
muffin test
ODDS
AND ENDS: (Jump
to odds and ends)
Buttercream
frosting
Cake
Batter Ice Cream (photo)
Lime
Rickie (photo)
Spoon
candy rediscovered! (photo)
UPDATED
WITH A BRAND NEW VIDEO!!!
Steak
Fanatic Pizza (photo)
Picture
perfect fried eggs (photo)
Lasagna
for manly-men
Cheesebread!
(photos)
Green
Muck!
Four-pound
hamburger (photo)
Faux
Lasagna (photo)
Perfect
boneless, skinless chicken breasts
Baked
Apples (With a picture of the strangest,
and best, baked apple ever.)
Apple
stuff
Corn
Bread
Gail's
Super Trail Mix
Light
& Crunchy Waffles
Fried
Oatmeal (photo)
Buttermilk
Biscuits (photo)
Chile
Dogs
Sourdough
French Toast (photo)
Homemade
Syrup
COOKIES
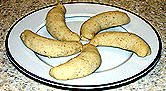
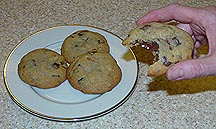
NEW!!! Kris Kringle Christmas cookies!
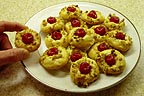
These are my son Jeff's favorite Christmas cookie. The cookie itself is very light with a delicate crunch. The nuts and cherry add interesting textures. This recipe makes 16 two-inch cookies.
1/4 cup soft butter
1/4 cup
granulated sugar
1/2 teaspoon
cream of tartar
Beat these ingredients on high until light.
Add:
1 egg yolk
1 teaspoon
real vanilla
Beat until fluffy, about two minutes.
Mix in one cup of cake flour until smooth. Refrigerate two hours then form into 16 balls. Dip one half of each ball in slightly beaten egg white then roll the dipped half in chopped walnuts. Place on a cookie sheet insulated with two sheets of paper toweling under a sheet on Teflon coated foil, or use regular foil that has been very lightly greased. Press a maraschino cherry that's been dried with paper toweling into the center of each cookie and bake at 325 degrees fro 28 minutes or until the cookie is very lightly browned. Cool five minutes then transfer to a cake rack to finish cooling.
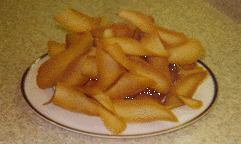
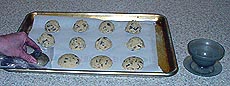
TUILE CHIP COOKIES
This recipe makes four dozen chip-shaped cookies that are more delicate than the finest potato chips. Mounded high on a white china plate, they make an eye catching display.
Don't
let their appearance fool you, these aren't potato chips but sweet,
buttery, delectably fragile cookies that will surprise everyone.
The
image above shows longer tuile twist cookies. These are the same as
the chip cookies described below
Because tuile chip cookies are small, thin and bake in a hot over they tend to burn very quickly. Unless each cookie starts off exactly the same size and shape a few out of every batch will burn while others will be underdone. The solution is to use a 1/8-inch thick molding stencil with a 1 and 1/2-inch diameter hole in it to make each cookie identical.
Fortunately, the dough is easy to make and the cookies bake quickly. Once you master the technique you can turn out dozens of perfectly formed, delicious cookies in a short time.
Let's get started!
Preheat your oven to 400-degress (F) with the baking rack in the middle of the oven.
Set aside two large cookie sheets and two sheets of non-stick aluminum foil that fit inside the cookie sheets. I recommend using heavy aluminum cookie sheets with rolled edges. These bake evenly and don't warp. Thin, flat cookie sheets often bend when in ovens and may cause the cookies to bake unevenly. If the bottoms of the cookie sheets are dark they will absorb heat too fast and the cookies may burn. If so, you can either buy shiny new sheets, scrub the bottoms until they are shiny or put a layer of typing paper between the cookie sheet and the foil to insulate the cookies. Cookies baked on non-stick foil tend to be a little smaller and coarser but come off the foil very easily. Cookies baked directly on the cookie sheet are larger and have a more delicate crunch but are harder to cut under with an offset knife to get up. I've recently taken to baking directly on the cookie sheets because I feel the increased difficulty is a small price to pay for a superior cookie.
Lay out two clean kitchen towels on a counter near the oven. Pinch sections together to form pleats to hold the cookies.
Mix the batter:
1/2
cup room temperature butter (salted)
1/2 cup sugar
1/8 teaspoon salt
1 teaspoon real vanilla extract
Beat until light and fluffy.
add 2 egg whites and beat until very light.
add 1/2 cup all-purpose flour
Mix in until smooth.
Holding the stencil down on the foil, use an offset frosting knife to pick up a dab of the dough and spread it into the circular opening. Use the edge of the knife to lightly scrape over the top of the stencil to create an even layer of dough. Lift the stencil, move to another area of the foil and repeat. Only make 12 cookies at a time. They melt and spread as they bake and need enough elbow room so they don't flow into each other. Once the sheet is covered with 12 evenly spaced cookies, place it on a cookie sheet, put it in the 400-degree oven and set the timer for 5 minutes. While these bake, make the next set of cookies.
(Note: I prefer forming the cookies on the foil while it's on a counter rather than starting off with the foil already on the cookie sheet because the edges of the cookie sheet sometimes get in way. If you use this technique, be careful to keep the foil as flat as possible when moving the cookies or the delicate circles of dough may be deformed and won't bake evenly.)
When the timer dings check the cookies. They need to be blonde in the middle and light golden brown around their edges. If they aren't golden brown, give them another 30 seconds, but be careful. At this stage they brown very quickly and can easily go from being underdone to burnt. Adjust the baking time according to how your oven bakes.
Once they are the proper color, remove the cookie sheet, gently slide a narrow off-set knife under a cookie, lift it and move it to the kitchen towels laid out earlier and gently bend it over the knife to form a curved chip and lay it over one of the pleats help it keep its shape. Repeat this with the remaining cookies working as quickly as possible, The cookies get brittle quickly as they cool.
Place the second sheet of cookies in the oven and repeat, alternating sheets until all the cookie dough is gone.
If you want to reuse the same sheet of foil, carefully wipe it off before forming the next batch of cookies on it. If not done, residual oil from the last batch of cookies will make the next batch spread out too far. Also, run the cookie sheet under cold water before placing the next batch of cookies on it or they will melt before you can get them into the oven.
Once on the kitchen towels, the cookies will be cool enough to eat in 10 minutes.
This recipe isn't as complicated as it sounds once you get the hang of it. These little treats are a lot of fun to make and well worth the effort. I hope you'll give them a try.
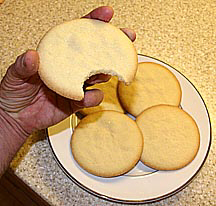
LEMON COOKIES FOR GROWN-UPS

This cookie packs a powerful lemon punch with enough kick to satisfy an adult's palate. The recipe makes 16 tender, chewy cookies two inches in diameter and a quarter of an inch thick. (I wish to thank Ann Meyer for all the valuable suggestions she provided to help me develop this recipe. Thanks Ann!) (Eat with caution! These things grab your taste buds in a judo hold and don't let go!)
1/2
cup of softened butter
1
cup of sugar
Beat these together until light and fluffy.
1
egg
1/8
teaspoon salt
Add to the butter-sugar mix and beat until very light.
Zest
from two lemons
four
tablespoons fresh-squeezed lemon juice
Cut the zest from two lemons directly into the mix. (Don't cut the zest unto a board and chop before adding. This makes finer pieces but much of the lemon oil is squashed out onto the board and is wasted. I prefer using the type of zester with five holes that is dragged over the lemon and cuts off thin strips of zest. These strips do not make the cookie stringy or fibrous.) Add two tablespoons of fresh-squeezed lemon juice and beat again.
2
cups all-purpose flour
1
teaspoon baking powder
Mix the two dry ingredients together first, then beat into the wet ingredients. This dough is very soft. At this point the dough can be put into a cookie gun and extruded onto the cookie sheet or rolled in plastic and frozen so that it can be easily cut. I prefer the freezing technique because it allows me to roll the cylinder of dough in yellow sugar before cutting. This gives the cookies a perky look that hints at the lemon flavor to come.
Place the cookies 1 inch apart on a heavy cookie sheet covered with one layer of paper toweling under a sheet of parchment paper. This slows the cooking of the cookie bottoms so that they don't burn. Make the cookies, either by rolling and slicing or by using a cookie gun, so that they are 3/16 inch thick and two inches in diameter. These cookies do not expand much during baking. If they were frozen, let the cookies thaw under a layer of plastic wrap for twenty minutes before baking. If not, the middle of the cookies will be doughy. Bake at 350 degrees for 18 minutes. The edges should not be turning brown, you just want to cook the eggs enough to set the cookies. Immediately place the cookies one layer deep in plastic bags so that they don't dry out while cooling.
If you want to kick the lemon punch up even more, try topping the cookies with lemon curd.
I tried several experiments while developing these cookies. I found that lemon zest provides flavor mainly during the first few chews of a bite of cookie. The lemon juice took over after that and carried mostly into the aftertaste. Adding more lemon zest than in the recipe starts to make the cookies taste bitter. Adding more lemon juice makes them too acidic and the dough so soft it's hard to work. Baking the cookies longer and letting them cool on a rack so that they are crunchy cuts the lemon flavor by over half. Boiling lemon juice to concentrate it makes cookies that taste more acidic than lemony. Lemon extract makes cookies that had almost no lemon taste. Bottled lemon juice made cookies that tasted more acidic than lemony. Fresh juice and zest are by far the best way to go. One batch got a few drops of yellow food coloring to see if the yellow would make them look more lemony. It didn't work. The beige dough color dulled the yellow to the point where it didn't look lemony. As one last experiment to boost the lemon flavor, I tried replacing some of the sugar with Country Time lemonade mix. The resulting cookies tasted too acidic and only mildly lemony.
I tried making these cookies using orange zest and juice, but the flavor was too weak. However, the frozen dough was delicious!
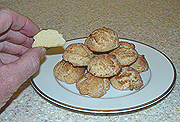
JEFF'S SUGAR COOKIES
These cookies are perfect four and one-half inch diameter circles, golden brown at the edges, and delicately crunchy. I named them for my son who loved them as a kid. This recipe makes 15 cookies.
1/2 cup (114
grams) salted butter
1/2 cup (90
grams) butter flavored Crisco
1 cup (200
grams) granulated sugar
1 (50 grams)
large beaten egg
1 teaspoon
real vanilla extract
2 tablespoons
(30 grams) milk
1/2 teaspoon
of salt
2 & 1/2
cups (350 grams) all purpose flour
1/2 teaspoon
baking powder
Cream butter, Crisco, and sugar together until very light. Add egg, vanilla extract, and milk to the sugar mixture and beat on high until fluffy. Blend the dry ingredients in a separate bowl and beat into the sugar mixture. The resulting dough is very soft and moist. Roll about one-sixth of the dough between two pieces of plastic bag material. The roller should roll on two shims .15 inches high (20 pieces of construction paper) to insure the dough is the perfect thickness. Carefully peel off the top layer of plastic and push a four inch diameter cookie cutter down on the dough. Use a knife to scrape away the extra dough outside the cutter then lift the cutter. Pick the cookie up by sliding a hand under the remaining plastic sheet and gently flip it over onto the other hand. Peel the plastic off and carefully drop the cookie dough onto a plate filled with sugar. Using a wide, many-tined fork (like those designed to fit between the slots of a grill) lift the dough and flip the other side onto the sugar. Transfer the cookie to a cookie sheet lined with two layers of paper towel (no paper towel if your sheets are mirror bright) and covered with aluminum foil. Repeat seven more times. With careful spacing eight cookies will just fit onto a standard cookie sheet. Bake in a 350 oven for ten minutes, turn the sheet for even baking and cook another three minutes. The cookies should just be turning a light golden brown at the edges but still be blond in the middle. Remove the cookie sheet from the oven and cool ten minutes. Transfer the cookies to a wire rack and leave them to rest one hour before eating. These cookies are in prime eating condition after one hour of cooling and before two hours have passed. Eaten sooner they won't have dried out enough to develop the proper delicate crunchiness. After two hours they start picking up moisture from the air and begin going stale. This is not to say the cookies aren't good all day long or even frozen for long term storage. It's just that they are at their prime during the second hour of their life.
CINNAMON PUFFS
This cookie is hemispherical, delicately crumbly, and has a fragile outer shell that evaporates when eaten. The finished cookie is one and one-half inches across.
Cookie
(45 grams)
granulated sugar
(50 grams)
soft serve margarine (the type sold in tubs)
(30 grams)
beaten egg
(110 grams)
all purpose flour
one-half
teaspoon cream of tartar
one-half
teaspoon baking powder
Topping
1 & 1/2
cups (300 grams) granulated sugar
1 & 3/4
teaspoons of (7 grams) cinnamon
(mix these two ingredients together)
Beat the margarine, cream of tartar, baking powder and the 45 grams of sugar until light and fluffy. Add the egg and beat until even lighter and fluffier. Mix in the flour. Chill this mix in a freezer for 20 minutes and use two spoons to form 26 cookies (12 grams each.) Roll these lightly to form balls then shake them with the cinnamon sugar to coat. Place on a cookie sheet insulated with two layers of paper and covered with aluminum foil or parchment paper. Let sit for ten minutes so the cookies come up to room temperature. Bake in a preheated 400-degree oven for eleven minutes. The tops should still be blonde. Transfer to a wire rack and let cool 30 minutes before eating. These cookies are best if eaten before two hours have passed.
Soft serve margarine works best and I prefer the flavor of Land of Lakes. Crisco gives the cookies a fatty taste and butter makes them heavy.
Timing is critical in baking. A minute too little and the insides may be a little doughy. A minute too long and the outer sheel will be coarse. You'll need to experiment with your oven to determine the best baking time.
PECAN FINGERS

These finger-shaped and sized cookies are a Christmas staple at our house.
1/2 cup soft butter
1/8 cup
powdered sugar
1/8 teaspoon vanilla
extract
1/2 teaspoon
of water
1 cup
all-purpose flour
1/8 teaspoon salt
1 cup of
coarsely-ground pecans (You want a mealy texture, not a paste.)
Cream the butter, salt, sugar, vanilla extract, and water. Combine the flour and nuts and mix these into the moist ingredients. The dough will be soft, sticky and difficult to shape. Form into fingers by using a 1.25-inch diameter ice cream scoop to measure the dough out then roll each scoop between lightly floured palms. You'll need to flour your hands before forming each cookie. Place on a cookie sheet covered with two layers of paper towel (no paper towel if your sheets are mirror bright) and one layer of parchment paper. Bake at 250 degrees for one hour. Roll immediately in powdered sugar and immediately roll them between your palms while the cookies are still warm to set the powdered sugar so it makes a moist coating over the cookie. These freeze very well, the only change being that their texture becomes finer grained.
VIENNESE CRESCENTS
These are pleasant tasting, mildly sweet cookies that go great with tea.
1/4 cup (52
grams) walnut paste
5 tablespoons
(62 grams) granulated white sugar
one stick (114
grams) of room-temperature salted butter
1 & 1/2
cups (180 grams) cake flour
Beat the walnut paste (made by processing walnuts in a food processor until a smooth thick paste forms), butter, and sugar until light and fluffy. Mix in the flour. Divide the dough into 24 equal pieces and roll each piece between the hand and a cutting board to form half-inch diameter rods three inches long. Form these rods into crescents on a cookie sheet insulated with two sheets of paper (no paper towel if your sheets are mirror bright) and covered with a layer of aluminum foil. Bake for 55 minutes in a preheated 250 degree oven. The tips of the crescents should just be turning a golden brown. Cool at least one hour before eating.
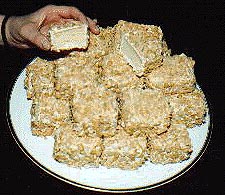
RICE KRISPIE SQUARES
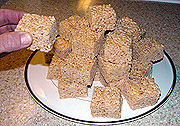
Properly made these are outstanding cookies that keep for several days. The trick to getting the optimal chewy/crunchy texture is to use the proper ratio of ingredients and not over-cook the marshmallows. The honey adds very little flavor but prevents the cookies from drying into rock hard bricks.
8 cups rice krispies
one-quarter
cup soft margarine (the type sold in plastic tubs)
4 cups
miniature marshmallows
one tablespoon honey
Melt the honey and margarine then add the marshmallows. Mix continuously over a low flame to gently melt the marshmallows. The mixture must not boil. When there are six or so unmelted marshmallows left, add the rice krispies, remove from the heat, and fold them in thoroughly. Firmly press the resulting mixture onto a lightly buttered 9 by 9-inch pan. Cool, cut, and eat!
I found the quality of the ingredients makes or breaks these cookies so please use only the best name-brand varieties available. A word of warning: although these are touted as cookies for children, they are not at all sweet and many adults enjoy them.
COCONUT MACAROONS
These macaroons are moist, sweet, and have a strong coconut flavor.
one-quarter
cup (55 grams) salted butter
one-third cup
(60 grams) granulated sugar
two and
one-third cups (200 grams) angel flake coconut (A 7-ounce package)
one-half cup
plus one tablespoon (80 grams) all purpose flour
1 teaspoon of water
Beat the sugar, water, and butter together until very light. Add the flour and mix until blended. Combine with the coconut and mix until uniform. Divide into 14 parts and form into balls. Place on a cookie sheet covered with eight layers of typing paper (to insulate the cookies and absorb the extra butter melted during baking) and place in a 325 oven for 12 minutes. Turn for uniform baking and cook another four minutes or until the tips of the coconut look golden brown. Transfer immediately to a plastic bag to cool ten minutes. Eat warm or let cool.
Don't compress the cookies before baking to smooth them out. Their texture will be better if left alone. Leaving the cookies in a hemispherical shape yields the moistest texture.
PEANUT BUTTER COOKIES
These one and one-quarter inch diameter flat cookies are bit sized, have a very strong peanut butter taste, and although they are dry still melt in the mouth.
1/2 cup packed
golden brown sugar (120 grams)
1/2 cup soft
serve margarine (the type sold in tubs, 104 grams)
1 cup creamy
JIF peanut butter (275 grams)
1 teaspoon
baking soda
1 teaspoon
real vanilla extract
1 & 2/3
cups all purpose flour (240 grams)
Beat the margarine, peanut butter, baking soda, vanilla extract, and sugar until light and fluffy. Mix in the flour until smooth. The dough should be soft and moist but not sticky. Divide the dough into 36 portions, form them into balls, and place on a cookie sheet covered with two layers of kitchen towel (no paper towel if your sheets are mirror bright) and covered with aluminum foil. Use a fork to flatten the cookies by making an "X" of parallel lines. Sprinkle a pinch of granulated sugar on each cookie. Bake for 11 minutes at 375 degrees. The cookies should bake just until they are set, not browned except for a few of the highest tips created by the "X" pattern. Cool on the cookie sheet 15 minutes then transfer to a plastic container with a tight lid. Let them sit overnight before eating to develop a delicate texture.
NEW!!! I was working on thumbprint cookies using a prepackaged Betty Crocker Peanut Butter cookie mix when I got wondering if using peanut oil instead of vegetable oil would help boost the peanut flavor in the cookies. I made a batch of each to test this hypothesis. Although it sounded like a good idea, the tests results were disappointing. To my untrained palate, both batches tasted the same.
CHEWY PEANUT BUTTER CHIP COOKIES
After many experiments trying to make a chewy peanut butter cookie, I found that the proteins in peanut butter tend to cook into a dry texture. Chewy peanut butter cookies are available but they lack to peanut butter impact I wanted. The solution was to prevent the peanut butter from effecting the texture of the cookie by using peanut butter chips. This recipe makes 14 chewy cookies with an intense peanut butter flavor.
1/2 cup plus 1
tablespoon firmly packed golden brown sugar (140 grams)
1/4 cup soft
margarine (50 grams)
1/8 teaspoon salt
1/4 teaspoon
baking soda
1 medium
beaten egg (37 grams)
1/2 teaspoon vanilla
extract
3/4 cup all
purpose flour (112 grams)
1 bag (283
grams) Reeses peanut butter chips
Cream the sugar, salt, and margarine. Add the egg and vanilla extract and beat until light. Mix the flour and baking powder together and blend into the moist ingredients. Fold in the chips. Divide the dough into 14 rounded mounds and place on a cookie sheet covered with three layers of paper towels (no paper towel if your sheets are mirror bright) and a layer of parchment paper. Bake for 10 minutes at 425 degrees. Cool in a plastic bag.
Using butter instead of margarine doesn't change the taste and is harder to work with.
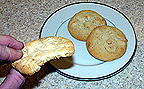
OATMEAL COOKIES
(The cookies on the left are oatmeal, those on the right are oatmeal-raisin-coconut.)
This recipe makes 12 chewy cookies one-half inch thick and two and one-quarter inches in diameter. Unfortunately only eight cookies ever come out of the oven. The cookie dough is so delicious much of it gets eaten before the cookies ever get baked.
one-half cup
(120 grams) golden brown sugar
one-quarter
cup (50 grams) granulated sugar
three-sixteenths
teaspoon (.75 grams) baking soda
three-eighths
teaspoon (1.5 grams) salt
three-eighths
cup (72 grams) butter flavored Crisco
one medium (40
grams) egg
one-half
teaspoon (2 grams) real vanilla extract
one and
one-half cups (150 grams) quick or instant oats
five-eighths(70
grams) cake flour
Mix the flour and oats together in a separate bowl. Beat the sugars, salt, baking soda, and Crisco on high until light and fluffy. Add the egg and vanilla extract and beat again until the batter almost look whipped. Add the oat and flour mixture and mix on low until smooth. Use an two inch diameter ice cream scoop with ejector to make 12 hemispheres of dough on a cookie sheet covered with three layers of paper towel (no paper towel if your sheets are mirror bright) and one layer of aluminum foil. Bake in a 350 degree oven for 12 minutes, turn, and bake an additional 5 minutes. The highest points of the cookies should just be turning a very light brown. Transfer immediately to a plastic bag and cool for ten minutes. Eat warm or let cool.
An option to this cookie is to add two tablespoons of water to the batter before adding the flour and oats. Follow this with three-quarters cup (112 grams) of raisins and a six ounce package (167 grams) of angel flake coconut. The flour and oats mixture is then added and the cookies are baked as before. Some people prefer these oatmeal-raisin-coconut cookies to the original recipe. In fact, using ten teachers to taste test them, oatmeal-raisin-coconut cookies disappeared twice as fast as regular oatmeal or oatmeal raisin cookies.
June's Butterhorn Cookies
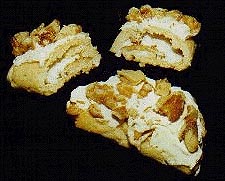
Who's June and why are these called butterhorns when there's no butter in them? These are question's that may never be answered. The one certainty is that these are the most delectable cookies imaginable. They have a perfect balance of sweetness and richness combined with beautiful appearance and a unique, interesting texture. They are three-inch long crescents filled with meringue, covered in vanilla extract frosting and walnuts and are more like a pastry than a traditional cookie. (The dark specks in the photograph are artifacts from the scanning/pasting process used to cut the photo into this page.)
1 tablespoon yeast
2 cups (320
grams) cake flour
1 tsp. salt
1 cup (210
grams) shortening
2 eggs (separated)
8 ounces
chopped walnuts
cinnamon in a
fine shaker
16
ounces vanilla frosting
1/4 cup warm water
1 tablespoon sugar
1/2 cup sugar
Mix the yeast, warm water, and 1 tablespoon of sugar and set aside. Make a stiff meringue out of the egg whites and 1/2 cup of sugar. Make a crumble out of flour, salt. shortening. Mix egg yolks with yeast and add the mixture to the crumble. Form into a pie dough. Divide dough into four pieces. Roll each piece out into an eight-inch diameter circle. Spread with 1/4 of the meringue, sprinkle with some nuts and cinnamon, and cut into eight wedges. Roll up loosely and transfer to a cookie sheet covered with two layers of kitchen paper towels (no paper towel if your sheets are mirror bright) and one layer aluminum foil or parchment paper. Bake in a 325 oven for 20-30 minutes until edges are a light golden brown and the meringue is set. Cool, frost the tops lightly and roll in the remaining nuts.
These are good to eat for 6-12 hours. Past that the dough starts to get stale.
Pecans can be used but walnuts are lighter in color and look better. I don't notice any significant taste difference. Leaving out the yeast prevents the cookies from browning and weaken the taste. Using butter instead of Crisco doesn't add anything to the flavor or texture and makes the dough much trickier to make. Sprinkling the meringue with cinnamon sugar instead of just cinnamon makes the cookies too sweet.
If you're going to freeze the cookies, do so before they are frosted or the moisture from the frosting will slowly eat into the dough and spoil the texture of the dough.
My mother got this recipe from someone named June who lived on 19th street in Milwaukee in 1953.
NEW! I wrote several authors of cookie cook books and asked them about the possible source of butterhorns. The consensus is that they started off as rugala or rugalach cookies. Crisco replaced butter because butter was in short supply during the war, which answers the question of why they are called butterhorns when there is no butter in them. The meringue and nut filling reminded on chef of the filling for one type of potica bread. Both rugala and potica are middle European and strongly influenced by Jewish cooking. The best guess is that a Jewish German cook got creative with rugala cookies and butterhorns were born.
For a more complete guide with many pictures on how to make these great cookies, please see my page: BUTTERHORNS.
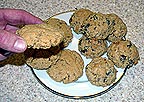
CHOCOLATE CHIP COOKIES!
The two greatest debates in the history of mankind are: which was the better television show, the Addams Family or the Munsters?; and should or shouldn't chocolate chip cookies have nuts? The answers are: obviously the Addams Family and by all means nuts!
These cookies are so rich just two of them will satisfy even the most ardent chocolate addict. They have a delicate, crunchy shell and a very moist inside and retain this condition for hours if left uncovered. These cookies are two and one-quarter inches in diameter and slightly rounded in shape.
one-half stick
(57 grams) of soft but not melted, salted butter
one-half cup
lightly packed (90 grams) golden brown sugar
one-quarter
cup (60 grams) granulated sugar
one medium (45
grams) beaten egg
one-half
teaspoon real vanilla extract
one-eighth
teaspoon salt
one cup (135
grams) all purpose flour (stir flour before scooping)
three-eighths
teaspoon baking soda
one cup (100
grams) walnut pieces
one cup (160
grams) of chocolate chunks
Whip the butter, baking soda, salt, and sugars until they are fluffy. Add the egg and vanilla extract and beat until light. (Take a small taste of the batter at this point if you're sure the egg is safe, the batter's a sweet rich cream that's delicious.) Mix in the flour. (Taste again!) Add the nuts and chocolate and mix one more time. The dough is so stiff by this time that it's better to put the mixer aside and fold the nuts and chocolate into the dough either with a dull knife or by hand. The mixing at this stage is like kneading stiff bread. Use a 1 & 13/16 inch diameter ice cream scoop to make 14 hemispheres (about 1/5 cup each) and place them on a cookie sheet that has two layers of paper towels on it (no paper towel if your sheets are mirror bright) covered with a layer of parchment paper. The paper slows the cooking of the bottom of the cookies so that the tops and bottoms bake at the same rate. Cover each cookie with a piece of plastic wrap and press it drown slightly with the palm of your hand so it makes a dome 5/8ths of an inch high. The plastic wrap prevents the cookie from sticking to your hand. The 5/8-inch thickness insures the insides cook completely yet remain moist. Remove the plastic and bake for ten minutes in a preheated, 375 degree oven. The cookies should just be starting to turn golden brown. Cool on the cookie sheet ten minutes then transfer to a cake rack to cool completely. If the bottom of the cookies tear when you try sliding a spatula under them, try inverting the entire sheet of cookies onto a cake rack then gently peel the parchment paper off the bottoms of the cookies.
(If the cookies are left hemispherical as the come out of the ice cream scoop the centers don't get done. If they are flattened too much, the inside will bake dry. I found the perfect shape by cutting the bottom off a sorbet cup so that it held three tablespoons - the same amount as the ice cream scoop.)
The choice of chocolate chips is important to the flavor of the cookie. Many people prefer semisweet morsels. However, this gives the cookie a sharp edge that overpowers the flavor of the cookie dough. Milk chocolate chips yield a milder flavor that's so mild the chocolate is hard to taste. The perfect balance between chocolate impact and the sweetness of the dough can be achieved by making a special formula chocolate chip consisting of three parts milk chocolate chips and one part semisweet chips. To do this, melt all the chips in a double boiler and spread the mixture out one-quarter inch thick on a large piece of aluminum foil. Cool and cut into pieces sized to your preference. I prefer chunks about three-eighths of an inch square. Sift the chips in a large-holed colander to remove any small bits of chocolate. Making your own chips is a lot of work but it's worth it and enables you to vary the ratio of chocolates to get the flavor you prefer. I've recently discovered that Dove brand milk chocolate is halfway between milk and semisweet chocolate and can be used instead of blending your own. Get a bag of individually wrapped pieces (Dove Promises) and cut each piece into three pieces if you prefer chunk cookies or six pieces for chip cookies. Cooking shows sometimes tout the importance of using a quality chocolate like Callebaut, El Rey, or Valrona. Dove is equal in quality (as far as cookies are concerned) and a lot easier to find.
I've found walnuts provide more aroma and taste than pecans. Nuts give structure to the cookies so they don't fall when cooled. Chocolate chunks increase interest over small morsels. Black walnuts impart a sharp flavor that masks the sweetness of the dough. Vary the size of the nuts and chocolate pieces to create the texture that's perfect for you. Butter gives better flavor and texture than either butter-flavored Crisco or margarine. Increasing the amount of butter, or decreasing the amount of flour, makes for a greasy cookie. Increasing the amount of baking soda causes the cookies to over-rise, spread, then collapse into thin pancakes that may bake crisp. Increasing the amount of egg can give the cookies a rubbery texture.
Increasing the amount of brown sugar by the same amount the white sugar is decreased gives a chewier cookie but also one where carmel tastes start competing with the other flavors. Increasing the total sugar makes the cookies so sweet the chocolate inpact is weakened.
Using a collection of ten teachers as guinea pigs, I found that chocolate chip cookies with walnuts were consumed twice as fast as cookies without nuts.
While we're on the subject of chocolate chip cookies...
WHITE CHOCOLATE CHIP MACADAMIA NUT COOKIES
This recipe makes twenty-eight, rich, delicately crunchy cookies that are three inches in diameter and half an inch thick. The secret in making them taste good enough to tempt chocolate lovers away from the chocolate chip cookies is the use of the very best white chocolate chips and macadamia nuts.
1 cup or two
sticks (228 grams) very soft butter
1 cup (200
grams) granulated white sugar
1 tsp baking powder
1/2 tsp salt
1 large egg
(56 grams)
1/2 tsp real vanilla
extract
2 1/2 cup (350
grams) unbleached flour
3 cup
Callebaut brand white chocolate chips
1 cup Mauna
Loa brand macadamia nuts cut into halves
Mix the butter, sugar, baking powder, and salt with an electric mixer on high until they are very light. Add the egg and vanilla extract and beat until fluffy. Add the flour and mix until it's just incorporated. Use a table knife to knead the chips and nuts into the dough until it is uniform. Divide the dough into twenty-eight equal parts, roughly one-quarter cup portions, and place them on a cookie sheet covered with a layer of parchment paper on top of two layers of paper towels (to prevent the bottoms of the cookies from baking faster than the tops - no paper towel if your sheets are mirror bright). Squash the cookies flat so that they are one quarter of an inch thick. This is easy because the nuts and chips prevent you from making the cookies too thin. Placing a plastic bag between the cookie dough and whatever you use to flatten the dough will prevent the cookies from sticking to the flattener. Bake in a preheated, 300 degree oven for 22 minutes. Remove the cookies to a cake rack and let them cool. These cookies need at least half an hour of cooling to reach their optimum crunchiness. They should be eaten within six hours after that. If it's going to be longer than that before they're eaten, place them in a plastic bag one hour after they come out of the oven. They should retain their delicate crunch twelve to fourteen hours that way.
The Caullebaut white chocolate chips have the best flavor of any white chip and are perfectly sized for these cookies. They used to be available from the Williams-Sonoma chain of gourmet stores located in most large shopping malls. A more readily available white chocolate is Baker's. This is the same company that markets Baker's Chocolates for cooking, which are sold in the baking section of most grocery stores. This white chocolate is a poor substitute for the Caullebaut and has to be cut into chips (which should be one-half inch cubes). At all costs avoid plain white chips. These seldom have any white chocolate in them and have a vile, milky flavor. I regret to say that all of the big-name white chocolate chips that I have tested are also pretty horrible. Link to the chocolate testing web page for a rating of white chocolates. Chocolate
I found the Mauna Loa brand macadamia nuts to be consistently the best. They have a deep, buttery flavor and a light crunch. Wash and dry them to get the salt off.
While developing this recipe I experimented with both chewy and crunchy variations. While in general I prefer chewy cookies, these were more satisfying when they were crunchy. If you want to try the chewy version just mound the cookie dough into slightly flattened hemispheres and bake for eight minutes in a 400-degree oven. Like the chocolate chip cookie recipe in this book, this method of cooking creates a delicately crunchy shell with a moist and chewy inside. They won't be as chewy as the chocolate chip cookies because they don't have any brown sugar in them. Place these cookies in a plastic bag immediately after they come out of the oven to give them the maximum amount of chewiness or let them cool on a cake rack to retain the crunchy shell.
All of the variations in the recipe and their effects were mentioned in the chocolate chip cookie recipe apply to this recipe.
Now for a confession. As much as I enjoy these cookies I have to admit that the white chocolate chip and macadamia cookies sold in groceries stores by Pepperage Farms under the TAHOE name are better. I don't know what they add to these cookies but since tasting them I don't go through the hassle and expense of making my own. I just wish I owned stock in the company.
SHORTBREAD
Shortbread is one of the simplest and most satisfying of all cookies. Although it's flavor is more subtle than most cookies, good shortbread with an optimum balance between deep buttery flavor, sugar, and saltiness can still hold its own against the richest chocolate chip or peanut butter cookie. This recipe makes sixteen, three-inch-long, half-inch-thick shortbread fingers with a rich, buttery flavor.
one cup (135
grams) all purpose flour
six
tablespoons (80 grams) granulated sugar
one stick plus
one tablespoon (128 grams) very soft butter
one-eighth
teaspoon salt
one-eighth
teaspoon baking powder
six
tablespoons (52 grams) rice flour
Cream the butter, sugar, baking powder and salt. Add the flours and mix until very small crumbs are formed. Roll the dough out into a one-half inch thick layer and cut into rectangular fingers. Space these one inch apart on a cookie sheet covered with four layers of paper towels (no paper towel if your sheets are mirror bright) under one layer of parchment paper. Bake in a preheated, 300-degree oven for fifty minutes or until very light golden brown. Cool on a cake rack before eating.
The thick layer of insulating paper is necessary to prevent the sugar in the fingers from caramelizing into a bubbly, hard texture. Adding more sugar to the dough results in excessive, brittle, caramelization, which makes the texture of the cookie too coarse. If you want a sweeter cookie, roll the fingers in sugar before baking. Adding vanilla extract doesn't do anything for the flavor and gives the cookie an unpleasant gray color. Reducing the baking temperature doesn't prevent caramelization if the sugar content of the dough is increased.
Butter softness plays a major roll in determining how easily the dough can be formed into cookies. Cold or cool butter isn't sticky enough to make a dough that will hold together. Adding water makes the dough manageable but the cookies become tough. Very soft butter (butter that holds its stick shape but you can push a finger through it and not feel any resistance) makes a dough that forms easily. Melting the butter makes it so thin that the individual flour grains absorb it resulting in dough that's too dry. The reason for this is that the butter that's absorbed isn't available on the surface of the flour to help stick the dough together. Using melted butter also tends to make the cookies' grain finer. Increasing the amount of butter or decreasing the amount of flour makes the cookies greasy. Using butter flavored Crisco yields a more tender cookie but the flavor and texture are inferior to all-butter shortbread. I've read that shortbread tastes better if it's aged in a closed container for several weeks. I have tried this and not been able to notice any improvement.
The baking powder fluffs the cookies slightly giving them a more tender crumble. This recipe is sensitive to the amount of salt used. Increasing it causes the dominant flavor to shift from buttery-sweet to salty. The rice flour makes the cookies' crumb more delicate. Using only wheat flour makes the cookies coarser. Increasing the amount of rice flour gives the cookies a grainy, sandy texture. Using powdered sugar instead of granulated sugar makes the cookies rock-hard. Using unbleached flour instead of all-purpose coarsens the texture slightly and, while the over-all flavor deepens, moves the flavor away from a strong buttery taste. Contrary to popular belief, I've never noticed that pricking the cookies with a fork had any effect on reducing the amount they rise because the holes allow steam to escape.
This recipe produces a light and crunchy cookie. For those wishing a more traditional Scottish shortbread, which is denser, please visit my SCOTTISH SHORTBREAD page.
BUTTER COOKIES
This recipe makes ten cookies that are two and a half inches in diameter and three-sixteenths thick. They have a deep buttery flavor balanced, but not overpowered, by a sugary sweetness. These are not like Danish-style butter cookies.
1/4 cup very
soft, but not melted (57 grams) , butter
1/4 cup
granulated sugar (50 grams)
1/8 teaspoon salt
1/8 teaspoon
baking soda
1/4 teaspoon vanilla
extract
1/2 cup (75
grams) all purpose flour.
Cream everything but the flour until light and fluffy. Beat the flour in until a smooth dough forms. Divide it into ten equal portions, place on a cookie sheet covered with four layers of paper towel (no paper towel if your sheets are mirror bright) and one of parchment paper. Use the bottom of a glass to squash each piece of dough until it's 2 and 1/2 inches in diameter. Bake in a preheated 325 oven 10 minutes, turn, and bake another seven to ten minutes or until the edges are turning a light golden brown.
If made with cold butter, the butter will move toward the center of the cookie making a chewy lump. If melted butter is used the crunch, or crumble, of the cookie will be too powdery. This knowledge can be used to modify the cookie for the texture desired. Margarine and butter flavored Crisco yield cookies with a weak butter flavor. Increasing the butter leads to greasiness. The composition of these cookies are similar enough to shortbread cookies that the variations cited in that recipe apply here.
CAKES
Glendale
Community College
Memorial
Apple Turnover!

My fondest memory from my days at Glendale Community College in Southern California isn't of a great teacher or victory on the athletic field, but of Gracy, who worked in the cafeteria making the best apple turnovers I've ever had. They were giants, with enough energy to fuel a freshman an entire morning. Thirty-five years later I was driving by the campus and decided to stop and see if the cafeteria still offered these baked delights. Sadly, I discovered the cafeteria is no longer there, having been replaced by a Pizza Hut, a taco stand and a McDonald's. There wasn't an apple turnover in sight.
In memory of those lost days I offer the following recipe that is close to the original turnover baked by Gracy all those years ago:
Make a pie dough out of: 3/8 cup (80 grams) butter-flavored Crisco, one and one-half tablespoon (20 grams) sugar, one-eighth teaspoon salt, one cup plus one tablespoon (150 grams) all-purpose flour and 3 tablespoons cold water following standard pie dough mixing procedures.
Make the filling from: 4 Granny Smith apples, peeled, cored, and diced into half-inch cubes (500 grams), 120 grams sugar, 1/2 teaspoon cinnamon, 1/4 teaspoon salt, 1 tablespoon tapioca powder. Combine and microwave about 10 minutes stirring occasionally until the apples just start to turn translucent. (You don't want them cooked to much.)
Make a glaze from: 4 tablespoons powdered sugar and 1 tablespoon boiling water.
Divide
the dough in half and roll out into two ovals, 6 inches by 8 inches.
Put half of the filling in each one, fold the tops over, seal the
edges, paint with egg wash, cut three slits in the tops to let steam
escape, and bake at 425 degrees for 20 minutes or until light golden
brown. Drizzle the glaze over the tops as soon as they come out of
the oven, cool 10 to 20 minutes on a rack and dig in.
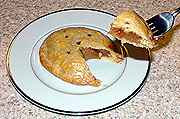
Blueberry Upside-down...?
I put the question mark at the end of the title for this desert because I'm not sure what to call it. The recipe started off its development as a pie, shifted to an upside-down cake, and finally to something closest to a cobbler, except the fruit and body are made separately and it's served with the blueberry sauce on top. I've leave it to visitors to create their own name for it. Personally, I just call it delicious.

Start by making a single large biscuit using my biscuit recipe, but increase all the amounts by 50-percent. Roll it out to 10-inches in diameter and push some of the center dough outward so the dough is slightly concave. This helps the biscuit form a flatter loaf.
While that bakes mix one pound of frozen blueberries (frozen actually work better than fresh for this dish. I found the Overlake brand to be best and Stator Brother's to be second) with 3/4-cup of R. W. Knudsen blueberry juice (the only brand I found that's 100-percent blueberries. All the others are mostly apple and/or grape juice), 3/4-cup of sugar and 1 and 1/2 tablespoons of tapioca powder (the best fruit thickener. Corn starch can be used but it makes the sauce cloudier and starchier.) and bring to a simmer. (This is for serving the desert warm. If it's going to be served at room temperature reduce the tapioca to 1 tablespoon. If served at refrigerator temperature only use 1/2 tablespoon. If the amounts aren't reduced to fit the cooler serving temperatures the sauce will be thick and gloppy.)
When the biscuit is done, trim the top crust off it, place it in a 12-inch diameter dish with two-inch high sides and using a slotted spoon, ladle the blueberries over the top of the biscuit. Trimming the top of the biscuit off allows the sauce to soak in a little. Pour any remaining sauce into a gravy boat and use it to top individual portions as they are served.

The reason this desert works so well is that the sweetness of the sauce contrasts nicely with the hearty, slightly salty flavor of the biscuit. I've tried many different variations of cake and pie doughs and nothing works as well as biscuit dough. This is a dish that isn't sugary sweet and leaves you with a warm glow of satisfaction. I hope you'll like it.
Pineapple Upside-Down cake
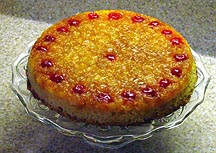
Line the bottom of a 10-inch ceramic pan with parchment paper and brush with 1/4-cup of melted butter. Sprinkle 1/2-cup of golden brown sugar evenly over the butter. Cut 20 maraschino cherries in half and blot them dry with paper toweling, then place them in a pattern of your choice. Cover this with two cups of crushed pineapple that has been drained. Carefully push everything down to form an even, smooth surface. Fill in any gaps in the pineapple.
Beat 1 cup of white sugar, 1/2 teaspoon of salt, 1 and 1/2 teaspoon of baking powder, and 1/3 cup butter-flavored Crisco until smooth. Add two large eggs and 1 teaspoon of vanilla extract a beat until light. Add 3/4 cup of pineapple juice (from straining the crushed pineapple) and 1 & 1/4 cups unbleached flour and mix until smooth. Gently pour this on top of the topping and smooth. Wrap a water-soaked Wilton Bake-Even Cake Strip (please see my product test page for an explanation of this item) around the outside of the pan and place in a preheated 350-degree oven. Bake for 40 minutes. The top, actually the bottom once it's turned over, should be golden brown.
Let the cake cool ten minutes. loosen the edge with a knife and turn out onto the serving tray. It's best eaten warm but if you wish to let it cool, wrap a strip of plastic wrap around the outside edge so that it doesn't get dried out.
POUND CAKE
Nothing has the delicate texture of a rich pound cake. This recipe makes a standard sized loaf that's rich, mildly sweet, and very tender.
two extra
large (113 grams) eggs
one and
one-quarter cup (170 grams) unbleached flour
one cup (200
grams) granulated sugar
1/2 cup (114
grams or one stick) soft, salted butter
1/4 tsp salt
1 tsp real vanilla
extract
Cream butter, salt and sugar until light. Add the eggs and vanilla extract and beat until fluffy. Mix in flour until smooth. Pour into a lightly greased bread pan and bake in a 300-degree oven for one to one and one-half hours. The top will be golden brown when done. Lining two sides and the bottom of the pan with aluminum foil will help lift the loaf out.
I've tried making this with egg yolks but it didn't improve the flavor. I also tried an artificial butter flavoring but that gave it a annoying aromatic chemical odor.
Best eaten fresh and warm, this cake also keeps well in the refrigerator and still tastes good cold.
As much as I like this recipe, the fact is that the frozen pound cakes made by Sara Lee have better flavor and texture.
BROWNIES
This recipe makes a moist brownie that's not quite as dense as a fudge brownie but has the same massive chocolate impact. This recipe makes an eight-by-eight inch square by one-inch thick brownie.
Interesting point: I made nine different kinds of chocolate cake, everything from chocolate sponge cake to a Sacher torte to a flourless chocolate cake, to discover what the best cake was. The hands-down winner was an old-fashioned fudge brownie. It had the best sweet to chocolate balance, moistest texture without being greasy, and tasted the best. I believe any honest, unprejudiced judge would class a good brownie as one of the greatest chocolate cakes ever created.
seven
tablespoons (96 grams) melted butter
one and
one-eighth cups (225 grams) granulated sugar
one teaspoon
real vanilla extract
two large (102
grams) eggs at room temperature
5 tablespoons
(30 grams) Dutched cocoa powder
one cup (135
grams) all purpose flour
one-quarter
teaspoon baking powder
one-half
teaspoon salt
three
tablespoons water
three-quarters
cup (100 grams) pecan or walnut pieces (optional)
Because brownie batter is so moist and bakes from the outside, it is common for the middle half of the brownies to be uncooked when the outer half is done. If the brownies are baked until the middle is done, the outside half can be overcooked, dried out, and even burnt. To get the middle to cook at the same rate as the outside it is necessary to insulate the outer portions of the pan leaving the center unisulated. To do this, cut a six inch diameter hole in the center of one paper kitchen towel and a three and one-half inch hole in the center of a second paper towel. Stack the towels so they make a fat "X" with the circles concentric and push them into an eight-by-eight inch glass pan. Line the pan with aluminum foil and lightly grease and flour. Be warned, this is harder than it sounds.
Sift and mix the flour, cocoa, and baking powder in metal bowl (metal kills any static charge that can make the cocoa powder dance around in plastic bowls). Mix the butter, salt, and sugar together with a wooden spoon. Add the eggs, vanilla extract, and mix until smooth. Combine dry (including the nuts if desired) and liquid ingredients with a spoon, mixing as little as possible. Beating air into the mix results in the brownies rising too high then collapsing into a solid mass. Pour into the center of the prepared pan and bake for 28 minutes in a 350 degree oven. A toothpick will come out clean when they are done but the brownies should not be pulling away from the sides of the pan. Remove the brownies to cool in the pan for at least 10 minutes before cutting and eating.
This recipe has a good strong chocolate flavor. For people who prefer semisweet chocolate to milk chocolate, increasing the cocoa to six tablespoons (36 grams) will add the extra "kick" they prefer. Similarly, the cocoa can be reduced to four tablespoons for a milder brownie.
Frosting shifts the overall flavor from chocolate to sweet but some people prefer brownies with frosting. The frosting below is light, mild, and doesn't compete with the flavor of the brownies.
six
tablespoons (80 grams) butter
two
tablespoons (9 grams) Dutched cocoa
two
tablespoons (30 grams) light corn syrup
one teaspoon
real vanilla extract
two and
one-half cups (270 grams) powdered sugar
two
tablespoons (24 grams) milk
Beat room temperature butter, corn syrup, vanilla extract, cocoa, and sugar until fine brown moist crumbs form. This takes about two minutes. Add the milk and beat on high until the frosting is light and fluffy. Frost cooled brownies and eat immediately. If they are left to sit the frosting starts to dry out. These brownies are also excellent frosted with French vanilla frosting.
I tried David Rosengarten's brownies and found they had an over-strong bitter-sweet chocolate flavor.
Increasing the butter of my recipe causes them to become greasy. Decreasing the water makes them tougher (especially the edges) and drier. Using un-Dutched cocoa (like Hershey's) gives the brownies a very sharp edge. I prefer Van Leer Dutch cocoa but if I have to use Hershey's I cut the amount of cocoa to four tablespoons (24 grams). Don't cover the brownies as they cool or the top won't develop a crunchy crust, which adds interest. The water reduces the crunch but the overall experience is better with it. I could not detect any flavor or textural difference between brownies made with all purpose or unbleached flour. I did not like brownies made with chunks of chocolate added to the batter. There is no significant difference in the greasiness of the bottoms of brownies cooled in the aluminum foil liner versus those cooled open-air; evidently sweating is not an issue with this recipe.
The best brownie mix I've found is Pillsury's Original Fudge Brownie mix for a 13 by 9 inch pan. Let it cool uncovered to let the crust develop. Change that! On January 5, 2001, I made another batch of these and was amazed that the flavor had changed to one that was far too sharp. When I checked the box, I noticed that a "now more moist and fudgier" sign had been added. An old box I found with the original recipe confirmed that the older version tastes better and that the list of ingredients had changed. Too bad. Pillsbury had a winner, now it's a flop.
PEANUT SQUARES
This is a non-recipe because it can be made without any baking from off-the-shelf items. It has such a unique flavor and texture that it's a hard cake to classify.
one
ready-made vanilla
sheet cake (Buy one or make one from a mix or favorite recipe.)
one
jar of dry-roasted peanuts, lightly crushed with a rolling pin
one
tub of Pillsbury's French Vanilla frosting
Cut the cake into 2-inch cubes and freeze them to make handling easier. Once the cubes are frozen, take them one at a time, frost all six sides, and roll them in the crushed peanuts. That's it!
What makes these so delicious is that the sweetness of the frosting plays against the saltiness of the peanuts. Besides that, they look so different that people find them irresistible.
NEW!!! For those who prefer live action demonstrations, the following video shows how easy it is to make peanut squares:
INDIVIDUAL APPLE PIES
These five-inch diameter pies are packed with intense apple flavor. One is perfect for a dessert, but make extras... everyone will want seconds. This recipe makes four pies.
Crust (This is the best-tasting pie crust I've found)
3/8
cup (80 grams) butter-flavored Crisco
or butter
one
and one-half tablespoon (20 grams) sugar
one-eighth
teaspoon salt
one
cup plus one tablespoon (150 grams) all-purpose flour
3
tablespoons cold water
apple filling
2
pippin apples, peeled, cored, and diced into half-inch cubes (250 grams)
five
tablespoons (60 grams) sugar
one-quarter
teaspoon cinnamon
one-eighth
teaspoon salt
one
and one-half teaspoons tapioca powder (For larger batches, use 1
&1/2 tablespoons per cup of liquid.)
glaze
four
tablespoons powdered sugar
one
tablespoon boiling water
Combine everything for the filling accept the tapioca and microwave on high for five minutes. Strain and add the tapioca to the liquid and microwave one minute. Mix the thickened liquid with the apples and let cool completely. This can be done in large quantities, divided into one-quarter cup portions, and frozen for later use.
For the crust cut the Crisco in to the dry ingredients until the crumbs are pea-size. Mix in the water and shape into a ball. Divide into eight equal pieces (44 grams each). Roll out between layers of plastic to form four and three-quarter inch circles. Place four circles on a cookie sheet covered with two layers of paper towel and one layer of parchment paper and mound one-quarter cup portions of the filling in the center of each. Cover with the remaining four circles and press the edges to seal. Paint the tops but not the edges with a little egg-wash and bake at 425 degrees for 14 minutes or until the edges are golden-brown. Painting the edges makes them tough. Paint with the glaze and cool twenty minutes to eat warm (The filling stays burning-hot for that long. These can be frozen and thawed and the crust will stay crunchy as long as they are thawed in a plastic bag so moisture in the air doesn't condense on the pie shell.
INDUSTRIAL STRENGTH APPLE PIE
At ten inches in diameter and almost three inches tall this is a massive apple pie. The straight, vertical sides and smooth flat top make this pie look more like a monument that a piece of pastry. The crust is not as light and flaky as some pies because it needs to support the sides. However, no one has complained yet and everyone seems to enjoy the pie immensely.
crust
three-quarters
cup(160 grams) Crisco
two
and one-eighth cups (300 grams) all purpose flour
three
tablespoons (38 grams) granulated sugar
one-quarter
cup (60 grams) water
apple filling
three
and one-third pounds (1500 grams) pippin apples, peeled, cored, and
sliced into one-sixteenths (about four and one-quarter pounds before peeling)
one
and one-half cup (300 grams) granulated sugar
one
teaspoon ( 4 grams) cinnamon
five
tablespoons (45 grams) cornstarch
(Even better, use an equal amount of apple filling from the Individual Apple Pie recipe.)
topping
three-quarter
cup (80 grams) graham cracker crumbs (rolled and sifted into a fine powder)
four-fifths
cup (120 grams) all purpose flour
three-quarters
cup (150 grams) granulated sugar
one-half
cup plus three tablespoons (160 grams) salted butter
one
teaspoon (4 grams) real vanilla
extract
The pie shell, apple filling, and topping are all made separately. They can even be prepared the day before and assembled when needed. The pie shell tends to absorb moisture from the air so the less it is stored, the better it will be.
Begin
the crust by combining the flour and sugar. Cut the Crisco
into this mixture with a pastry cutter until fine crumbs are formed.
Add it the cold water a little at a time, stirring constantly with a
two pronged fork until the dough forms a ball. (More or less water
may be needed depending on the temperature, humidity, and moisture
content of the flour.) Fold and roll the dough out to one-half inch
thickness five times on a floured surface. Divide the dough into two
pieces, one containing 60 percent of the dough and the other 40
percent. Alternate rolling out lengthwise and pushing in the sides of
the larger piece to make a two and one-half inch wide by twenty-eight
inch long ribbon. Roll the smaller piece into a circle one inch
greater in diameter than the bottom of a ten inch spring form pan.
Place the round piece of dough into the bottom of the spring form pan
so the dough comes up one-half inch on the side all the way around
the pan. Use the long strip of dough to line the sides of the pan.
Press the ends of the ribbon and the seam where the sides cover the
dough from the bottom coming up the sides firmly together to seal.
Use a short length of a one to two inch diameter dowel to roll around
the inside of the sides of the shell to make sure the shell is evenly
thick everywhere. Use a sharp knife to cut any extra dough that
extends over the top of the pan. Prick the sides and the bottom all
over with a fork. Take a thirty inch long by twelve inch wide piece
of aluminum foil and fold it to form a thirty inch by two inch strip.
Using a paper clip to hold the ends together after it's in place,
position this strip so that it presses against the inside of the
crust's sides. The aluminum foil prevents the sides from falling
during baking. Bake at 400 degrees for 35 minutes until golden brown.
For
the apple filling mix the sugar, cinnamon, and cornstarch together
and then toss the apples in the mixture to evenly coat and separate
the apple slices. Microwave at medium high for ten minutes, stir,
heat ten more minutes, stir again, and heat one last time for ten
minutes. Test the apples for tenderness and taste. The apples should
be tender but not mushy. The flavor should have a good balance
between sweetness and tartness. Unfortunately variations in apple
ripeness and moisture content makes a precise formula for cooking
times and the amount of sugar impossible. After achieving the proper
apple doneness and flavor, dip out some of the liquid. If the pie is
to be served hot this liquid should be as thick as room temperature
honey. If it isn't, strain the liquid from the apples, add a water
and cornstarch thickener, and cook until the viscosity is correct.
Usually, one tablespoon of cornstarch dissolved in one tablespoon of
water is enough. Return the thickened liquid to the apples. Trying to
thicken by cooking with the apples does not work because the apples
continue to release water making the filling thinner. If the apple
pie is to be served cold, cool a sample of the filling, apples and
liquid, to the serving temperature to check for the desired
consistency. The same thickening procedure for the hot pie is
followed to thicken the liquid for the cold pie. In both cases, it
the liquid is too thick, add apple juice to thin.
The
crumb topping is prepared by beating the sugar and butter until
light. Add the vanilla
extract and beat
again. Add the graham cracker crumbs beat. Finally, add the flour and
beat again to form a light crumbly mixture. A finer crumb can
sometimes be obtained by chilling this mixture in a freezer then
beating again.
Assemble
the pie by pouring hot filling into the shell while the shell is
still in the spring form pan and level the top. Pouring cold filling
or pressing the filling into the shell can break the outside of the
pie. Cover with the topping smoothed to a perfectly flat surface and serve.
Pippin apples are specified because they provide as much flavor as the more traditional Granny Smith apples but are not quite as tart.
A simpler technique which produces an even better tasting pie, although not as large or dramatic, is the go to a Baker's Square Restaurant and order one of their French Apple Pies. It will taste better and there won't be any dirty dishes to wash.
CHOCOLATE LASAGNA
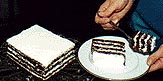
This simple recipe uses butter, powdered sugar, and a store-bought cake mix to produce a rich and eligant dessert.
Cake:
1
cake mix (I prefer Duncan Hines Dark Chocolate Fudge Cake Mix for
this dessert.)
Buttercream
filling:
2
& 1/2 sticks very soft salted butter
1
& 1/4 cups powdered sugar.
Mix up two-thirds of the cake mix and spread it in the bottom of an 11 by 15 by 1 inch high sheet pan. Bake at 350 degrees for 12 minutes. Transfer it to a rack and cool completely.
Beat the powdered sugar into the butter until light and fluffy. (Note: frosting is mostly sugar with a little butter. Buttercream is mostly butter with a little sugar.)
Once the cake is cool, transfer it to a large cutting board and frost the entire top. Cut the cake in half and stack the halves. Repeat to make a rectangle consisting of four layers of cake. Trim the edges square with a long sharp knife. When serving, this cake looks and eats better if it's cut into blocks rather than thin slices.
DESSERT BREADS
DATE-NUT BREAD
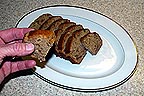
The best date-nut bread I ever tasted was made by the old Van de Kamp bakeries. Unfortunately, that old chain died and sold their name to a company that doesn't make the same recipe. After many trials, I came up with the following recipe that comes very close to the original. It's rich, moist, with a mild date flavor and a shiny, sweet gloss that forms naturally as the loaf cools. I hope you like it.
Recipe For One Loaf:
4 oz. moist, fresh, pitted dates cut into small pieces
1 cup water
1 cup packed golden brown sugar
4 tbsp melted butter
1 extra large egg
1/2 tsp salt
1 tsp real vanilla extract
1/2 cup walnut pieces (Remove any dark pieces. They can taste bitter.)
1 & 1/3 cup unbleached flour
1/2 tsp baking powder
Combine the dates and water in a blender and puree until smooth. Pour into a large mixing bowl and add the salt, vanilla, brown sugar, egg and butter. Beat with a mixer on low until smooth. Mix in the walnut pieces. Combine the flour and baking powder in a separate bowl then stir this into the wet mixture. Only mix until the batter is smooth. Pour into a greased, 8 x 4 inch glass bread pan and bake for 60 - 70 minutes in a 325 degree (F) oven. A toothpick should come out clean when inserted into the middle of the loaf. Remove from the oven and cover immediately with aluminum foil tented so it doesn't touch the top of the loaf. Cool for one hour before slicing. This bread is great slathered in butter while still warm.
If the edges and especially the corners of breads baked in your loaf pans tend to over-brown, try covering the pan with aluminum foil and cutting out large windows in the centers of the bottom and four sides. The remaining foil covers the edges and corners, slowing the baking of these areas so they don't burn before the rest of the bread is done.
BANANA NUT BREAD
This recipe makes two medium-sized loaves that are dense, moist, and rich and have a strong banana taste.
2 cups
unbleached flour
1 cup sugar
2 cups
thoroughly mashed bananas from yellow, not green or bruised bananas
1/2 cup
butter-flavored Crisco
1 egg
1 tsp vanilla
extract
1/2 tsp salt
2 tsps baking powder
1 cup of
medium-sized walnut pieces
After creaming the sugar, salt, baking powder, and Crisco, beat in the egg and vanilla extract on high until the mixture is light and fluffy, about two minutes. Add the bananas and mix until the batter is smooth. Finally, add the flour and nuts and blend thoroughly. Divide the mixture evenly between two lightly greased bread pans and bake in a preheated, 300 degree oven until the tops are a light golden brown, about 65 minutes. Test with a toothpick to make sure they loaves are done all the way through. Place in plastic bags to cool.
If your pans have dark outsides they may absorb heat too fast and over-cook the bottom of the loaves. Covering the outside of the pans with aluminum foil will prevent this from happening.
I've tried recipes that used lemon juice and orange rind to zip up the flavor but found the citrus taste detracted from the sweetness of the bananas. Using plain Crisco weakens the depth of the flavor. Softened butter can be substituted for the butter-flavored Crisco but you may have to reduce the salt to compensate for the saltiness of the butter.
ZUCCHINI BREAD
Unlike the banana bread recipe, this bread is light and cake-like. The recipe makes two medium loaves.
2 cups
coarsely shredded zucchini
1 cup of sugar
1/2 cup butter
or butter flavored Crisco
1 1/2 tsp vanilla
extract
2 extra large eggs
2 cups
unbleached flour
1 tsp cinnamon
1/2 tsp salt
1/2 tsp baking powder
3/4 cup raisins
Cream the sugar, salt, cinnamon, baking powder, and Crisco. Add the eggs and vanilla extract and beat until light and fluffy. Mix in the zucchini and raisins, then the flour. Divide the batter evenly between two greased pans and bake in a preheated 325 degree oven for 60 minutes. Test with a toothpick to test for doneness, it should come out clean and dry. Wrap immediately and let cool before eating.
PUMPKIN BREAD
Unlike the banana bread recipe, this bread is light and cake-like. The recipe makes two medium loaves.
1 1/3 cup
canned pumpkin
1 cup plus two
tablespoons of sugar
1/2 cup
softened butter
1 1/2 tsp vanilla
extract
2 extra large eggs
2 cups
unbleached flour
1 tsp cinnamon
1/2 tsp salt
1/4 tsp baking powder
1 1/2 tsps
baking soda
Cream the sugar, salt, cinnamon, and softened butter. Add the eggs and vanilla extract and beat until light and fluffy, about two minutes. Mix in the pumpkin, then the remaining ingredients. Divide the batter evenly between two loaf pans with just their bottoms greased and bake in a preheated 325 degree oven for 70 minutes. Test with a toothpick to test for doneness, it should come out clean and dry. Cover immediately with foil and let cool on its side before eating.
APPLE SPICE BREAD
This recipe makes one medium loaf.
1 cup apple
pie filling, slightly diced
1/2 cup sugar
1/4 cup
softened butter
1 tsp vanilla
extract
1 extra large egg
1 & 1/4
cups unbleached flour
1/2 tsp cinnamon
1/4 tsp salt
1/4 tsp baking powder
Cream the sugar, salt, cinnamon, and softened butter. Add the eggs and vanilla extract and beat until light and fluffy, about two minutes. Mix in the apple puree, then the remaining ingredients. Divide the batter evenly between two loaf pans with just their bottoms greased and bake in a preheated 325 degree oven for 70 minutes. Test with a toothpick to test for doneness, it should come out clean and dry.
Comment: Some recipes for fruit breads use baking soda to reduce the acidity of the fruit. In the case of apple bread this is a mistake because much of the apple flavor comes from the acidic tang unique to apples. Neutralize it with baking soda and most of the flavor is lost. Also, the baking soda shifts the PH to basic with the result that the bread comes out brown instead of blonde.
CINNAMON ROLLS
Cinnamon rolls would be considered one of the great desserts if it weren't for two problems: they are too readily available to be thought of as being special, and most of them are terrible. Made properly, a cinnamon roll is a steamy-moist, tender, bread-roll, wound up with a brown-sugar syrup spiced with cinnamon and glazed with a lusciously rich cream cheese frosting. Unfortunately, unless you frequent a pasty store that specializes in them like the Cinnabon chain in many malls, what you'll get is a small, cold, stale, dried-out chunk of bread tasting weakly of cinnamon and buried under a lifeless sugar glaze.
This recipe makes four cinnamon rolls that are four inches square and four inches tall. One of them is a meal and well worth the hour and a half (mostly spend raising the dough) it takes to make them.
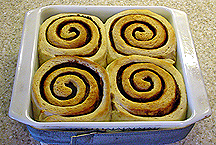
Fresh out of the oven!
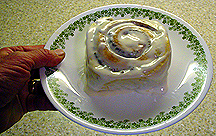
Glazed and served. The glaze is really a sauce, so be generous!
Dough
1 extra large egg
1/4 cup sugar
1 and 1/2 tbsp yeast
5/8 cup milk
1/4 cup melted butter
2 and 3/4 cup
unbleached flour
1/4 tsp salt
4 tbsp
softened butter
Cinnamon Filling
3/4 cup packed
golden brown sugar
1 tbsp cinnamon
Cream Cheese Glaze
4 ounces
softened cream cheese
1/8 cup
softened butter
1/2 tsp vanilla
extract
2 cups
powdered sugar
4 tbsps milk
Make the frosting by using a mixer to blend all the ingredients except the powdered sugar and the milk. Add the sugar a little at a time and beat until smooth. Add the milk one teaspoon at a time, adjusting the amount to make a very thin, but not pourable, mixture. The goal is to produce a light, slightly foamy texture. Cover and keep at room temperature if the rolls are going to be frosted within ten minutes, otherwise refrigerate. The glaze works best if it's at room temperature when it's used.
Place an eight-inch square, glass or ceramic pan, a marble rolling pin, and a marble pastry board in a turned-off oven for half an hour to warm.
Use a fork to blend the brown sugar and cinnamon together to make the filling.
Mix all of the dough ingredients, except the flour, salt and four tablespoons of butter, in a pan and stir them over a low flame until the mixture is warm to the touch. Warm the flour in a microwave for three minutes at the microwave's lowest setting. Add the yeast to the warmed liquid and mix in the warmed flour a little at a time. Kneed the dough just enough to make a ball. Place it in a lightly oiled bowl and cover with oiled plastic wrap. Put the bowl in the oven for ten minutes to give all the flour a chance to absorb the moisture.
Remove the dough after ten minutes and knead it five minutes or until it's smooth. Add the salt in a little at a time as the dough is kneaded. Salt mixed in earlier slows the raise of the dough. Added at the end like this it enhances the flavor but doesn't inhibit the yeast. Return the kneaded dough to the oiled bowl, cover with oiled plastic wrap, and let it rise in the oven twenty minutes or until doubled in volume. Remove the dough, the warmed rolling pin, and warmed board. Roll the dough out on the warmed board to a five-inch wide by eighteen-inch long rectangle. Using a warmed rolling pin and board prevents the dough from cooling off. Breads that are kept warm rise in half the time of cooled doughs.
Spread the reserved four tablespoons of butter evenly over the dough and sprinkle with the brown sugar and cinnamon filling. Press the filling lightly into the butter. Lightly dab or spritz the brown sugar with a little water. This lets the brown sugar dissolve during baking. Without the water much of the brown sugar will remain crunchy. Some people prefer it crunchy so experiment for yourself to decide which you like better. You want to use the least amount of water possible. While some is needed, just a drop or to too much will cause the brown sugar filling to liquify and run out of the bottom of the rolls. Roll up the dough starting from the narrow end to form a six-inch long by three-inch diameter cylinder. Pinch the seam at the end closed. Compress or stretch the roll as needed to make it uniform in diameter. Use a sharp knife to cut the roll into four cylinders an inch and a half high. Lightly oil the warmed, ceramic pan and place the spirals in it. Cover with oiled plastic wrap and let rise in the oven twenty minutes or until they've risen enough so they're just touching each other and the sides of the pan. Remove the plastic wrap, turn the oven on to three-hundred and fifty degrees and bake twenty minutes or until the tops of the rolls are lightly golden brown. Remove, separate, slather the sides and top with the glaze and eat while they're still hot.
Comments: Some people like raisins in their rolls. I've tried them and found that they are hardly noticeable except when they burn and then they have a bitter taste. If you must use them make sure none are showing on the bottoms or tops of the rolls or they'll burn. The rolls can be formed and frozen prior to the final rise. Thawing takes a full day in a refrigerator. After thawing, place them in an oiled ceramic pan and let then rise as before. It'll take two hours because they are starting out cold. Bake as usual. Be careful to add the milk very slowly while make the glaze. Adding it too fast will liquefy the sugar and the glaze will break into a soupy liquid that no amount of beating will revive. Baked cinnamon rolls freeze well and after thawing the outsides are more tender than fresh-baked.
JENNY'S SCONES
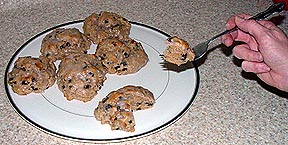
The main difference between a scone and a biscuit is that a scone is made with eggs. This recipe makes six free-form raisin scones about three inches in diameter and an inch and a half high.
1 & 1/2
cups (210 grams) unbleached flour
6 tablespoons
of butter (79 grams)
2 teaspoons of
baking powder
3 tablespoons sugar
3/8 teaspoon salt
2/3 cup
buttermilk mixed with one egg
1 & 1/2
teaspoon cinnamon
150 grams raisins
Mix the sugar, flour, cinnamon, and baking powder. Use a pastry cutter to cut the butter into this mix. Mix in the raisins. With a two pronged fork, mix the liquid ingredients into the raisin mixture until it is just barely mixed. Divide into six equal parts and on a cookie sheet covered with four layers of paper (no paper if your sheets are mirror bright) and one layer of parchment paper. The dough is very wet and sticky. To form smooth, round scones, shape them with lightly oiled hands. A rougher, and more interesting, appearance is achieved by just scooping and dropping the dough onto the cookie sheet. Bake at 425 degrees for 12-16 minutes or until the outermost areas have turned a golden brown. Remove any raisins that may have burnt. Lightly coat with a glaze made of three-quarters cup powdered sugar and enough hot water to form a thin syrup. Cool 5 minutes.
The best flavor is achieved by going lightly with the glaze.
NEW!!! Blueberry muffin test!
On my "Taste Tests" page I compared several blueberry muffin mixes and concluded that Betty Crocker's Double the Blueberries mix was the best. While mixing up a batch one day it struck me that instead of using water in the mix as instructed, the muffins might be given a stronger blueberry flavor if instead of water I used the juice from the blueberries. I whipped up a batch of each and here's what I discovered:
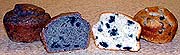
As expected, the muffins with the blueberry juice came out blue. More importantly, they had a tougher texture and had an only slightly stronger blueberry flavor. The superior texture and appearance of the regular batch indicated that all in all, using the blueberry juice does not improve the overall pleasure of eating these muffins.
ODDS AND ENDS
NEW!!!
How to Make REAL Meat and Potato Pie!
Quick and simple to make, this delicious dish is a classic. Just click on the following YouTube video to see how I do it:
French Vanilla Frosting
When Pillsbury stopped making their excellent French Vanilla Frosting, I decided I had to come up with a recipe for something better than the sweetened Criscos that pass for most prepared frostings. After trying several vanilla frosting recipes I discovered that they all suffered from having so much sugar in them that it overpowered the subtler vanilla and butter flavors. No matter what I did to traditional buttercream frostings, none had the depth of flavor of Pillsbury's formula. Then I began experimenting with cooked frostings and found one that still isn't as good as Pillsbury's, but much better than anything else.
1
cup whole milk
3
tablespoons unbleached flour
1/4
teaspoon salt
Combine these ingredients in a sauce pan and whisk constantly over low heat until the mixture bubbles and thickens, about 5 minutes. Immediately put the mixture in a plastic container and cover with plastic pushed down on the surface to prevent a skin forming. Cool to room temperature.
4-ounces
(1/2-cup or one stick) very soft, salted butter
2
teaspoons real vanilla extract (I prefer Madagascar bourbon from the
Baker's Catalog.)
230
grams of powdered sugar
Beat on high until light and fluffy.
Combine the thickened flour mixture and the buttercream, whipping on high until smooth.
Notes: Soft margarine works surprisingly well and doesn't get hard when refrigerated, though butter gives a slightly richer, purer flavor. The salt is very important for deepening and enriching the flavor the flavor. By all means experiment with increasing of decreasing the amount to fit your tasts. I tried adding copious amounts of imitation butter flavor but didn't find it had much effect. This frosting has a pretty strong vanilla impact. Cutting the extract back to 1 and 1/2 teaspoons may make it taste more mellow.
Note: the first two times I made this frosting it came out great. The third time it broke, or seperated, and was too thin. I don't know what went wrong. Chilling it in the refrigerator and rewhipping it helped a little but it still wasn't perfect. The truth is that I now almsot always use Duncan Hines Homestyle vanilla frosting that has been improved by adding one drop of yellow liquid food coloring, 1 and 1/2 teaspoons of imitation butter flavor and 1 teaspoon of real vanilla extract. This still isn't as good as Pillsbury's French Vanilla but it's very tasty.
Cake Batter Ice Cream
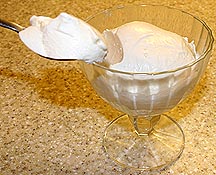
The Coldstones ice cream restaurant chain deserves high praise for popularizing one of the most unique and delicious frozen desserts ever created: cake batter ice cream. What makes this treat so outstanding isn't just great flavor but also its remarkable texture. Fortunately for the at-home ice cream maker it's also easy to make.
After testing several recipes from the Internet, I took the best and using side-by-side comparisons to some original cake batter ice cream from Coldstones, developed the following recipe, which is indistinguishable from the original:
1
cup whole milk
2
cups whipping cream (not heavy whipping cream)
1/2
cup sugar
1
and 1/4 cups finely sifted super-moist vanilla cake mix (I use Betty Crocker)
two
pinches (1/16 teaspoon) salt
2
drops yellow food color
Whisk several times to mix everything and immediately pour into an ice cream freezer. Turn on the freezer and add the ice and salt as per the ice cream freezer's directions. (No pre-chilling is required.) In 15 to 25 minutes you'll have some of the best ice cream you've ever tasted.
The cake mix has enough vanilla in it so I don't recommend adding any more or the ice cream will come out tasting sharp. For the same reason, don't use French vanilla cake mix. The yellow food color doesn't make the ice cream look yellow. It just makes it look a little richer. Salt reacts chemically with taste buds to increase their sensitivity and heighten the ice cream's flavor. It doesn't make the mix taste salty. It's the flour in the cake mix that gives this ice cream its unique texture, which many people call chewy but is in fact much more delicate and refined than what we normally think of when hearing this adjective. I've experimented with increasing the milk to 2 cups to see if this would reduce the ice cream's richness. It does, but also results in the weaker, less interesting mix that comes off a little too floury. I suspect the high butter fat content of this recipe is necessary to insure the ice cream comes out smooth.
In a way this ice cream can be thought of as a low calorie dessert. It's so delicious that half a cup of it satisfies more than three times as much of regular ice cream. By all means eat it fresh from the ice cream freezer while it's soft and creamy. It's high butter fat content causes it to freeze very hard after being stored in a freezer overnight. The delectably soft texture of freshly made ice cream can be preserved for several hours by wrapping the container with a couple of towels before putting it into the freezer of your refrigerator.
Adding 2.5 ounces of instant vanilla pudding to the mix creates a slightly smoother texture, but the vanilla taste may be too strong for some people.
By far the best way to smooth the mix out is to mix it in a blender at the highest setting for a minute. This thickens the mix considerably before it goes into the ice cream freezer.
This ice cream is so good that the memory of it haunts you long after the last spoonful is gone.
Enjoy!
(For taste tests of five other cake batter ice cream flavors, take a look at a special page about this frozen delight at: CAKE BATTER ICE CREAM.)
Pancakes for Manly Men
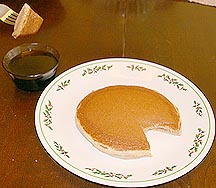
The typical pancake, like cotton candy, is mostly air and when considered with care is quite tasteless. I prefer a thick, hearty pancake that has enough body to give me something to chew. It should also have flavor of its own and not just that of the butter and syrup put on it. The following recipe makes two 6-inch diameter pancakes that will fill you up and keep you full for hours:
3/4-cup
whole wheat flour
1
tbsp sugar
1
tsp baking powder
1/2
tsp salt
1
extra large egg broken into a 3/4-cup measuring cup
add
milk to the measuring cup with the egg to fill the cup
Heat a large non-stick griddle to 425 degrees F. (An infrared surface reading thermometer works great here.) Mix the dry ingredients then add the egg and milk. Whisk until smooth. It'll look thick but don't worry, it'll still pour.
Give the griddle a short shot of spray oil then wipe it down with a paper towel. All you want is a very thin layer of oil. Too thick and it'll cause air bubbles to form that will give the pancake a blotchy appearance. Pour out two pancakes and let them cook until their bottoms are a golden brown, 3 to 4 minutes. Turn and cook the second side for 2 to 3 minutes. Place in a plastic bag and cover with a towel to keep them tender, moist and warm.
Rather than pouring syrup over the pancakes, which tends to make them so sweet that before finishing the first one your palate revolts, I prefer to lightly dip just the top surface in a bowl of heated syrup. This lets me control the amount of syrup in each bite so that the excellent flavor of the pancake isn't masked by too much sweetness.
Peanut Butter Ice Cream
Warm 2 cups of whole milk until it's just short of simmering. Melt 1 cup of Jif creamy peanut butter in a microwave and whisk this into the hot milk until the mixture is smooth. Whisk in 1 cup sugar and one cup of heavy cream. Pour this mix into a blender and blend on the highest speed to smooth out any remaining bits of unmelted peanut butter. Chill the mixture in the refrigerator and freeze in an ice cream freezer as per its instructions.
Add
chocolate chips or other flavorings as desired but be careful, this
is very rich ice cream.
Lime Rickie!

Much of my mis-spent youth went to slurping down Lime Rickies while seated at the lunch counter in the old Owl Drugstore on Brand Boulevard in the southern California city of Glendale. Icy-cold and refreshing on a hot summer afternoon, memories of these drinks are the cornerstone of my recollections of those long lost years. As beautiful to look as at they are delicious, I was surprised to discover that none of the Lime Rickie recipes found on-line matched what I remembered. Here then, is my recipe for this great thirst-quencher.
1. Place one lime slice and the juice of a freshly-squeezed lime into the bottom of a frozen, tall, straight glass. Add a straw.
2. Fill the glass to the top with broken ice. (You want chunks the size of marbles. Finely crushed ice melts too fast and will dilute the drink.)
3. Slowly pour ice-cold Seven-Up over the ice. Avoid shaking or stirring the glass. You don't want to disturb the different layers of flavor.
4. Top the drink with two or three maraschino cherries and let it sit for a minute or two for the cherry to flavor and tint the top layer of the drink.
Drink it through the straw without stirring.
Prepared and sipped in this way, the flavor of the drink changes from sweet with a limey zing, to the pure sweetness of the Seven-Up, to the slightly sweeter, cherry-flavored finish at the top of the drink. Fantastic!
Steak
Fanatic Pizza!
During the Fall and Winter of 2005-2006, Domino's Pizza introduced the most unique and delicious pizza I've ever tasted: the Steak Fanatic Pizza. Unfortunately, just about the time I got addicted to this pizza they stopped offering it. (Why do they do that?) Unwilling to live without this gastronomic treasure, I worked up the following recipe that comes very close to it.
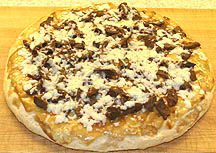
Purchase or make any standard pizza crust. Before baking the crust, take 1/2-pound of steak meat, cut it cross-grain (to make it more tender) as thinly as possible and brown the slices. Slice the meat into short strips. Deglaze the pan with 1/2-cup of water, add 1/8th teaspoon of salt, and simmer, scraping the pan to get up all of the flavorful brown residue, until the liquid is reduced so that there's just enough to coat the meat. Toss it with the meat to coat. (Or, just get some sliced roast beef from a deli and roughly chop it up.)
Line the crust with a thin layer of white American cheese and top with a thin layer of Campbell's beef gravy. Let the crust rise and then bake as directed. when it's done, warm the sliced steak and pile it on the pizza. Top with shredded provolone cheese, melt the cheese in the oven, slice and eat. Great!
(The original came with mushrooms so go ahead and add some if prefer. I like it better without them.
VERY IMPORTANT!!! I tested four different beef gravies and only Campbell's provided the rich, hearty flavor of the original pizza at Domino's.
Spoon
candy rediscovered!
UPDATED!!!
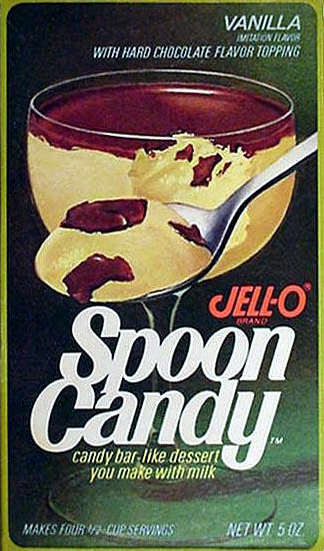
In the early 1970s Jello sold a boxed dessert mix called spoon candy. It was simply vanilla pudding topped with a shell of chocolate.
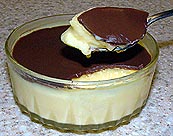
As good as I thought it was, it must not have been popular because after two years it disappeared. Here is a homemade version which is as good as the original:
Mix up a batch of Jell-O brand vanilla instant pudding. (I tested ready-made Swiss Miss, the instant French vanilla, and Jell-o's cooked puddings and the plain instant vanilla had the best flavor and texture for this dessert.) Pour the mix into four dessert dishes (wine glasses make a more elegant presentation) and let it set in a refrigerator for at least one hour.
Once the pudding has set, melt three ounces by weight of Dove Promises milk chocolate with two tablespoons of vegetable oil in a double boiler. (The oil thins out the chocolate so that it cuts easily with a spoon and so that it flows to form a thin layer on the pudding. I tested several different chocolates and the Dove milk worked the best.) Stir until the mixture is smooth and pours easily. Pour one tablespoon of the melted chocolate onto the center of the pudding and swirl the dish around to spread the chocolate in a thin layer. If too much chocolate is used it will form such a strong shell than instead of being cut with a spoon it'll squash the pudding under it up and around the sides. Let the chocolate turn hard in the refrigerator for ten minutes. That's it. Eat as is or top with whipped cream.
Here's a video for those prefering a live action demonstration on how to make Jello's classic spoon candy:
Picture perfect fried eggs
No matter how I timed fried eggs, by the time the whites were done so that there wasn't a slimy coating on the top, the yolks were over done. Also, the whites have two components: a thick gelatinous part and a thin runny part. The thin part invariably spread out paper thin and cooked dry by the time the thick stuff was done.
To solve both problems I separate the yolks from the whites. Then I pass a sharp knife through the whites ten times to break up the gelatinous part, being careful not to stir or whisk the whites because that would beat air bubbles into them. The whites are then poured into a pan a cooked for thirty seconds to one minute to set the bottoms. This creates a layer of cooked white that will insulate the yolks from the worst of the heat. The yolks are added to the center and the eggs cooked slightly covered until the tops of the whites are almost set. Transfer the eggs to a warmed plate and serve. In the few seconds it takes to get the eggs to the table the whites will finish cooking.
I use a teflon coated pan that has been lightly sprayed with non-stick oil then gently wiped off. The goal is to have the very thinnest possible coating of oil in the pan. It there is enough oil to see, it's too much. The oil will vaporize creating bubbles under the whites.
Using this technique the entire yolks is heated to a thickened state but very little has cooked solid. All they need now is a very small pinch of salt to bring out their full flavor.
If you have an infra-red thermometer, use it to start the egg white when the pan reaches 325 degrees. Started hotter than this the egg white may form a brown crust on the bottom.
Lasagna for Manly Men!
Heavy on the meat and light on the cheese, this hearty lasagna is simple to make.
1/4 pound of sweet Italian sausage, browned, broken up into small pieces and patted dry.
1 pound of
4-percent ground beef, browned, broken up into small pieces and
patted dry (The low fat beef is not used to make this a low-calorie
dish... it's used to prevent the lasagna from getting greasy and runny.)
7 ounces of
Kraft non-fat shredded mozzarella (Again, I'm not concerned about
calories, this stuff just tastes the best. Correction: Kraft
changed the formula fopr their fat free mozzarella and it now tastes
terrible. Use your own favorite.)
1/4 cup grated
Parmesan cheese
1 jar of Ragu
flavored with meat sauce (I prefer it strained.)
12 pieces of
very al dente (barely cooked) lasagna noodles
Mix the meats, cheeses and one cup of the Ragu sauce. Spread 1/4 cup of Ragu on the bottom of an 8 x 8 inch ceramic pan. Top with a layer of noodles cut to length to fit the pan. Cover this with one third of the meat mixture, pressing it down to spread it evenly. Cover with another layer of noodles placed perpendicular to the first layer and spread another 1/4 cup of sauce over them. Repeat the meat, noodles and sauce layering two more times. Press down firmly to settle all the layers. Spread any remaining sauce over the top. Cover tightly with teflon coated foil with the teflon side down and bake for one hour in a 350 degree oven.
Remove the lasagna and loosen the foil. Place a 7.5 x 7.4 piece of wood on it and weight this with a pitcher filled with a gallon of water (or use eight pounds of anything.) Let the lasagna sit like this for at least 15 minutes to press all the layers together. This makes the lasagna hold together better when it's cut instead of dissolving into goo when it's served.
If you're baking it a day ahead, paint the top with an additional layer of sauce before covering it with foil or plastic wrap and putting it in the frig. The sauce will prevent the top layer from drying out and getting tough.
Cheese Bread!
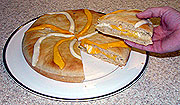
This simple recipe makes a ten-inch diameter round loaf of white bread with a layer of cheese in its middle. Served warm, it works great as a meal's main course. While any bread can be used, I like the white bread included with this recipe because it's slightly sweet and provides an interesting contrast to the cheese's salty heartiness.
White bread:
1
cup (200 grams) milk
1/4
cup (70 grams) honey
1/4
cup (50 grams) melted margarine
Combine these ingredients and heat until they feel warm (95-degrees) to the touch.
Add 1 & 1/2 tablespoons of yeast
Add 2 & 1/4 cups (340 grams) unbleached flour and mix and kneed to form a bread dough.
Divide the dough in half and roll one piece out so that it will fill the bottom of a 10-inch diameter ceramic baking dish. Spray the dish with nonstick baking oil, lay the dough in the bottom of the pan, and cover the dough with thin wedges of your favorite cheese. My family prefers 2/3s Monterey Jack and 1/3 mild cheddar.
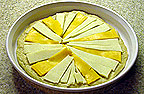
Roll out the second half of the dough and use it to cover the cheese. Let this rise until doubled in height and bake for 20 minutes, or until golden brown, in a 350-degree oven. I like to top the bread with narrow slices of cheese and slide it back in the oven a minute to melt it to give the loaf a decorative topping.
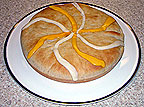
Green Muck!
This dish is a favorite of the Patten family of Glendale California. If you like mayonnaise, cottage cheese, lime Jell-O, and potato salad type dishes, you might enjoy this. It's true name is "Molded Jello Salad."
2
cups boiling water
1
6-ounce package of lime Jell-O
1
cup mayonaise
1
cup chopped celery
2
cups cottage cheese
1
cup of crushed pineaple (do not drain)
the
juice of one lemon
a
pinch of salt
Mix the Jell-O into the boiling water and let cool for fifteen minutes in the refrigerator. The goal is to cool it down enough so that it doesn't cook the cottage cheese but not so cool that it sets. It needs to be thin enough to mix with the other ingredients.
Fold all of the other ingredients together, then fold in the cooled Jell-O. Pour into a 13 x 9-inch glass pan and let set in the refrigerator for at least 6 hours. This dish is served cold.
I made a low calorie version for my wife and she said she preferred it's flavor more than the full fat/sugar version. All you need to do is use sugar free Jell-O, fat-free mayonnaise, and fat free cottage cheese.
Oh
yes, she also prefers it made with two tablespoons of pineapple
juice replacing the lemon juice.
The Four-Pounder!
Want something new, yet familiar, for lunch or dinner? How about a giant double-bacon-cheeseburger?
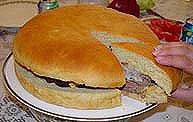
Simply mix up recipe for white bread and form it into a 12-inch diameter disk. Let it rise, bake, cool, and slice to form the bun. Then form two 13-inch diameter hamburger patties and broil them on each side for 7 minutes or to the amount of doneness preferred. Top the patties with cheese and bacon, stack inside the giant bun after warming it in a microwave and cut into pie-shaped wedges.
I must confess I always have a problem with the patties. They shrink in diameter and end up too thick no matter how thinly they are rolled out. Thank you.
Faux Lasagna
Once upon a time when I worked hard to be in great shape (Ah... those were the days.) I developed a nonfat, no sodium recipe for Lasagna. What really distinguishes this dish isn't its health-conscious formulation, but its texture. Instead of a loose creamy texture, mine is solid like a steak. I doubt many people will like it but I'm posting it so that if nothing else, it gives some visitor another example of how recipes can be modified to suit particular tastes.
I sincerely apologize to anyone who is offended that I use the name "Lasagna" for this dish, which has as little similarity to real lasagna as meat loaf has to Filet Mignon. At least the use of "Faux" confesses my transgression.
This recipe makes four servings. In addition to an 8x8x2-inch high ceramic pan, you'll need a 7x7-inch square of 1/4-inch plywood. The corners of the square should be rounded. People who don't mind loading up on fat and sodium can boost the flavor of this dish by using regular spaghetti sauce, real cheese, real Italian bread crumbs and higher-fat meat.
15
sheets of partially-cooked, flat, 7-inch long lasagna noodles
(Barilla brand is perfect)
2
cups of non-fat, no-sodium spaghetti sauce (Please see below.)
1
cup non-fat, no-sodium seasoned bread crumbs (Please see below.)
1
pound of 4-percent fat ground beef, lightly browned and drained
1
eight-ounce package of fat-free shredded mozzarella cheese
Spread 1/3 cup of the spaghetti sauce over the bottom of an 8x8-inch ceramic pan. Top this with three strips of noodles, another 1/3 cup of sauce, sprinkle 1/4 of the browned beef, 1/5 of the cheese and 1/4 cup of the bread crumbs.
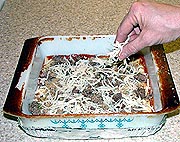
(Yes, in real kitchens the pans sometimes have baked-on spains.)
Rotate the dish ninety degrees and add three more noodles so that they lay perpendicular to the first three. Repeat the layering of fillings and noodles three more times. Gently press down on the top of the lasagna to evenly compress all the layers together. Don't get carried away or sauce will squirt up the sides at you. Spread the last 1/3 cup of sauce over the top layer of noodles. Cover tightly with aluminum foil and bake in a 350-degree oven for an hour.
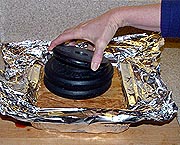
(Here's where things start to get a little strange.)
When it's done, remove from the oven, place the plywood square on the top of the foil, fold the edges of the foil back and press down firmly on the plywood to compress the lasagna. Place a 10-pound weight (or a large pitcher of water) on the plywood and let it stand for ten minutes. Remove the weight, wood, foil, and top with the remaining mozzarella cheese. Serve.
What this becomes is a solid, meaty chunk. It's not tough but is best eaten using a steak knife to cleanly cut off bite-size pieces. This dish will be most appealing to people who prefer something solid to chew on.
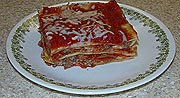
Nonfat, no-sodium spaghetti sauce
Boil whole paste (or plum) tomatoes for three minutes. Strain off the water and use a stick blender to puree the tomatoes. Strain out the seeds by forcing the puree through a medium mesh strainer. Season with basil, garlic, onions, oregano, etc. to taste and simmer for 15 minutes to cook the sauce.
Non-fat, no-sodium seasoned bread crumbs
1
cup lightly toasted whole wheat bread crumbs
2
teaspoons dried parsley
1
teaspoon basil
1/4
teaspoon oregano
1/2
teaspoon garlic powder
3/4
teaspoon onion powder
Perfect Boneless, Skinless Chicken Breasts
Boneless, skinless chicken breasts can be one of the tastiest, lightest-calorie meat meals available, but... they often suffer from overcooking and being dried out. Here's a quick technique that makes them come out juicy every time.
Take a half breast and trim off the tender (the thin wimpy slip of meat on the inside edge of the breast... use it later for stir fry) and any bits of fat on the outside of the breast. Quickly brown both sides of the breast in a smoking hot heavy pan preheated and lightly oiled. It needs to be very hot so that the outside browns (necessary to develop flavor and for the sauce) before the inside of the breast cooks. Transfer the breast to a plate and microwave at 20 percent power (for a 1400 watt oven) for 4 minutes. While it's cooking, deglaze the pan with a half cup of water, thicken to a thin sauce with a little corn starch slurry, and season with a very small pinch of salt. Check the breast with thermometer, the thickest part should be at 165 degrees. Pour the sauce over the cooked breast and enjoy!
(Hint: to make sure that the meat tastes the tenderest possible, study the surface of the breat after it's cooked to determine the direction of the meat's grain, then cut perpendicular to the grain. This ensures that the meat fibers are as short as possible, meaning the meat will be more tender without long stringy fibers.)
I've overcooked breasts this way to as high as 195 degrees and they are still good, although not as juicy as at 165. If you are cooking several breasts, increase the cooking time by 4 minutes per breast rather than increasing the power. Low power helps cook more evenly. Also, arrange the breasts with the thin ends overlapping and toward the middle. Thin areas cook faster so overlapping helps even things out by making them cook as if they were thicker sections. Finally, be very careful about the salt. Chicken responds quickly to salt, a little too much and all you'll taste is salt and not chicken. Add very small pinches slowly and taste often so you don't overshoot.
BAKED APPLES
If this photograph looks strange, read on and discover the best way to make sweet, succulent, non-mushy baked apples.
I've heard that a good Cognac leaves a pleasant taste on the palate that can last up to forty minutes. A baked apple can do the same thing. Unlike most sweet desserts, baked apples have enough acidity to keep the sugar in it from souring. This makes it one of the best ways to finish a meal.
Apples baked in an oven come out wrinkled, shriveled, and usually mushy. This is because the apple cooks from the outside in and by the time the inside is done, the outside is overdone. The baked apple in this recipe avoids these problems by being cooked in a microwave. Microwaves cook more uniformly so that all parts of the apple will be done at the same time. Apples baked this way come out looking much like they did when they went in: the skin is still smooth and shiny.
There is one catch: the cooking liquid boils out of the cavity made in the apple when it's cored and the liquid gets lost down the sides. That's the purpose for the funnel-like object screwed into the apple in the photograph: it keeps the cooking liquid where it can cook into, and flavor, the apple. But enough discussion... let's bake the best apple you've ever tasted!
First, cut the bottom off a two-liter soda bottle and hold the other end, the one with the screw top, down into a large pan of boiling water for one minute. Remove, cool, wash, dry, and cut off the top to make a funnel like you see in the picture. This is a little bit of work but you only have to do this once because the funnel lasts forever. The reason you have to boil it is that these bottles are made from thermal plastic that reacts to heat. Boiling stabilizes it so that the funnel doesn't melt or change shape in the microwave. If boiling causes too much distortion to the threaded section, try again but leave the cap screwed on to help the threads retain their shape.
Second, make the cooking liquid that fills the cavity of the apple. Mix eight onces of golden brown sugar with half a cup of the best apple juice available. (I found Knudsen Apple juice, available in good health food stores, to be outstanding.) Bring this mixture briefly to a light simmer and cool. I make a batch of this and keep it in the refrigerator so it's ready anytime it's needed.
Third, take a medium Rome apple, (I tried six different varieties and found that Romes work the best.) core it without going all the way through the apple so that the liquid doesn't run out the bottom, make a shallow horizontal slice through the skin all the way around the apple, shake one-eight of a teaspoon of cinnamon into the inside, screw the funnel into the coring hole tight enough to make a waterproof seal, and pure in half a cup of the brown sugar syrup. Place the apple in a microwave-safe cup that's tight enough so that the apple doesn't fall over as it cooks, and microwave on low (a setting of 3 out of 10) for fifteen minutes. Be sure to use some sort of rotating bed. The apple will give when done but should still be firm. Cooking times will vary depending on the apple's size and can be adjusted for how soft or firm you like your baked apples. Let it cool ten minutes, remove the funnel, and eat using any remaining sauce as a dip for bites of the apple. This is eating at its best! (Note, for the best baked apples, microwave on the lowest setting to let the maximum amount of the syrup to cook into the apple. This may take up to an hour but it's worth it.)
APPLE STUFF
This is my favorite apple pie filling. Actually, I make it up in large batches and freeze it in one-cup portions for latter use at pie filling, topping for pancakes, bread, or toast. This stuff is so delicious it's even great all by itself. This recipe makes ten cups.
15
medium pippin apples, peeled, cored, and diced.
550
grams (2 & 3/4 cups) white sugar
2
& 1/4 tsps cinnamon
1
& 1/8 tsps salt
4 Tbsps tapioca powder or cornstarch
Mix everything except the tapioca powder in a large bowl and microwave on high for ten minutes. Mix and microwave for another five minutes. Mix one last time and microwave for a final five minutes. Strain the liquid from the apples. Separate and cool a quarter-cup and mix the tapioca powder into it. Bring the remainder of the apple liquid to a boil, add the tapioca liquid, and stir for one minute after everything comes back to a boil. Mix the thickened liquid with the apples, cool, divide and freeze.
CORN BREAD
Mildly sweet with a strong corn flavor, this bread is great plain but even better served hot with butter and honey.
1 & 1/3
cups yellow corn meal
2/3 cups
unbleached flour
1/3 cup
granulated sugar
1 tablespoon
baking powder
1/2 teaspoon salt
1 egg
1 & 1/8
cups milk
Wisk everything together until smooth and pour into a lightly greased 8 by 8 inch glass pan. Bake at 350 degrees for 25 minutes until a toothpick inserted into the center of the bread comes out clean. Remove from the pan and place in a plastic bag to cool for ten minutes. Cut into nine squares and serve hot.
GAIL'S SUPER TRAIL MIX
My wife, Gail, designed this mix. Everyone who's tasted it agrees it's the best they've ever had. Why make trail mix when it can be purchased ready made? Because the ready made stuff uses the cheapest of ingredients and the flavor suffers from it.
Using the highest quantity ingredients in the optimum proportions transforms generic trail mix into a complex, delectable, gastronomic experience. Use only top quality, name brand ingredients and you'll be surprised at how much more flavorful the result is.
five-eighths
cup (85 grams) whole salted cashews
one cup (140
grams) salted peanuts
five-eighties
cup (85 grams) raisins
one-half cup
(100 grams) M&Ms
three-eighths
cup (65 grams) butterscotch chip morsels
five-eighths
cup (85 grams) diced dates
five-eighths
cup (75 grams) dried apricots (Mediterranean style) diced (Get two
7-oz bags and only use the moistest, tenderest apricots.)
one-quarter
cup (20 grams) angel flake coconut
Just dump all the ingredients into a large bowl and mix them together. Grab by handfuls and enjoy!
Important note: eaten fresh, each individual flavor can be tasted as this mixture is chewed. If it's mixed a day ahead, the flavors start to blend and the taste, while still outstanding, isn't as good.
LIGHT AND CRUNCHY WAFFLES
This recipe makes four, six-inch diameter waffles that are light brown and delicately crunchy on the outside yet tender on the inside. The recipe makes use of Aunt Jamima's Pancake and Waffle Mix prepared differently than the recipe on the box. I've worked up several waffle recipes from scratch and never found one that's as good as results from starting with this mix.
7/8 cup Aunt
Jamima Original Pancake and Waffle Mix
1 large egg
3 Tbsp oil
3/4 cup water
Preheat the waffle iron. Mix all of the ingredients together and pour ¼ of it in a ring half way between the edge and center of the iron. If it is a good, non-stick iron, spraying it with oil will not be necessary. Close the lid slowly so as not to trap any air pockets above the waffle mix and set a timer for seven minutes and twenty seconds. Watch the waffle iron. About thirty seconds after the lid is closed the waffle mix will hit its highest rise. Use three small wedges, halves of clothes pins work well, to wedge the top of the waffle iron so it can't fall as the waffles cook. Don't lift the top any higher; just prevent it from falling. When the first batch is done pour the next in without re-heating the iron.
Waffles get soggy fast so eat them one at a time as they come off the iron. Most of the crunch it lost within seconds of being covered with syrup so the best way to eat waffles, while preserving crunchiness, is to dip them one bite at a time into warm syrup.
Waffle irons vary so the cooking times will vary. If your waffles come out too crisp, try reducing the cooking time.
Cooking time, crispness, and the amount of browning are all interrelated. The longer the waffles cook, the crisper they get and the darker brown they get. This recipe switched water for milk because for the crispness I was looking for milk-based batters came out too dark. Reducing cooking times makes a more tender waffle but also one that may be too lightly browned for some people. Reducing the water and replacing it with milk to make the same amount of liquid will make a darker waffle. By experimenting with the cooking time and water/milk ratio you can optimize the waffles to amount of crispness and color you prefer.
FRIED OATMEAL
Served like pancakes, these oatmeal patties are delicious.
3 cups instant
of quick oats
3 cups water
Bring the water to a brisk boil, stir in the oats, and turn off the heat. Stir for one minute until the oats have thickened. Push into a three inch by five inch plastic container, cover the surface with plastic wrap.
Let sit overnight in the refrigerator. Slice into 1/16ths-inch thick pieces.
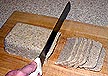
Fry on a hot griddle like pancakes. The patties will not stick so oil is not required. The oatmeal doesn't brown. Fry until the surface is just a little crisp.
Serve hot with butter and syrup.
BUTTERMILK BISCUITS
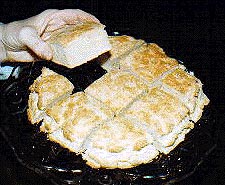
This is not an ordinary biscuit recipe. It makes a single biscuit eight inches in diameter and two inches high. The top is scored and broken apart into individual biscuits after baking, which ensures the biscuit is as light a possible. This recipe makes one large biscuit which yields seven good-sized biscuits after separating. The biscuits are buttery, light, very soft and tender.
At the bottom of this page is a listing of the 34 experiments I performed to perfect this recipe. I'm including is so you can see how a recipe evolves and what effects different ingredients and techniques have on the final product.
240
grams (two cups) unbleached flour
1/2
teaspoon salt
1
tablespoon baking powder
70
grams (one-third cup) butter flavored Crisco
3/4
cup plus one tablespoon buttermilk
Cut
the Crisco
into the dry ingredients until fine crumbs form. Dump this mixture
into a bowl that already has the buttermilk in it. Mix with a large
two pronged fork just until a uniform dough forms. This dough is
sticky and very soft. Fold five times on a floured board. Dust off
the excess flour and knees fifteen to twenty times in your hands to
form a smooth dough. Roll out into a six inch diameter, five-eighths
inch thick circle. With a very sharp, unserrated, lightly oiled knife
cut two shallow grooves horizontally around the edge of the biscuit,
one near the bottom and the second near the top, and score the top
into as many individual biscuit squares as you want. Place on a
cookie sheet covered with four layers of paper towel (no paper if
your sheet is mirror bright) under a sheet of parchment paper. The
paper insulates the bottoms so that they don't burn before the tops
are brown. Bake in a pre-heated, 400 degree oven for 21 minutes.
Work as quickly as possible once the buttermilk is mixed in. This dough starts rising immediately and you'll want to preserve as much of the initial raise as possible.
CHILE DOGS
This is more of a hint than a recipe. Try making chile dogs using pork smokie links instead of plain hot dogs. The improvement in flavor and texture is incredible.
Sourdough French Bread
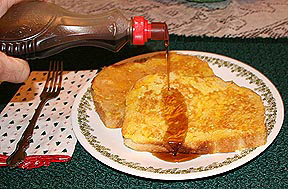
The mild tartness of sourdough gives French toast an added zing that makes this old classic a real treat.
Get a large unsliced sourdough roll and slice it into straight, flat, thick (3/4 inch) slices. Beat up whole eggs and quickly dip only one side of a slice and drop it onto a hot griddle. Cook two minutes or until the egg looks done. Pick it up, dip the other side, and repeat cooking. Doing one side at a time prevents the egg from soaking in and making the toast a soggy mess. Serve hot with butter and warm syrup.
One problem that can occur with French toast is that the bread can curl, preventing the entire surface from becoming evenly cooked. Some areas will fail to brown and may even end up raw. One solution to this is to cut bread-sized grids from cake racks and use them to press the slices flat onto the griddle during the first minute of cooking. I use empty mugs to provide enough weight so that the bread is pressed flat without squashing it.
Homemade Syrup
Maple syrup is great but because I was raised on the following recipe for brown sugar syrup, it tastes even better to me. Try it and see what you think!
Mix 8 ounces of golden brown sugar with 1/2 cup of water and heat it until the first few bubbles of a light simmer form, stirring from time to time. (Don't boil or the syrup can taste carmely or even burnt.) Stir until all the sugar dissolves. Cool until it's warm before using. Store in the refrigerator.
Biscuit Development
I surveyed eight cookbooks to establish a standard biscuit recipe. I then subjected this recipe to the following thirty-four tests to optimize the resulting biscuit. Here are those tests so that you may see for yourself the effects each test had. With this information in hand it is easy to modify the final recipe to achieve the biscuit of your dreams.
TEST 1
1.75
cups all purpose flour
.33
cup butter flavored Crisco
1
tbsp baking powder
.75
tsp salt
.875
cups buttermilk
No kneading, bake 450 degrees for ten minutes
Results: Bottoms too dark, biscuit heavy and too salty
TEST 2
Same
as 1 except used cake flour, half the salt, and
milk.
Also used two layers of paper towel under parchment
paper
to prevent bottoms from browning.
Results:
Bottoms still browning too fast, biscuits cooked
touching
each other, undone where in contact. Still too salty,
otherwise
okay.
TEST 3
240
grams cake flour
70
grams butter flavored Crisco
1
tbsp baking powder
.25
tsp salt
1/2
cup milk
Results: Too dry.
TEST 4
Same
as number 3 except no Crisco
and a little additional milk
for
proper texture.
Results: Dry, tough, bad taste.
TEST 5
Same
as number 3 except 3/4 cup milk and baked at 350
for
16 minutes. Rolled .675 inches thick.
Results: Dough very sticky. 1.05 inches average height.
TEST 6
Same as number 5 except baked at 450 degrees. Four layers of paper towel used.
Results: 1.25 inches high, bottoms didn't burn.
TEST 7
Same as above but baked at 400, milk reduced to 5/8 cup.
Results: better texture, 1.15 inches thick.
TEST 8
Same as above, some cut with a sharp knife, others with a dull
knife.
Results: No difference. This test was in response to a cooking show where the chef said a sharp knife doesn't seal the edges permitting a higher rise.
TEST 9
Same as above accept half kneaded five times.
Results:
Kneaded raised more to 1.45 inches. Mainly because
edges
split and permitted less restrained rising. Tests 6 through
9
were all a little dry.
TEST 10
Same as above except used white Crisco.
Results: Biscuit whiter but not as flavorful.
TEST 11
Same as number 9 except broke dough into three pieces and kneaded one piece five times, one ten times, and one fifteen times. Left-overs were kneaded together for a final test.
Results: The one kneaded fifteen times rose the most to 1.8 inches but that was mostly due to split sides. The position of the split is always at the last fold.
TEST 12
Bought a Whoosit's Restaurant biscuit and measured it's density at 5.7 grams per cubic inch. Remember, it would have sat around awhile so a lot of water would have evaporated from it. It's not valid to compare this to a fresh biscuit. I did this to get a feel for how light my biscuits were to commercial products.
TEST 13
Compared formula 11 (15 kneads) where half of the recipe had the Crisco mixed in just until coarse crumbs formed. The other half was beaten until very fine crumbs formed.
Results: The finely mixed batch had a powdery, cake-like texture. The coarse mix yielded a coarser texture. No difference in rise height. Coarse crumbs gave a better over all biscuit.
TEST 14
Same as 13 except half of the biscuits had their edges slit with a knife to see if that would free the edge for rising.
Results: The slit biscuit rose one-eighth inch higher.
TEST 15
Same as above (coarse mix) with one half flour kneaded and half lightly sprayed with oil between each layer. Both were rolled out thin, folded seven times, then rolled to .675 inches to try to maximize the number of splits. Left overs balled together.
Results: Sprayed dough turned into a gooey mass. Other half still split in only one location. Rose to 1.5 inches. Balled rose to 1.6.
TEST 16
Same as above except half was made with butter flavored Crisco, half white Crisco.
Results: At 15 kneads on a floured surface the dough is so dry it won't kneed smooth. Average rise 1.5 inches. Butter Crisco tastes better.
TEST 17
Same as butter Crisco above except half made into 1 1/2 diameter rounds, half into 2 1/2 diameter rounds.
Results: Small rose to 1.5, large to 1.6 inches. This is the test that indicated that larger biscuits rolled to the same thickness, rise higher than smaller ones.
TEST 18
Same as above except lightly oiled outsides.
Results: No effect.
TEST 19
Compared above recipe with cake to unbleached flour.
Results: Unbleached tasted better, rose higher, had better texture.
TEST 20
Unbleached flour kneaded 5, 10, and 15 times.
Results: No difference but five kneads is easier to work with. All rose to 1.63 inches.
TEST 20
Same as above except compared kneading seven times with flour then ten times in hands to smooth to 17 times in hand (no extra flour).
Results: Flour kneed rose to 1.65 inches, other 1.35 inches.
Test 21
Dough made with 3/4 cup plus 1 tbsp butter milk and kneaded five times.
Results: Buttermilk tastes best, had a smoother texture, and rose slightly more.
Test 22
Same as butter milk recipe above but instead of rolling into balls then rolling out, formed dough into single biscuit six inches in diameter and cut into six wedges. Used knife to split outside edges.
Results: Splitting edges allowed it to raise slightly more. Also, inclined edges to burn. Average height (middle of wedge) 1.75 inches. Rose up and back so tops pulled away from each other. Center didn't get done. Baked 17 minutes at 400.
TEST 23
Same as above but baked as a single giant biscuit. Doing it this way preserves as much of the stage one leavening as possible. Baked 20 minutes.
Results: Beautiful! It came out golden brown, 2.25 inches high, and uniformly thick. But, difficult to cut. Also, may be too light. It had a cotton-candy like texture.
TEST 24
Same as above but lightly scored top in sixths and once circumstantially around edge near top with a sharp knife coated with a spray oil.
Results: Scoring helped break biscuits apart. A light cut with a serrated knife helped them to pull apart. Seven inches in diameter, about two inches high. Seems to fall after breaking apart. Compared to restaurant biscuits, mine taste better, have equally light texture, but weight slightly more. Doubt if you'd want them any lighter.
TEST 25
Same as above but with twice the baking powder.
Results: Rose to an average of 2.25 inches, about the same as before.
TEST 26
Same as test 24 but half (1&1/2 tsp) baking powder.
Results: Rose to 2.3 inches!!! This opens the door to a low-sodium biscuit.
TEST 27
Same as above except 1/4 baking powder (3/4 tsp)
Results: Insufficient raising. 6.25 inches in diameter by 1.9 inches tall. Texture too bread-like. Small diameter made me realize that volume is the product of both diameter and height. Recalculated and found total volume increases with the amount of baking soda but in a decreasing, less than linear manner. The optimum seems to be around two tsps.
TEST 28
Standard recipe (1 tbsp baking powder) made with salted butter instead of butter flavored Crisco.
Results: Same texture and flavor. Slightly saltier and less yellow than Crisco recipe.
TEST 29
Same as above but increased Crisco to 105 grams (a 50% increase)
Result: A greasy mess that collapsed after coming out of the oven.
TEST 30
Same as number 28 except 35 grams of Crisco (50% less)
Result: A little dry and breadlike. Flavor weak. Didn't fall as much as regular recipe.
TEST 31
Same as regular recipe except rolled out into a long loaf and cut into pieces. Baked with pieces touching.
Results: 2.25 inch, uniform rise. Cutting good for separating pieces but long shape hard to cut edges. Round is better.
TEST 32
Same as above but cut into 3, four inch diameter circles
Results: Rose to 2.17 inches, Still took 20 minutes for center to get done. Rolling 1/2 inch thick would give a more manageable thickness.
TEST 33
Same as test 32 except store-bought lard was used instead of butter.
Results: Texture and flavor were the same as using white Crisco.
TEST 34
Same as 33 except used homemade lard. Pork fat was slowly rendered until the remaining bits of meat floating in the melted fat were very lightly browned. The fat was strained, cooled, and used as with butter. The resulting biscuits have an aromatic, smoky flavor that is completely different than biscuits made with butter. I prefer biscuits made with butter. If you want to try homemade lard be careful not to cook the fat until the small bits are medium or dark brown. This results in a harsh, burnt flavor instead of a pleasant smoky flavor.
![]()