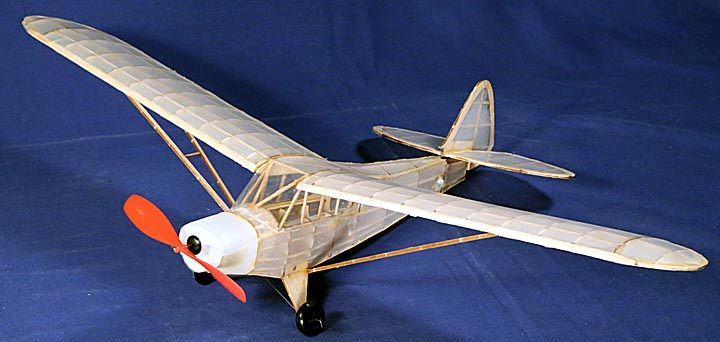
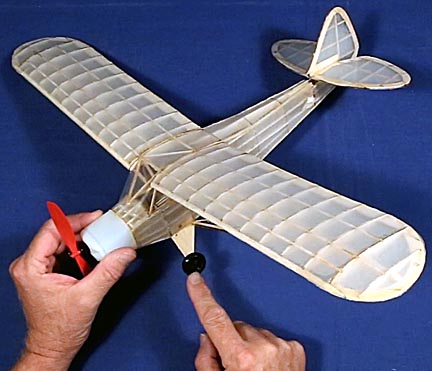
If you're looking for a different hobby with a touch of retro, try building a classic stick-and-tissue-paper flying airplane such as the venerable Guillow's Piper Super Cub 95 pictured above. New construction technologies have made these models easier than ever to assemble, but there are a couple issues that can cause first-time builders a few problems. This web page provides hints and suggestions to make the process more enjoyable and successful.
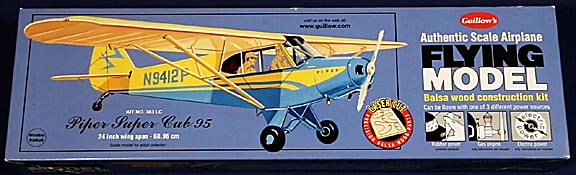
Guillow's is by far the largest manufacturer of stick-and-tissue paper models. Their kits are available from many sources including Amazon.com for as little as $10.00. They offer over a dozen designs, of which this Piper Super Cub 95 is one of the simplest and least expensive.
Two developments have made these models much better than they were when they first appeared.
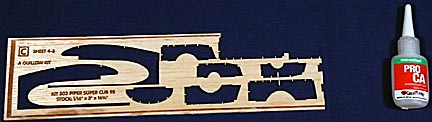
First, instead of being stamp cut, like a cheap puzzle, they are now cut by lasers. This makes the pieces more accurate and eliminates crushed and broken parts. Second, the new instant drying thin glues enable much faster build times. These two improvements work together because the parts are now precise they almost snap together and once that's done, a small drop of glue on each joint instantly bonds the parts.
This web page is not intended to provide a detailed step-by-step instruction on how to build this plane because it really isn't needed. The plane is simple enough that putting it together doesn't represent any great problem. But there are a few points that can trip up the first time builder. I hope to point these out and explain how to avoid them
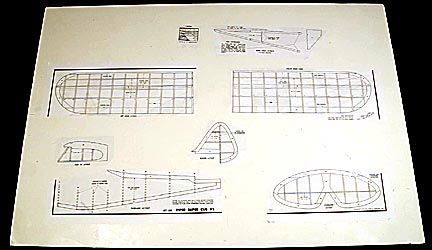
The first problem is the plans.
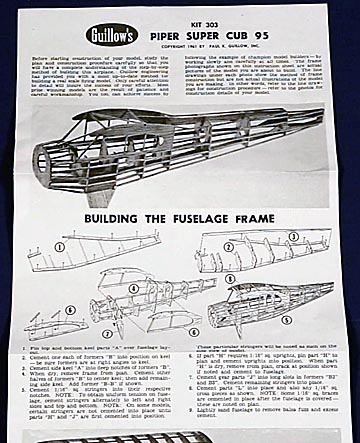
The line drawings don't always match the plane in the kit and the pictures of the actual framework are of such low resolution that many times it's impossible to see the area needing clarification. I recommend reading through the plans several times, dry-fit the plane together, then reread them again to make sure everything is correct before applying a single drop of glue. Balsa is far too fragile to unglue.
Assembly requires the use of pins to hold parts down on a board covered with the plans. I found a 30 x 20 inch sheet of 1/2-inch foam board worked very well. Spraying it with removable adhesive allows the plans to be held in place perfectly flat. Make sure there are no wrinkles or folds sticking up because these could cause the structure to became warped. Lay a sheet of waxed paper on top of the plans making sure the waxed side is up. Scraping a fingernail or knife across both sides will indicate which is which because a little wax will scrape off.
Some builders recommend using ceiling tiles for the build board, but I found their larger size and rougher surface harder to work with. Also, in all of the hardware stores in my area they are only sold in expensive boxes of six.
The first major problem with building a Guillow's Piper Super Cub 95 comes in assembling the wings. The trailing edge piece, labeled E1, is too short. It doesn't reach far enough to fill the keyway of the first inner rib. If the tail of the rib is angled to the left slightly so that it can be glued to the trailing edge, then the wing angle won't match the fuselage angle and the wings will end up with a slight backward sweep.
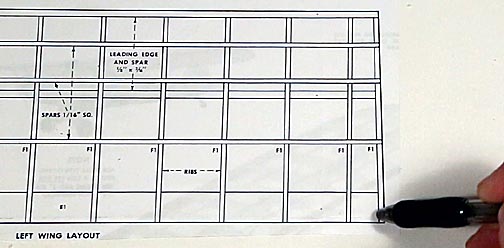
My solution was to glue a small piece of scrap balsa to extend the training edge to fit the plans.
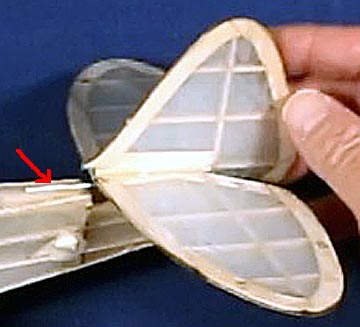
The next problem involves adapting the rudder and stabilizer for RC control.
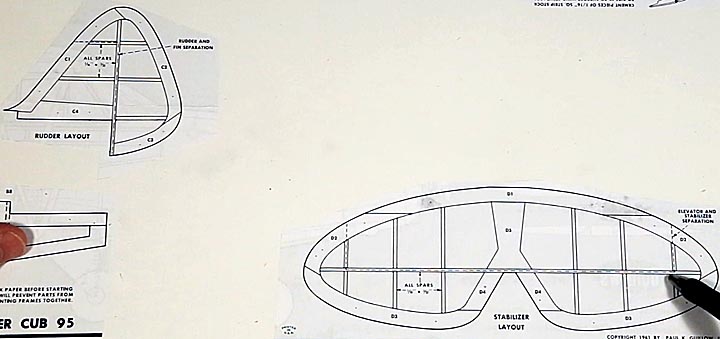
The plans seem to indicate the 1/16-inch thick spars should be cut in half lengthwise and then hinged. It's impossible to cut such thin balsa pieces in half and even if it wasn't the resulting spars would be far too weak to support the wing. Worse still, there isn't even a hint provided at what type of hinge to use. Experienced builders will know to ignore the plans and replace each spar with two spars. Also, thicker spars are needed to hold the hinge and take the strain of being tilted by the RC controls.
My kit came with only one sheet of tissue paper. I found I needed almost two to finish the plane. Fortunately, the cheap tissue sold for wrapping presents works very good as a covering. I covered my sections by stretching the tissue as tight as possible by taping the edges of the pieces down to the build board over the part to be covered, then applying a thin line of thin instant glue. It soaked through and locked the paper to the frame. Hard to cover areas got a light coat of white glue and the paper applied over it. Only apply glue to the outside perimeter of each piece. The middle needs to be free to shrink. Once the glue is dry, spritz the paper lightly with water. As it dries, the paper will shrink and create a drum-tight surface. Spray it with a waterproof coating. I like Design Master Clear Gloss Spray from Michael's Craft Stores. It dries quickly with very little fume. Almost any spray will work. Avoid classic airplane dope. It releases dangerous fumes.
Don't try covering the entire wing with one sheet of tissue. The wingtips have a double curve that will cause wrinkles. Instead, cover the length where the ribs are all the same with one large piece, then use a small piece for the tip.
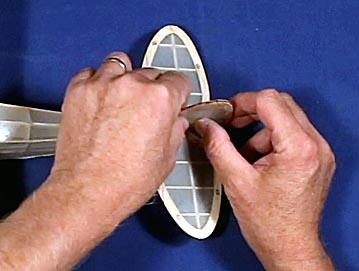
Another issue concerns the windscreen. The pattern provided is too narrow in the middle to cover the forward opening. This requires an unattractive seam where the left and right pieces overlap. Additionally, the center section extends upward three times as long as it needs to be.
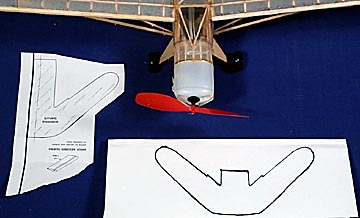
My solution was to use the provided pattern to trace a custom fitted pattern for my particular airplane. It can be seen in the image above on the lower right. It's a single wrap-around piece that eliminates all seams. I traced the side panels wider and longer than the originals to make sure there was enough material to glue them to the sides of the cabin.
The thin instant glue works very good for attaching the clear plastic windscreen to balsa. Hold it flush and apply a drop of glue to the edge and capillary action will draw the glue into the space between the two materials. The only downside is that these types of glues turn the plastic cloudy so try not getting any on the clear areas.

Once the airplane is done the builder faces one of the most difficult tasks: getting the rubber into the plane. The hole in the cowling is only 1/4-inch in diameter and the rubber band has to be threaded all the way down to the tail of the fuselage, where it is secured.
What I did was notch the end of a dowel, stretch the rubber over it so the notch was open at the side, thread the dowel and rubber down the plane and when I could see the notch through the two holes at the end of the fuselage, pushed a pointed bamboo skewer through the hole on one side, through the notch, thereby catching the rubber, and out through the hole on the far side of the plane. I then used wire cutters to trim both sides of the skewer and small pieces of masking tape to lock it in place. I didn't want to glue the skewer in case the rubber broke and needed to be replaced.
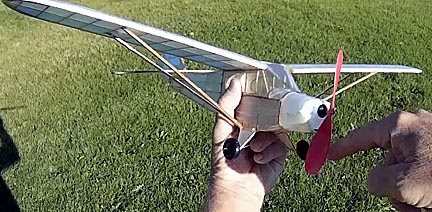
The instructions recommend flying the plane on a grassy field for soft landings. The problem is that the wheels are so small that they dig into the grass and act like hooks, causing the plane to nose over rather than roll.
If I had it to do over again, I'd replace the wheel with long skids.
The tail section is a serious problem with the design of the Guillow's Piper Super Cub 95 if it's intended to be flown as a rubber-powered plane.
The plans call for rigidly gluing both the rudder and stabilizer to the body. Then, if adjustments are required, to "gently bend" them as needed to trim the aircraft. First, if you try bending them they will break. Second, even if by some miracle they don't it's doubtful you're going to get enough bend to properly trim the plane for level flight.
What I did changes the lines of the plane slightly but provides a large amount of adjustment without damaging the control surfaces.
The rudder and stabilizer were glued together, then glued to a piece of wire, which was then glued to the end of the fuselage. Now, by bending the wire up or down, left or right I have complete control over the airplane's trim. As it turned out, this plane needed a small amount of 'down' on the stabilizer and considerable 'right' on the rubber to fly straight.
I found the propeller to be so inefficient it barely maintained the plane for even short flights, and even they required increasing the number of winds from the recommended 100 to over 250.
Hobby stores and Amazon.com carry much better propellers that will provide more thrust and longer run times.
To set the balance point, I found adding 1/4 ounce of lead to the underside of the front of the plastic worked perfectly. Once everything was adjusted it was off to the park for a morning of flying!

I hope these few hints and suggestions for building the Guillow's Piper Super Cub 95 help you in your own build. Thank you for visiting and I wish you good flying!
The following video features this page in live action and shows the plane at the very end flying:

Return to my main page to browse 60 other subjects