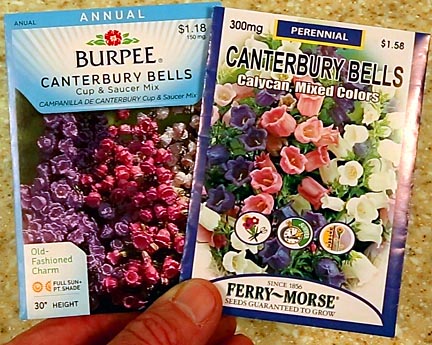
How to Grow Canterbury Bells
While
other varieties are available, they are extremely hard to find.
Only
the classic cup-and-saucer and bell shaped varieties are common.
I've
always been surprised by how much I'm attracted to Canterbury Bells
because I'm the original impatient gardener, begrudging them the 13
months they take to flower Perhaps it's the charming cup-and-saucer
shape many Canterbury Bells exhibit, the way they attract hordes of
bumble bees to the garden, or the rich blue, pink or white blossoms.
Whatever the reasons, they're well worth the year it takes to grow
them. This page is devoted to their culture. I sincerely hope you
find it useful and entertaining.
Their classification as biennials implies that they take two years to flower. Actually, it's two seasons. Planted in Spring, they flower the following spring so we're really only talking about one year of growth. (Some seed packages say they flower in 100 days. I have never found this to be true and I live in an area with an extremely long growing season.)
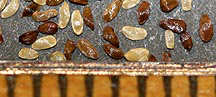
Life starts off modestly for these regal plants, as small seeds barely 1/16th-inch long.
I plant them thickly because in my high desert location the seedlings are favorites of many insects and many are lost before they get large enough to protect themselves.
While germination outdoors may take three weeks or more, this can be reduced to 10 days by planting inside and holding them at 80 degrees F. and 100-percent humidity. Either way the emerging seedlings are almost microscopic.
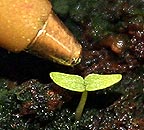
A
tiny Canterbury Bell seedling compared to the tip
of
a ball point pen in this much enlarged photo.
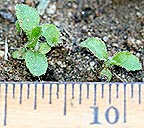
Six
weeks after later the seedlings are still so small that they barely
cover the tip of a finger.
At this stage a single cutworm can level an entire planting. For this reason it's best to start them in pots and transplant them once they are too large to interest predators. (I prefer a very fine peat-based potting soil. Coarser soils heavy in bark and forest products can be so airy that the seedling's tiny roots may dry out.)
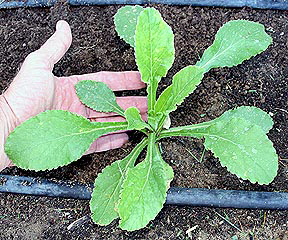
A 4-month old Canterbury Bell plant. It's starting to show the classic rosette shape that dominates its youth. During this phase of their growth I like to feed them with a 10-10-10 fertilizer rather than one formulated to promote flowering. They're not going to flower the first year so I figure the extra nitrogen will help them grow larger, more robust plants to power the flowering cycle the next year.
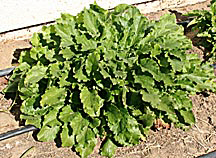
After a full nine months of growth, the plants have fleshed out to 18-inches across. At this stage many Canterbury Bell plants will appear to be made up of a single large rosette or a cluster of many small rosettes. These patterns may suggest whether the plant will produce a single large stalk the following year or many smaller ones. Since many smaller stalks seem to produce a greater number of total flowers and are less prone to breakage I've been tempted to pinch off the main rosette when they are still small in an attempt to encourage the multi-stalk growth pattern. I've never done it because they grow so slowly it would break my heart to do so.
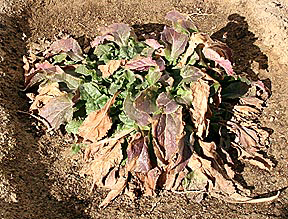
After four months of nightly below-freezing temperatures, the Canterbury Bells in my garden look pretty beat up. In spite of their appearance, I continue watering them once every other week throughout the winter. My location gets no snow and the winter days are typically in the 50s or higher with very bright sun. Under such conditions the plants aren't completely dormant and the watering ensures that they don't dry out. Care must be taken not to fertilize during this period because it might trigger the production of tender leaves, which could be burnt by the next frost.
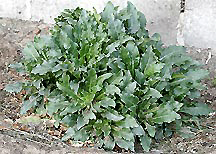
Although my area gets frosts as late as April 17, by early March the daytime temperatures are into the 60s and 70s and this wakes the plants up. By the middle of March they typically look like the plant above. I still hold off on the fertilizer until April, at which point it's best not to stand too close to these plants. Once they enter their rapid growth and flowering stage they grow so fast it almost seems like they're trying to knock you over.
By mid-April, 13 months after sowing the seeds, the plants are deep into an explosive rate of growth. Because the stems are hollow and very brittle it's best to provide support, particularly if they're in a windy location. I prefer thin but stiff bamboo stakes painted dark green. They blend in with the plants and don't attract attention.

The first bud
appeared on 17 April.
By April 28th it had opened.
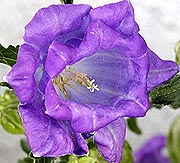
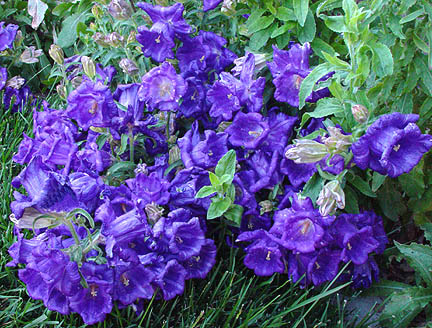
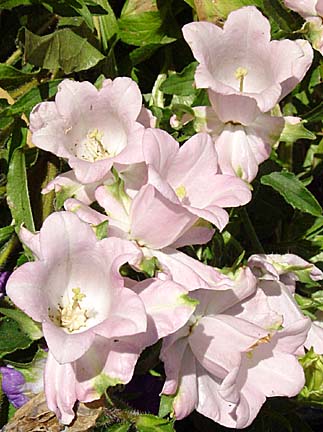
In early May the flowers appear in full glory, a seemingly endless shower of blues, purples, violets, pinks and whites; bobbing gently in the breeze. This is what all the waiting has been for and it's well worth it.
Canterbury Bells prefer cool, mild weather. In the bright, sunny days of my high desert location once the temperatures get above 80 degrees the plants against a south facing wall wilt even with deep waterings every other day. Plants on an east facing wall, they get shade in the afternoons, can take temperatures up to 85 degrees before wilting. One of the hazards of wilting is that the stems may become so limp that they fold and crease from the weight of the flowers. Once that happens the stem may die. If your conditions are similar to mine, providing half shade during the hottest part of the day may reduce the stress on your Canterbury Bells and prolong the flowers.
Flowering lasts a month to six weeks, depending on the conditions and variety.
Canterbury Bells, Campanula, come in many different flower shapes. The traditional, my favorite, is the old fashioned cup-and-saucer form. But there are varieties with no saucers and others with doubled cups. Experiment with all of them to find your favorite and even though they may take some time to mature, I'm certain you'll enjoy the eventual show.


Canterbury
Bells make excellent, long-lasting cut flowers. Given them new cut
and fresh water every other day a large sprig will look good for as
long as two weeks. Unopened buds will complete their growth and color
up adding to the beauty of the display. When cutting, be sure to cut
a foot below the last desired flower and strip off all growth. This
long stem is necessary to have enough to make repeated cuts and still
have enough to support the flowers.
The only problem with floral arrangements featuring Canterbury Bells is that the flowering sprigs tend to be so large the dominate the setting, if not the entire room.
2015-2016 Season Is In Bloom!!!
Anyone preferring a live action version of this page featuring plants from the 2015-2016 season may view it by clicking on the following Youtube video:
This video presents a novel way to grow Canterbury Bells in hot, dry climates:
![]()
Return to my main site for more gardening pages or browse over 90 other topics: everything from electric rocket engines to Knitting Nancys.