How to Stretch Depth of Field in a Print: A simple technique using copy-and-paste to increase the depth of field around a subject to any distance.
While browsing the Internet for articles on depth of field, I happened across the following URL: http://www.crystalcanyons.net/pages/TechNotes/3DMicroMacro.shtml, in which the author presented a simple technique for using cut-and-paste from a series of images taken of an object to increase the amount of the object in the final print that's in focus. The process is simple as long as the distance between the object and camera lens is constant.
Simply set the shot up and take a series of photographs with the focus point of each moved a little further down the length of the object. Make sure that the camera and object remain fixed and that the focal length, magnification factor, is the same for all shots. This technique may not work with lens where the front element moves as it's focused.
Download the images into a computer and combine them on one canvas. The following example shows a sequence of three shots of an old, and much broken, toy rocketship:
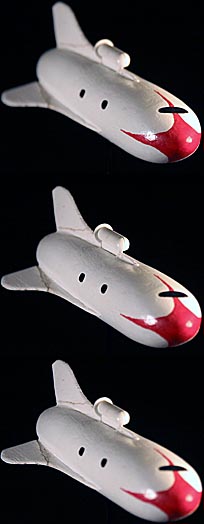
As you can see, the area of sharp focus moves toward the rear of the spaceship in each picture. Using copy-and-paste, select the in-focus areas and overlay them on the out of focus areas of one of the images. The result follows:
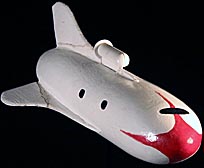
As can be seen, the focus is much improved over the entire length of the spaceship.
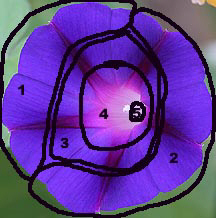
This process can be applied to any image simply by varying the shape of the copied and transferred zones. For example, in the following picture a series of images of a morning glory were combined so that the entire flower from the outermost petal to deep inside its throat is in focus:
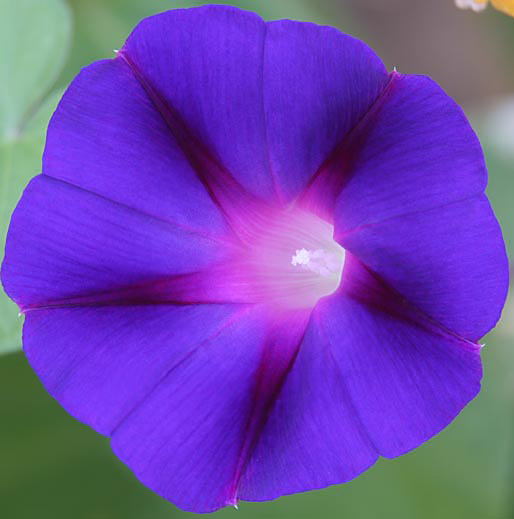
This is a composite of five images sectioned as shown below and combined into one picture.
The following picture:
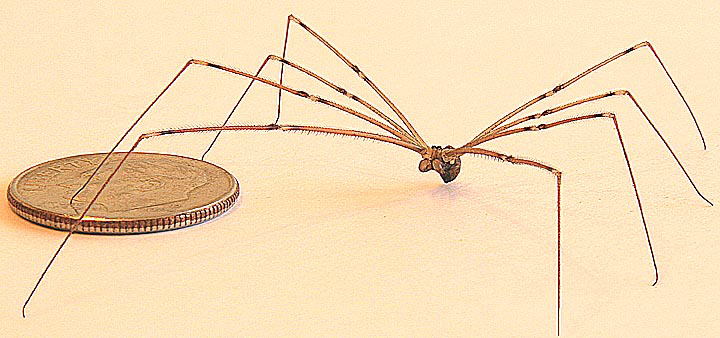
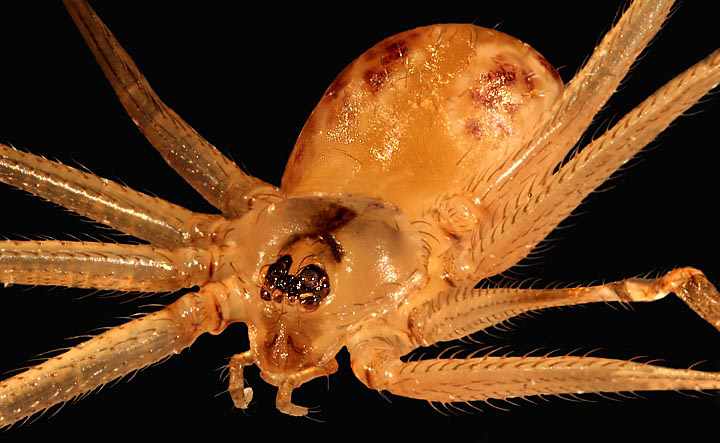
...is a composite of nine images. I took pictures with a 200mm lens at its closest focus with each image focused on a different leg then one final one for the body. An f-stop of f13 was used because I found it provided the best compromise between overall sharpness and maximum depth of field. Copy-and-pasting the most in-focus sections together produced the image above with every part of the spider's body in focus. (At 300 ppi the original is much sharper than the much-reduced resolution image shown here.)
An extreme example of DOF stretching is the following image, which is a composite of 90 sections copied from 34 images taken using a 5X macro lens:
The original images were taken in RAW mode, converted to lossless TIFF and then sectioned for compositing. The final image took over 20 MB of storage.
Returning to a more attractive venue is the following flower:

It's a composite of 12 images. As stated before, this 71kb JPEG doesn't do the original 16MB TIFF justice.
(For examples of using this technique with macrophotography, please see my CANON MP-E 65 mm 5x MACRO LENS GUIDE page. For examples of my best work using this technique, please see the MY BETTER PICTURES page.)
The webpage http://www.crystalcanyons.net/pages/TechNotes/3DMicroMacro.shtml provides examples and techniques for using software that automatically merges the sharpest parts of a series of pictures. Such picture sequences may have as many as 40 images.
![]()
Return
to the mainpage and browse 90 other
subjects including several other pages related to cameras, lenses and photography.